
Note: Handle the brake system with care, do not inhale the dust generated by the wear of its components, as it may contain asbestos that is harmful to health.
Inspection
1. Although the 2.0L models are equipped with rear disc brakes, the handbrake operates independently of the brake pedal using pads mounted behind the disc that work similarly to drum brake pads.
2. To inspect the handbrake pads on single overhead cam models (SOHC), it is necessary to remove the hub/disk as described in Section 10.
3. To inspect the handbrake pads on DOHC models (DOHC), it is necessary to remove the brake disc as described in Chapter 10.
4. Having removed the hub/disc or disc (depending on the model), check that the brake pads are not worn beyond the Specifications limit.
5. If any of the pads have worn beyond the specification limit, replace all four handbrake pads as a matched set.
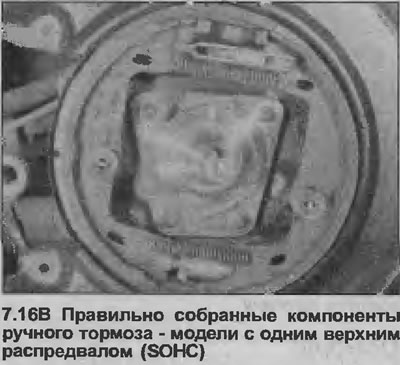
Single overhead cam models (SOHC)
Removing
6. Clean dust and dirt from various components, being careful not to inhale airborne particles.
7. Disconnect the handbrake cable and return spring from the handbrake control lever on the support shield. If necessary, loosen the handbrake cable using the adjuster (see chapter 26).
8. Remove the shoe support legs and springs by pressing down on the spring seats and turning them 90°with pliers. Please note that the support legs of the pads are removed from the back of the support shield.
9. Remove pads, adjuster, handbrake lever and return springs as an assembly.
10. Note the position and orientation of all components, then disconnect the upper and lower return springs from the shoes and remove the handbrake control lever and adjuster.
Installation
11. Apply a small amount of brake lubricant to the adjuster threads, then reduce the length of the adjuster to the minimum. Also apply a small amount of the same lubricant to the contact area of the support plate with the side surface of the pads.
12. Install one of the new brake pads and attach it to the backboard with a support post with a spring.
13. Install the handbrake control lever.
14. Install the second brake shoe and also secure it with a support post.
15. Hook the upper return spring to the shoes.
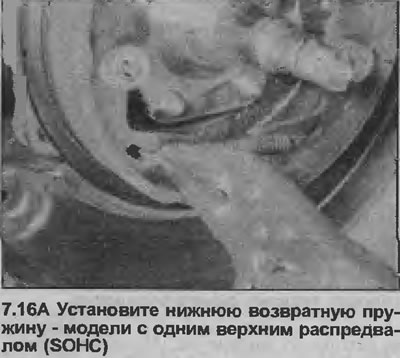
16. Install the adjuster between the lower ends of the shoes, then install the lower return spring (see illustrations).
17. Attach the handbrake cable and return spring to the handbrake control lever.
18. Install the hub/disc and adjust the wheel bearing clearance as described in Section 10. Do not install the wheel at this stage.
19. Repeat steps on the second wheel.
20. Check the handbrake cable adjustment as described in Chapter 26.
21. Install the wheels and lower the vehicle to the ground. Do not fully tighten the wheel bolts until the vehicle is lowered onto the wheels.
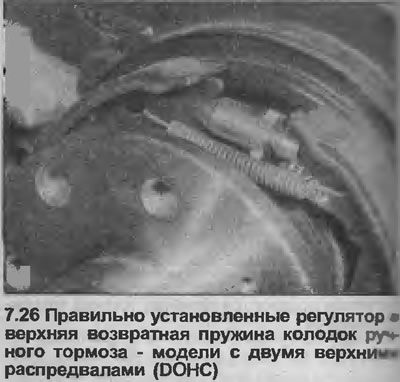
Models with double overhead camshafts (DOHC)
Removing
22. Proceed as described in points 6 and 7.
23. Remove the support legs of the pads (along with springs), by turning the spring supports with a screwdriver. Please note that the support legs of the pads are removed from the back of the support shield. Note the position and orientation of all components, then disconnect the upper and lower return springs from the shoes and remove the handbrake control lever and adjuster.
Installation
24. Proceed as described in paragraphs 11-14.
25. Install the lower return spring on the shoes.
26. Install the adjuster between the upper ends of the shoes, then install the upper return spring (see illustration).
27. Attach the handbrake cable and return spring to the handbrake control lever.
28. Install the brake disc as described in Chapter 10. Do not install the wheel at this stage.
29. Proceed as described in paragraphs 19-21.
Visitor comments