
Models with rear drum brakes
1. Proper handbrake adjustment is supported by automatic rear brake pad adjustment. However, since As the cable stretches over time, handbrake lever travel can become excessive. In this case, follow the steps below.
2. Block the front wheels, jack up and support the rear of the vehicle on axle stands.
3. Fully release the handbrake.
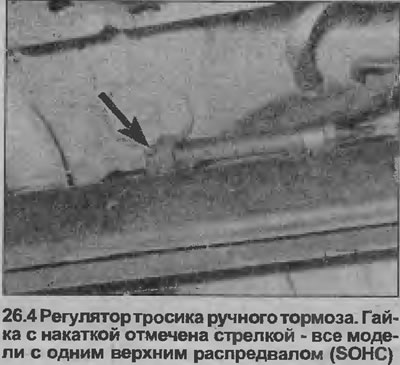
4. Turn the knurled nut on the cable adjuster (mounted on a torsion beam), so that the brake pads begin to rub against the drum (rustling will be heard) when rotating the rear wheels forward manually (see illustration).
5. Loosen the adjuster nut until the shoes move slightly away from the drum.
6. The handbrake should engage when the lever moves to the second notch on the ratchet.
7. After completing the adjustment, make sure that the handbrake cables move freely. Apply some lubricant to the threads of the regulator to prevent corrosion.
8. Lower the vehicle to the ground.
Models with rear disc brakes
9. Where applicable, remove the caps, then loosen the rear wheel bolts and block the front wheels. Jack up and support the rear of the vehicle on axle stands. Remove wheels.
10. Move the handbrake lever to the second notch on the ratchet.
11. On models with two overhead camshafts (DOHC), equipped with a catalytic converter, unscrew the four fixing nuts and remove the heat shield of the central section of the exhaust pipe.
12. On all single overhead cam models (SOHC) loosen the knurled nut on the cable adjuster (mounted on a torsion beam).
13. On models with two overhead camshafts (DOHC) Loosen the nut securing the cable equalizer to the handbrake lever actuating link.
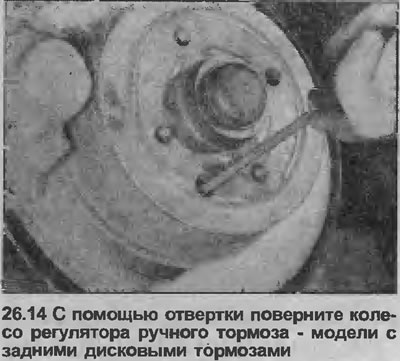
14. Insert a screwdriver through the adjustment hole on one of the disc/hub blocks (see illustration) and turn the adjuster wheel so that the brake pads begin to rub against the disc (rustling will be heard) when rotating the disc/hub forward manually.
15. Turn the adjuster wheel back until the pads are slightly away from the disc/hub.
16. Repeat steps 14 and 15 on the second wheel.
17. Turn the nut on the adjuster or cable equalizer (depending on the model) to the position where the handbrake starts to work. Make sure the brakes apply simultaneously on both wheels.
18. Fully release the handbrake, then tighten it again.
19. The discs/hubs should lock when the handbrake lever is on the sixth notch on the ratchet. If necessary, turn the nut on the cable adjuster or equalizer (depending on the model), to achieve this.
20. Where applicable, install an exhaust system heat shield.
21. Install the wheels and lower the vehicle to the ground. Do not fully tighten the wheel bolts until the vehicle is lowered onto the wheels.
Visitor comments