
Note: See note at the beginning Chapters 3 before starting work. Note also that both valves must be changed at the same time and that the valves must be identical. Make sure you buy the correct type of valves (valve type is indicated on its body).
Valves mounted on the master cylinder
Removing
1. Remove the cover of the brake fluid reservoir, cover the filler neck with a piece of polyethylene and secure it with an elastic band or reinstall the cover. This will reduce fluid loss during the next procedure.
2. Place a suitable container under the master cylinder to catch the brake fluid that will be released.
3. Mark the two lower brake pipes, then unscrew the union nuts and disconnect the pipes from the pressure control valves at the base of the master cylinder. Seal the open ends of the tubes to prevent dirt from entering.
4. Unscrew the pressure control valves from the master cylinder and plug the openings in the cylinder to prevent dirt from entering.
Installation
5. Install in reverse order. Finally, remove the polyethylene from the filler neck of the reservoir and bleed the entire brake system as described in Chapter 3.
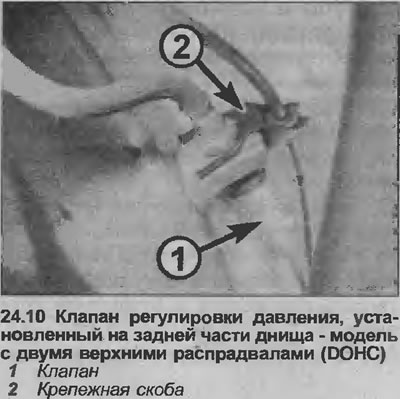
Valves mounted on the back of the bottom
Removing
6. Proceed as described in point 1.
7. Block the front wheels, then jack up and support the rear of the vehicle on axle stands.
8. Working under the rear of the vehicle, remove the union nut and disconnect the brake pipe from one of the valves. Be prepared for fluid to escape and plug the end of the tubing to prevent dirt from entering and further loss of fluid
9. In the same way, disconnect the flexible hose from the valve.
10. Release the valve mounting bracket from the bracket on the bottom, bearing in mind that on some models the mounting bracket also secures the ABS sensor wiring. Remove valve (see illustration).
11. Remove the second valve in the same way.
Installation
12. Proceed as described in point 5.
Visitor comments