
Removing
1. Where applicable, remove the wheel cover, then loosen the rear wheel bolts. Block the front wheels, jack up and support the rear of the vehicle on axle stands. Remove the wheel.
2. Fully release the handbrake.
3. Remove the drum fixing screw and remove the drum. If this fails, remove the baseboard inspection hole plug and move the handbrake control lever towards the brake shoe to move the shoes away from the drum. If necessary, loosen the handbrake cable tension using the adjuster.
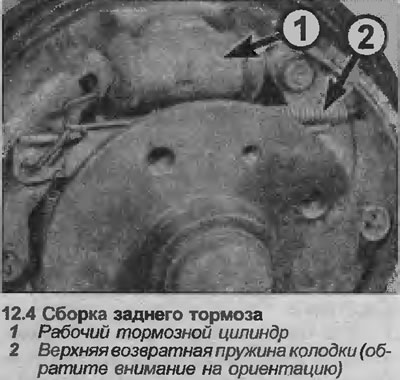
4. Using pliers, disconnect the upper return spring from the brake pads, noting its orientation. Then spread the upper ends of the pads to the sides until they move away from the working brake cylinder (see illustration).
5. Working in the engine compartment, remove the brake fluid reservoir cap, cover the filler neck with a piece of polyethylene and secure it with a rubber band, or reinstall the cap. This will reduce fluid loss during the next procedure.
6. Turn off a connecting nut of a brake tube from a back part of the working brake cylinder and disconnect a tube. Be careful not to deform the tube. Be prepared for fluid to come out and plug open holes to prevent dirt from entering and further loss of fluid.
7. Turn off two bolts of fastening from a back part of a basic board of a drum brake and remove the working brake cylinder.
Bulkhead
8. If the bulkhead of the working brake cylinder is not required, go to step 17.
9. Clean off dust and dirt from the working brake cylinder, trying not to inhale particles that have risen into the air.
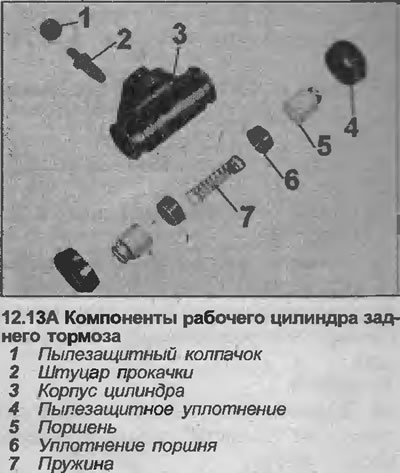
10. Remove the rubber dust seals from the ends of the cylinder body.
11. Pistons are usually pushed out by spring pressure. If they don't come out, tap the end of the cylinder against a piece of wood, or drive the pistons out with low pressure air by connecting, for example, a foot pump to the brake pipe coupler port at the rear of the cylinder body.
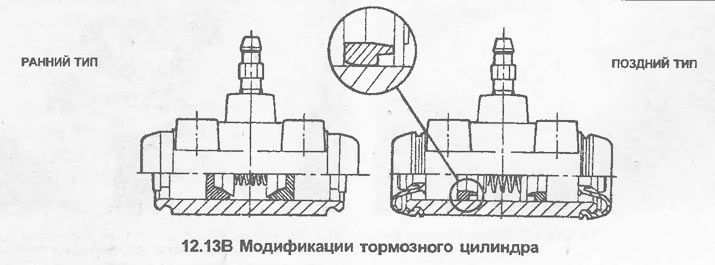
12. Examine pistons and internal walls of the cylinder on existence of scratches or other damages. If damage is found, replace the slave cylinder assembly. Please note that an early modification of the brake slave cylinder block can be replaced with a later modification.
13. If the pistons and cylinder walls are in good condition, discard the seals and purchase a repair parts kit that will contain all the necessary replacement parts. Later models (since 1992) fitted with L-shaped piston seals (see illustrations). Be sure to purchase the correct overhaul parts as early cylinder components are not compatible with late modification cylinder parts.
14. Lubricate the piston seals with clean brake fluid and insert them into the cylinder channels, placing a spring between them. Do not use any tools to perform this action.
15. Dip the pistons in clean brake fluid and insert them into the cylinder.
16. Install dust seals and make sure the pistons can move freely in the cylinder.
Installation
17. Establish the working brake cylinder on a basic board of a drum brake and tighten bolts of fastening.
18. Connect the brake pipe to the cylinder and tighten the nut.
19. Bring the brake shoes to the pistons, then install the upper return spring.
20. Install the brake drum and tighten the mounting screw. If necessary, move the shoes with the adjuster so that the drum can be installed.
21. Remove the polyethylene from the filler neck of the brake fluid reservoir and bleed the corresponding hydraulic line as described in Chapter 3.
22. Adjust the brakes by depressing the brake pedal several times. In this case, clicks will be heard in the drum, since the automatic gap compensator will work. When the clicks stop, the adjustment is complete.
23. Install the wheel and lower the vehicle to the ground. Do not fully tighten the wheel bolts until the vehicle is lowered onto the wheels.
Visitor comments