
Removing
Attention! If the caliper will be removed only in order to dismantle the brake disc, then do not disconnect the brake hose of the wheel brake cylinder from the caliper, because after installation the brake system will have to be pumped. Secure the caliper to the body with a wire hook or wire. The brake hose must not be kinked or stretched.
1. Mark the position of the rear wheels on the hub with paint. This will allow the assembly to set the balanced wheel in its original position.
2. Loosen the wheel bolts. The vehicle must be on wheels during this operation.
3. Place the vehicle on jack stands and remove the rear wheels.
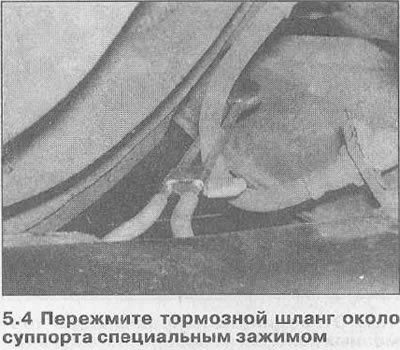
4. Pinch the brake hose near the caliper with a special clamp if the hose is disconnected (see illustration). It is also recommended to unscrew the cap of the brake fluid reservoir, cover the opening with plastic wrap and screw on the cap. This technique helps to minimize the loss of brake fluid when the hose is disconnected from the caliper.
5. Remove the brake pads (see relevant chapter).
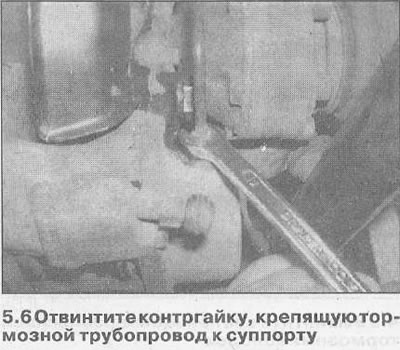
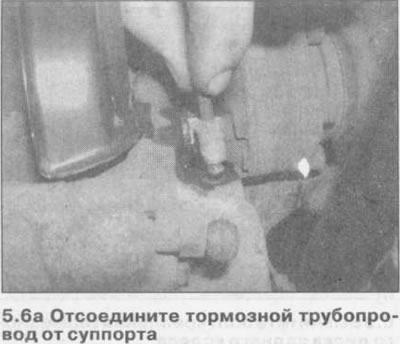
6. Unscrew the locknut securing the brake line to the caliper and disconnect the line (see illustrations 5.6 and 5.6a).
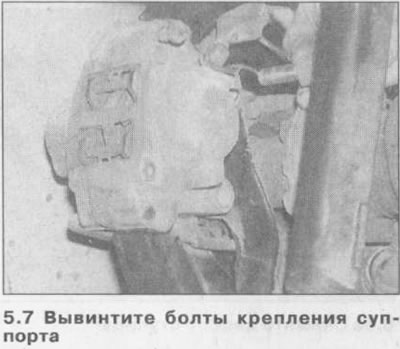
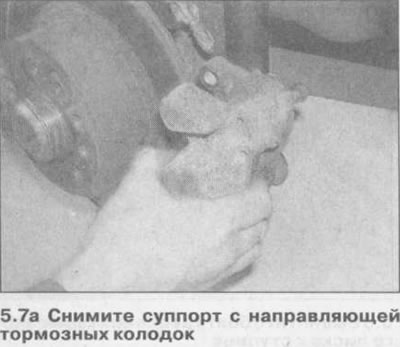
7. Unscrew the caliper mounting bolts and remove the caliper from the brake shoe guide (see illustrations 5.7 and 5.7a).
Bulkhead
8. Clean the outer surface of the caliper.
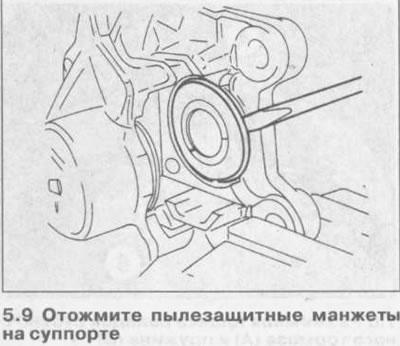
9. Press the dust seals on the caliper and remove them from the piston grooves (see illustration).
10. Place a piece of wood between the pistons and blow the cylinder through the inlet to remove the pistons from the cylinders. If one of the pistons comes out before the other, remove it and plug the empty cylinder so the second piston can come out.
11. Remove the piston seals being careful not to damage the cylinder walls.
12. Clean pistons and cylinders with brake fluid and let them dry. Inspect pistons and cylinders for damage, signs of wear and corrosion. If these damages are found, replace the caliper assembly. If the caliper is serviceable, purchase a repair kit that includes piston seals and dust seals, as well as a tube of brake cylinder paste.
13. Apply a small amount of paste to the pistons, their seals and cylinder walls.
14. Install the piston seals into the cylinder grooves, then carefully insert the pistons until they engage the seals. The pistons may need to be inserted in a rotary motion to prevent them from getting stuck in the seals.
Do not fully push the pistons into the cylinders as this will make it difficult to install the dust seals.
15. Establish dustproof cuffs at first in flutes of pistons, and then on a support.
16. Establish on cuffs lock rings.
17. Press the pistons into the cylinders, then rotate them so that the slots point downwards at an angle of approximately 23°. This will ensure the correct fit of the pistons to the pads.
Installation
18. Fix on a rotary fist directing brake shoes if it acted in film. In this case, replace the guide mounting bolts with new ones and lubricate them with a protective paste, for example, Loctite 243. Bolt tightening torque 130 Nm.
19. Install the brake pads.
20. Install the caliper on the brake shoe guide, insert the mounting bolts and tighten them to 30 Nm.
21. Connect to a support a brake pipeline, having tightened a counternut.
22. Remove the special clamp from the hose, remove polyethylene from under the cover of the expansion tank and bleed the brake system drive (see relevant chapter).
23. Install the wheels in accordance with the labels applied during removal and secure with bolts.
24. Lower the car and tighten the wheel bolts, acting in a crosswise manner, with a torque of 110 Nm.
Attention! Depress the brake pedal with force several times until a strong resistance is felt. When this action is performed, the brake pads are centered and they self-adjust to the working position.
25. Check the brake fluid level in the expansion tank. If necessary, top up to the maximum mark.
26. Check the operation of the brake system.
Visitor comments