


Contents: Removal ⬇ Installation ⬇
Removal
1. Remove the rear section of the center console.
2. Release the parking brake lever.
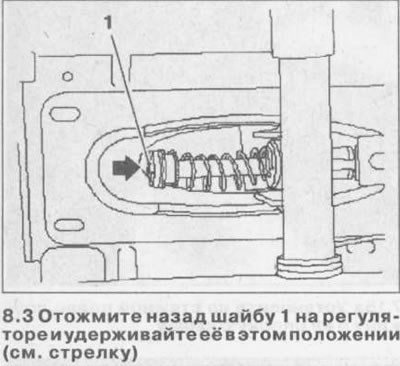
3. Press back the washer 1 on the regulator and hold it in this position (see arrow in illustration).
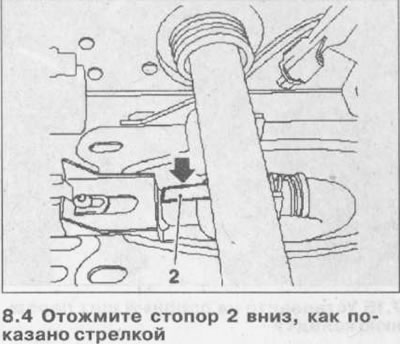
4. Press stopper 2 down as shown by the arrow in the illustration and fix it, holding the washer on the regulator in the same position.
5. Remove the exhaust system (see the relevant chapter).
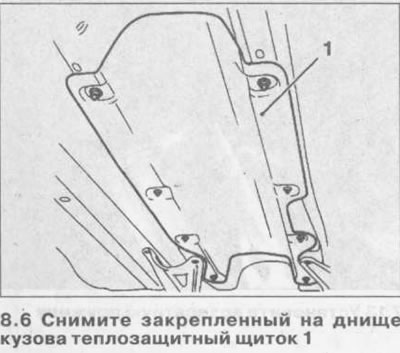
6. Remove the heat shield 1 attached to the underbody (see illustration).
7. Remove retaining ring 1, unscrew bolt 2 and disconnect equalizer 3 of cables from the bottom of the vehicle (see illustration).
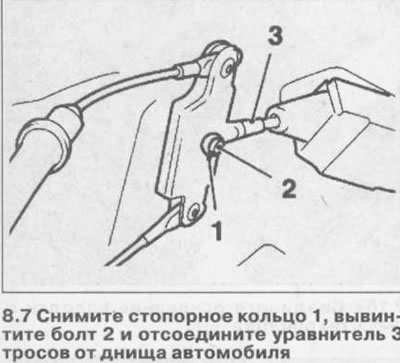
Caution! Mark or remember the location of the parking brake bolts and cables. The brown cable is located on the right side of the vehicle.
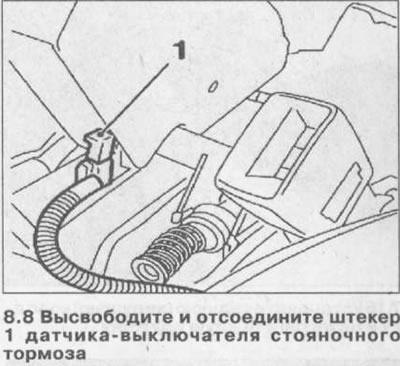
8. Release and disconnect connector 1 of the parking brake switch sensor (see illustration).
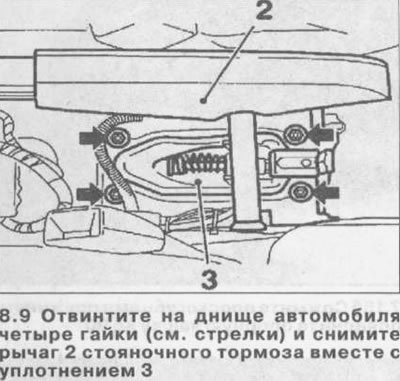
9. Unscrew the four nuts on the bottom of the car (see arrows in the illustration) and remove the parking brake lever 2 together with the seal 3.
10. Disconnect the cables from the brake shoe drive levers.
11. Unscrew the bolt securing the cable traction holder 1 (see illustration).
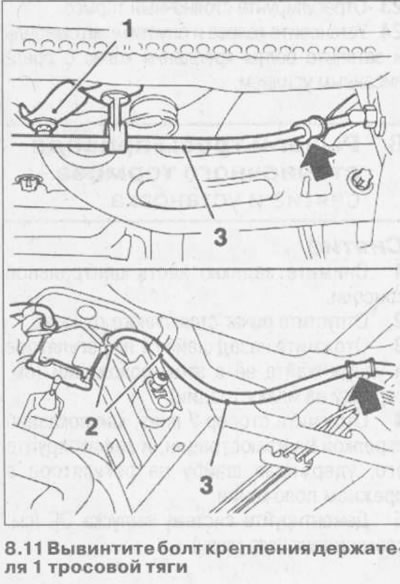
12. Release the right and left cables 3 from the fastenings on the bottom (see arrows in illustration 8.11) and disconnect from equalizer 2.
Installation
13. Secure the right and left cables to the holders on the bottom and to the brake shoe drive levers.
14. Install the parking brake lever into the mounting location, ensuring that its seal is seated correctly.
15. Tighten the four lever mounting nuts to 10 Nm and connect the parking brake switch sensor plug.
16. Secure the cable end to the equalizer by installing a new retaining ring.
Further installation is carried out in the reverse order of removal.
17. Tighten the parking brake lever. The stopper will be released and the parking brake will automatically set itself. No adjustment of the parking brake is required.
Visitor comments