
Note: Handle the brake system with care, do not inhale the dust generated by the wear of its components, as it may contain asbestos that is harmful to health.
Inspection
1. Where applicable, remove front wheel covers, then loosen wheel bolts and apply handbrake. Jack up and support the front of the vehicle on axle stands.
2. Remove wheels. Turn the steering wheel all the way to the right and check the right brake pads for wear. Make sure the thickness of the brake lining pad (including block) - not less than the minimum value given in the Specifications.
3. Turn the steering wheel all the way to the left and check the left brake pads in the same way.
4. If the thickness of at least one of the brake pads is less than specified in Specifications minimum, replace all front pads as a set.
5. If the pads require replacement, proceed as follows.
Models 1.4, 1.6 and 1.8 l
Removing
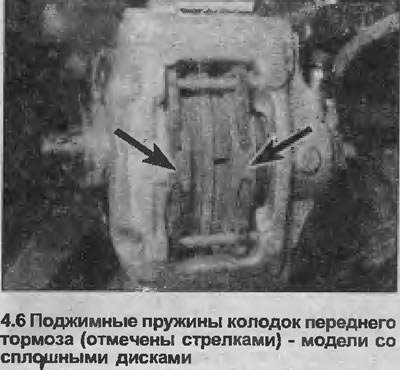
6. Remember how the brake pad springs are installed (see illustration), then remove the upper and lower pad mounting pins from the caliper using a punch.
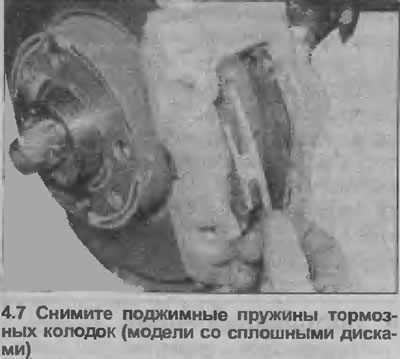
7. Remove the brake shoe pressure springs (see illustration).
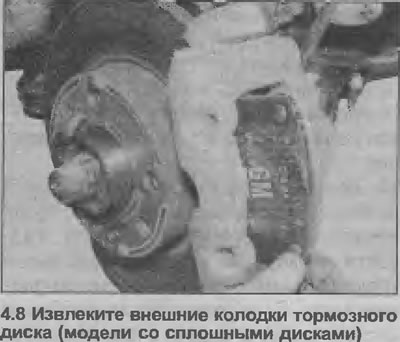
8. Slightly pry the pads away from the disc, then use pliers to remove the outer pad (see illustration).
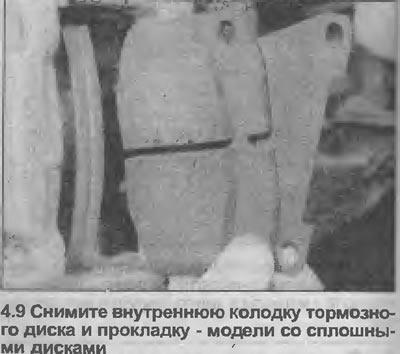
9. Remove the inner pad and gasket installed between the pad and caliper piston (see illustration).
Installation
10. Clean off dust and dirt from the caliper, being careful not to inhale particles that have risen into the air. Carefully remove rust from the edge of the brake disc.
11. To install new (thicker) pads, it is necessary to push the caliper piston completely into the bore of the cylinder using a flat metal rod. This action will raise the level of liquid in the tank, so to avoid losing liquid, pump out some of it with an old hydrometer or pipette. See note at the beginning Chapters 3. Do not insert a flat rod between the piston and disc in an attempt to displace the piston.
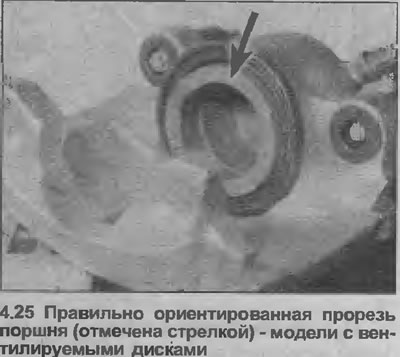
12. Be convinced that cuts in the piston are located on a vertical axis. If necessary, carefully rotate the piston to the correct position.
13. Apply a small amount of brake grease to the top and bottom edges of the metal base of the new pads.
14. Install new pads on the caliper by placing a gasket between the inner pad and piston. Make sure the brake linings of the pads are facing the disc and that the pads will mix freely.
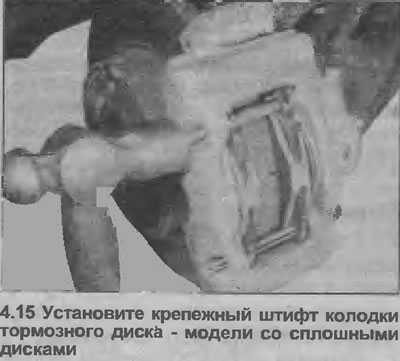
15. Install the preload springs on the brake pads, then insert the mounting pins (on the outside of the caliper), by pressing on the springs. Drive the pins into the caliper (see illustration).
16. Repeat steps on the second wheel.
17. Install the wheels and lower the vehicle to the ground. Do not fully tighten the wheel bolts until the vehicle is lowered to the ground.
18. Firmly press the brake pedal several times so that the pads are pressed against the disc.
19. Check and, if necessary, top up the brake fluid level.
20. New brake pads need to wear in first, so try to avoid hard braking for the first 100 miles after installing new pads.
Models 2.0 l
Removing
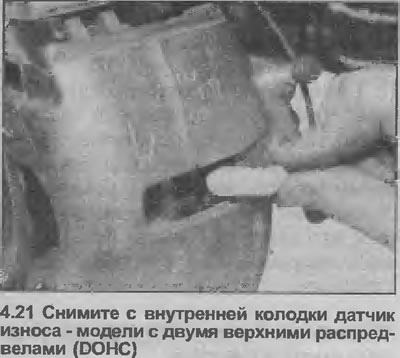
21. Where applicable, move the wear sensor away from the inner shoe and disconnect the wiring connector under the wheel arch, next to the suspension strut (see illustration). Remember how the wire runs.
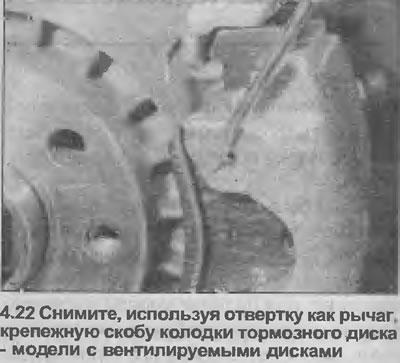
22. Using a screwdriver as a lever, remove the pad mounting bracket from the outer edge of the caliper (see illustration).
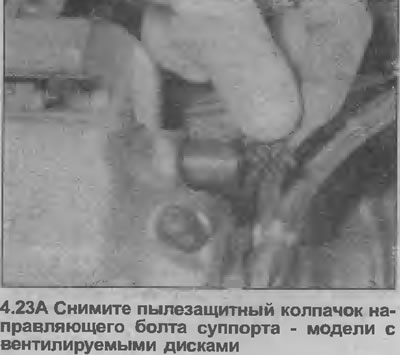
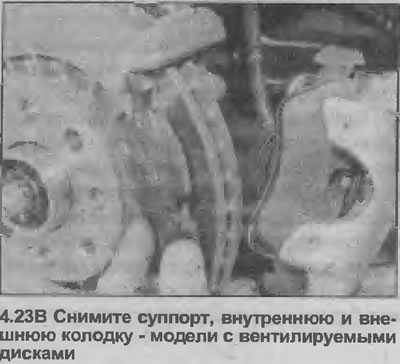
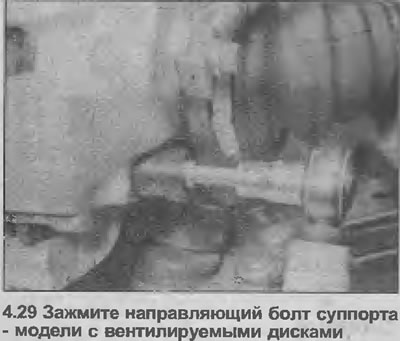
23. Use a screwdriver to pry off the dust caps on the two guide bolts from the inside edge of the caliper, then use a socket wrench to unscrew the guide bolts and lift the caliper and inner shoe off the bracket. Remove outer brake pad (see illustrations). Tie the caliper to the body with a wire or twine, so as to avoid deformation of the brake hoses.
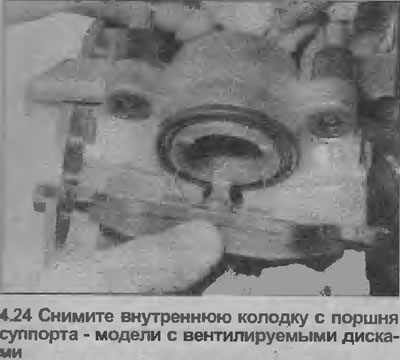
24. Move the inner pad away from the caliper piston (the block is fastened with a bracket mounted on its metal base) (see illustration).
Installation
25. Proceed as described in paragraphs 10-12 (see illustration).
26. Apply a small amount of brake lubricant to the caliper contact surfaces of the new brake pads.
27. Install a new inner pad on the caliper piston, making sure the piston is correctly positioned.
28. Install the outer pad on the caliper bracket with the brake pad facing the disc.
29. Install the caliper on the bracket and tighten the guide bolts with the torque specified specifications (see illustration).
30. Install the dust caps on the guide bolts.
31. Establish a fixing bracket of a block.
32. Where applicable, install a new wear sensor on the inner pad, and connect its wiring in the connector under the wheel arch. Route the wiring as noted when removing.
33. Repeat steps on the second wheel.
34 Proceed as described in paragraphs 17-20 inclusive.
Visitor comments