
Inspection
1. To inspect the brake pads, it is recommended to remove the drums. This will also allow you to inspect the working brake cylinders for signs of leaks. However, it is possible to determine the wear of the brake linings without removing the drums through the inspection holes in the support shields by removing the plugs.
2. Use a flashlight and, if necessary, a mirror, and make sure that the brake lining thickness of the pad is greater than that specified in Specifications minimum.
3. If any of the pads have worn beyond the specification limit, replace all four rear brake pads as a set.
Removing
4. Where applicable, remove the rear wheel covers, then loosen the wheel bolts and block the front wheels. Jack up and support the rear of the vehicle on axle stands. Remove rear wheels.
5. Fully release the handbrake.
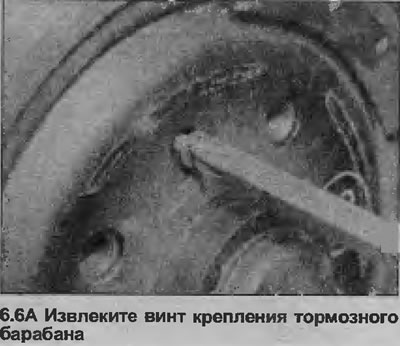
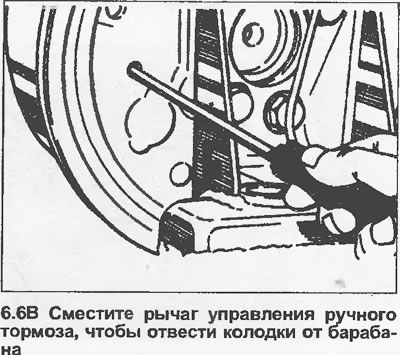
6. Remove the mounting screw and remove the drum. If this fails, remove the inspection hole plug in the support shield and move the handbrake control lever to the brake shoe to move the shoes away from the drum. If necessary, loosen the handbrake cable adjuster (see illustrations).
7. Note the location and orientation of all components before removing them to facilitate reassembly.
8. Clean off dust and dirt from the drum and shoe, being careful not to inhale particles that have risen into the air.
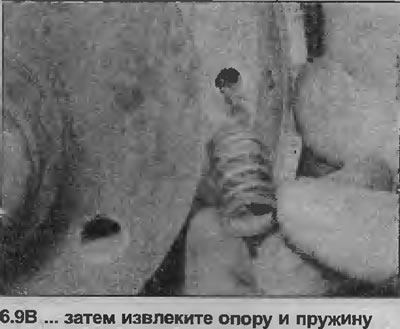
9. Remove the support legs and shoe springs (along with their supports), by pressing the spring seats and turning them 90°with pliers (see illustrations). Note that the shoe support posts are removed through the back of the support shield.

10. Disconnect the handbrake cable from the control lever.
11. Disconnect the upper and lower return springs and remove the pads individually or as an assembly with adjustable expansion bars and springs. Remove hub (see Section 10). Do not damage the rubber boots of the working brake cylinder. Note the correct position and orientation of the return springs and the position and orientation of the adjustable expansion bars before removing the return springs.
12. When removing the pads, put a tight rubber band on the working brake cylinder or install a spring clip to prevent the pistons from coming out. Never depress the brake pedal while the drum is removed.
Installation
13. Clean dust and dirt from the drum brake support plate, being careful not to inhale airborne particles.
14. Apply a small amount of brake grease to the contact area of the support plate with the side surface of the pads.
15. Find the cause of the lining contamination (working brake cylinder or leaking hub bearing seal) and eliminate it.
16. Although pads are sold separately (without pads), it is recommended to change the collection of pads with an overlay, because installing new pads on old pads requires special skills and equipment.
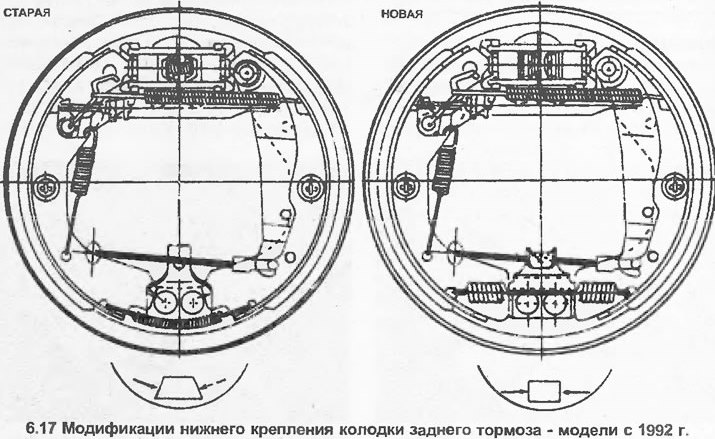
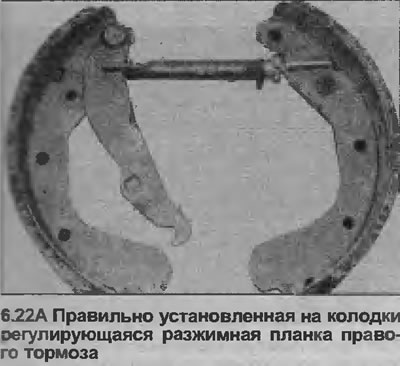
17. If removed as an assembly, disassemble the pads, adjustable expansion bars and springs. Note the position and orientation of the components. On late models (since 1992) installed modified lower brake pad mount (rectangular shape), respectively, the brake pads were also changed along with the lower return spring (see illustration).
18. If both brake assemblies are removed at the same time, do not mix up the components. Note that the left and right brake adjuster bar components are marked. The threaded rod is marked with the letter "E" (left) or "R" (right), other components are marked in black (left brake) or silver (Right brake) color.
19. Disassemble and clean the adjustable spreader bar. Apply some silicone grease to the threads of the adjuster bar.
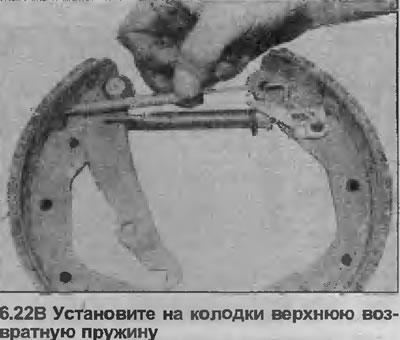
20. Inspect return springs If they are deformed or damaged, replace them. Weak springs can cause drag.
21. If the new pads were not fitted with a new handbrake control lever (where applicable), rearrange the lever from the old pads. The lever is secured with a pin and a circlip or rivet that needs to be drilled out.
22. If the components are installed as an assembly, assemble the new pads, springs, and adjuster bar components. Extend the adjustable expander bar to ease installation (see illustrations).
23. Attach the pads to the drum brake support shield. Be careful not to damage the boot of the working brake cylinder and do not move the pistons. Do not forget to remove the rubber band or spring clip from the working brake cylinder installed when removing the pads.
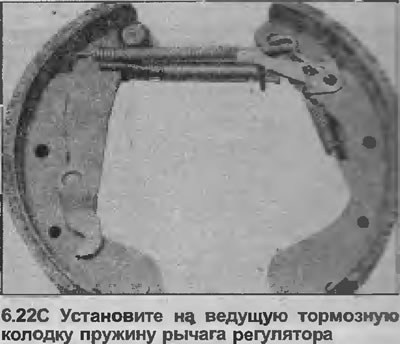
24. Insert the support posts of the blocks and secure them with springs.
25. Attach the handbrake cable, then install the hub and adjust its bearing.
26. Installing shoe and spring assemblies can be difficult. You can install the shoes and attach them with support legs, and then install the adjustable expander bar, return springs and adjuster.
27. Move the adjuster wheel so as to reduce the length of the expansion bar and move the shoes away from the brake drum.
28. Make sure the handbrake control lever is set correctly (pin on the edge of the jumper pad), then install and attach the brake drum.
29. Repeat steps on the second brake.
30. Adjust the brakes by depressing the brake pedal at least fifteen times. Clicks will be heard in the drums when the automatic gap adjusters are activated. When the clicks stop, the adjustment is complete.
31. Check handbrake adjustment as described in Chapter 26.
32. Install the wheels and lower the vehicle to the ground. Do not fully tighten the wheel bolts until the vehicle is lowered onto the wheels.
33. New drum brake pads need to wear in first, so try to avoid hard braking during the first 100 miles after changing the pads.
Visitor comments