
Removing
1. Since 1993, engines have been using a modified spring for the automatic tensioning mechanism of the toothed drive belt (see illustration). The tensioner assembly is similar to the others, but the removal and installation procedures are different.
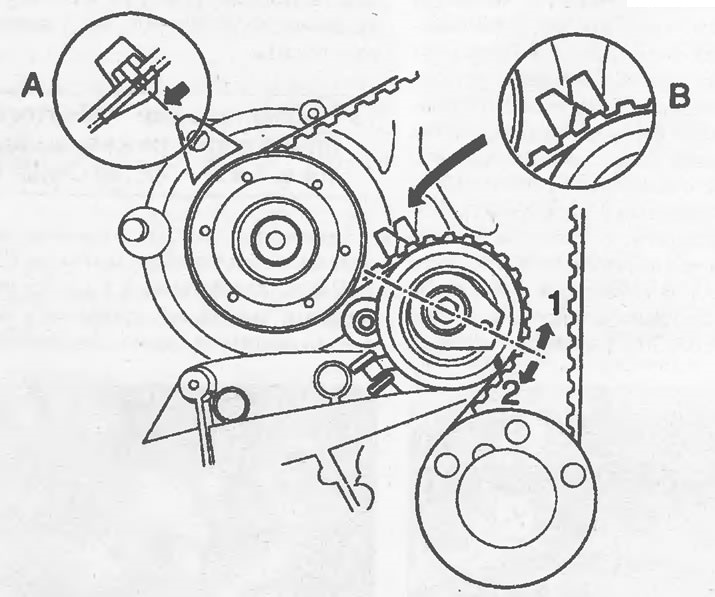
14.1 Parts of the drive belt automatic tensioner (one of the options)
A Alignment of the protrusions on the coolant pump and cylinder block
B The pointer on the tensioner is aligned with the notch in the bracket
1 To loosen the belt - move the lever counterclockwise
2 To tension the belt, move the lever clockwise
2. The main outer drive belt cover can be attached to the back cover either with staples or hex head screws; in some cases, brackets and screws are combined.
3. To loosen the tension of the belt before removal, slightly loosen the tensioner mounting bolt, then insert the tool into the groove on the tensioner lever, turn the tensioner lever until the drive belt sags. If necessary, remove completely and inspect the tensioner as described in Chapter 12.
Installation
4. Install the tensioner in place, lightly tighten the mounting bolt.
5. Make sure the coolant pump is properly located, ie. The protrusion on the pump flange must be aligned with the corresponding protrusion on the cylinder block. If this is not the case, loosen the coolant pump mounting bolts and move the pump slightly in the desired direction (see Section 3). Tighten the bolts with a torque specified specifications.
6. Install the toothed drive belt, then adjust its tension as follows.
Adjustment
7. Loosen the bolt securing the automatic tensioner, move the mechanism lever counterclockwise until the tensioner pointer hits the limiter. Tighten the mounting bolt to hold the mechanism in this position.
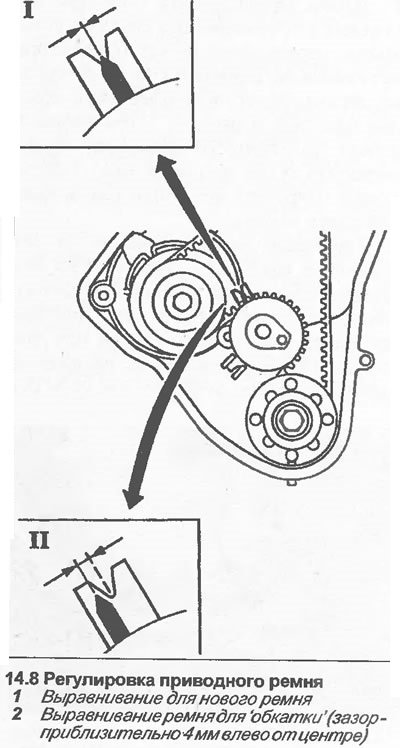
8. Turn the crankshaft two full turns in the normal direction of rotation, and check that the TDC mark on the crankshaft pulley is aligned with the pointer on the back cover of the toothed drive belt. The TDC mark on the camshaft sprocket must be aligned with the notch in the rear drive belt cover. Loosen the auto tensioner mounting bolt, move the mechanism lever clockwise until the pointer aligns with the notch in the tensioner bracket. The first few hours of operation, the new belt will wear out (break-in procedure). If you are installing a used belt (already run-in), position the pointer approximately 4 mm to the left of the notch (see illustration).
9. Tighten a bolt of fastening of the mechanism of a tension. Rotate the crankshaft one full turn in the normal direction of rotation, and check that the timing marks on the crankshaft and camshaft remain aligned. Then install all remaining components as described in Chapter 12.
10. By adjusting the toothed belt in this way, the correct tension will always be maintained by the automatic tensioner and no further control or adjustment is required.
Visitor comments