
Note: A two-legged puller may be required to remove the crankshaft sprocket on N16 NZ2, 1.8 and 2.0 liter engines. Some of the later 1.4 and 1.6 liter engines, which can be identified by the top sides of the timing belt covers, are equipped with an automatic timing belt tensioner to ensure proper tension when reassembling.
Removing
1. Disconnect the negative cable from the battery.
2. On models with power steering, remove the pump drive belt, see illustration. Section 1 and Section 10.
3. Remove the alternator drive belt as described in Section 5.
4. On C16NZ2, 1.8 and 2.0 liter engines, disconnect the wiring from the temperature gauge sensor.
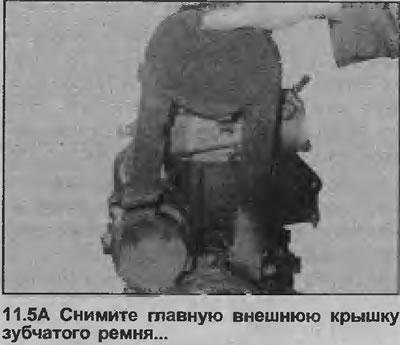
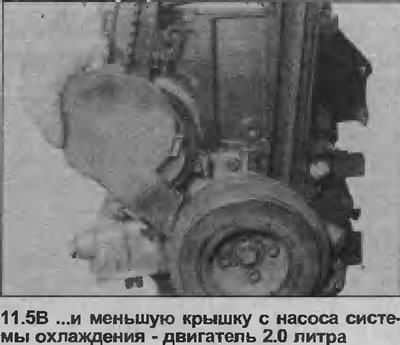
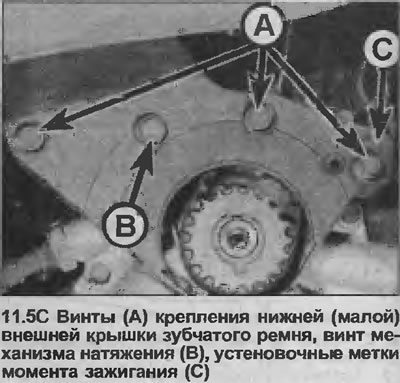
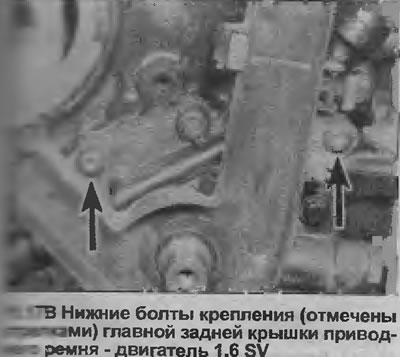
5. Loosen the fixing brackets (or hex head screws if used), remove the timing belt main outer cover, then unfasten the smaller outer cover from the coolant pump. On some models, three screws secure the support (small) the outer cover to the back cover, and the fourth attaches the tension mechanism (see illustrations).
6. On 1.6 liter models with power steering, remove the power steering pump as described in Section 10.
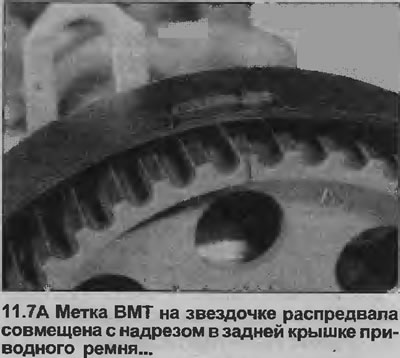
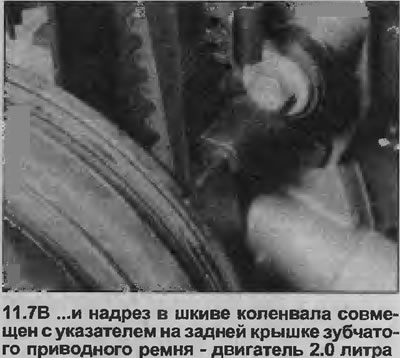
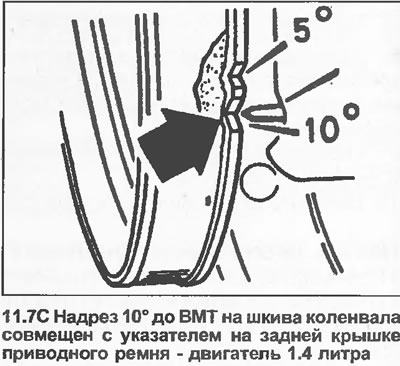
7. Turn the crankshaft by the crankshaft sprocket bolt until the alignment mark on the camshaft sprocket aligns with the notch in the back cover of the toothed drive belt, and the notch in the crankshaft pulley aligns with the pointer on the back cover of the drive belt (see illustration). Please note that on the 1.4 liter engine there are two notches in the crankshaft pulley marked 5°and 10°BTDC, the 10°BTDC notch must align with the pointer (see illustration).
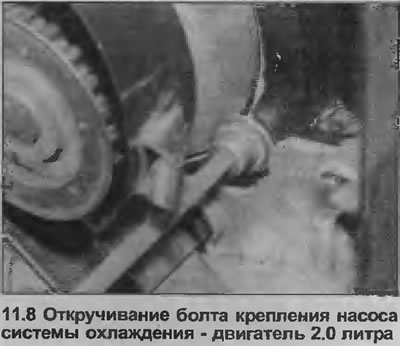
8. Loosen the three bolts securing the coolant pump (see illustration), and rotate the pump to loosen the toothed drive belt then pull the belt off the camshaft sprocket.
9. Now the crankshaft pulley can be removed. On engines 1.4 and 1.6 liters (except С16NZ2), the pulley is attached with one bolt, which also secures the crankshaft sprocket. On C16NZ2, 1.8 and 2.0 liter engines, the pulley is secured with four bolts, which must be unscrewed using a socket wrench or a hexagon socket. pedal. Or, you can insert a large screwdriver into the teeth of the flywheel crown.
10. After removing the crankshaft pulley, you can remove the toothed drive belt.
11. If required, the sprockets and timing belt rear cover can be removed as follows, otherwise go to step 23.
12. To remove the camshaft sprocket, first disconnect the breather hoses from the camshaft cover, then unscrew the mounting bolts, noting the location of the high voltage wire brackets and other electrical wiring, remove the camshaft crumb.
13. Remove the gasket. Block the camshaft from rotating by holding it with a wrench on the tabs between cams #3 and #4, and unscrew the camshaft sprocket bolt.
14. Remove the sprocket from the end of the camshaft.
15. To remove the crankshaft sprocket on 1.4 and 1.6 liter engines (except С16NZ2), If necessary, loosen the bottom bolts securing the toothed belt rear main cover and insert two large screwdrivers behind the cover to move the sprocket. Remove the segment key.
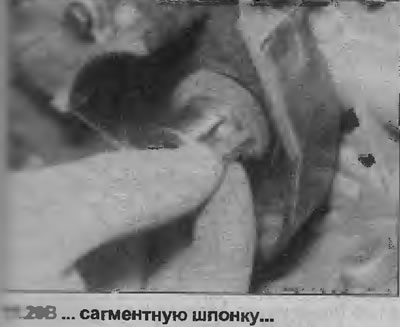
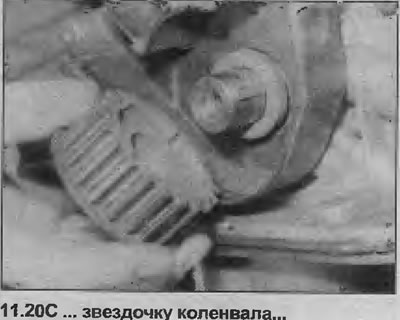
16. To remove the crankshaft sprocket on C16NZ2, 1.8 and 2.0 liter engines, it is necessary to block the crankshaft from rotation, as described in paragraph 9. Be careful when unscrewing the sprocket bolt, it is very tight. If necessary, use a two-legged puller to remove the sprocket. Remove the key and thrust washer from the end of the crankshaft.
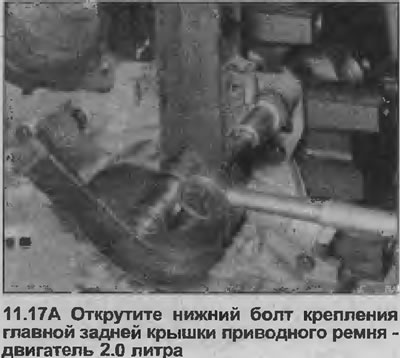
17. To remove the main rear drive belt cover on C16NZ2, 1.8 and 2.0 liter engines, disconnect the TDC sensor wiring, unfasten the wiring from the belt cover. Then unscrew the two upper and one lower mounting bolts (one in the casing of C16NZ2 engines, 1.8 and 2.0 liters, two on other engines with one overhead camshaft (SOHC)). Remove the cover by manipulating it through the smaller rear belt cover on the coolant pump (see illustrations).
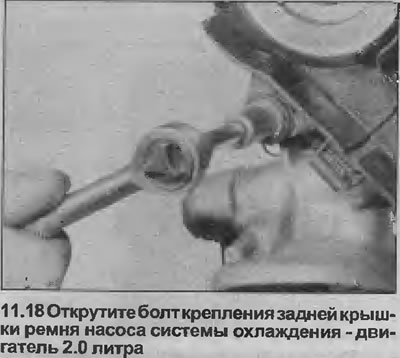
18. If required, the smaller rear belt cover can be removed from the coolant pump by unscrewing the mounting bolt (see illustration), and rotating it to release it from the mounting flange on the pump.
Installation
19. Install the back cover (lids) timing belt in reverse order of removal. When doing this, make sure that the main cover is correctly engaged with the smaller cover on the coolant pump.
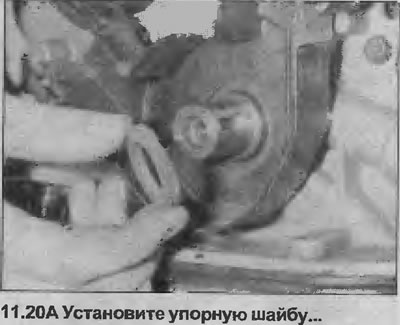
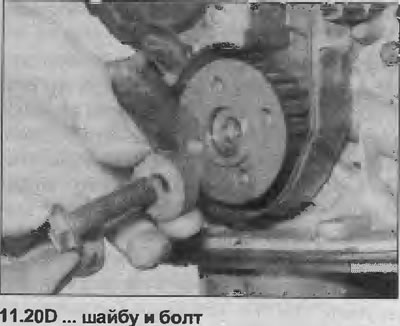
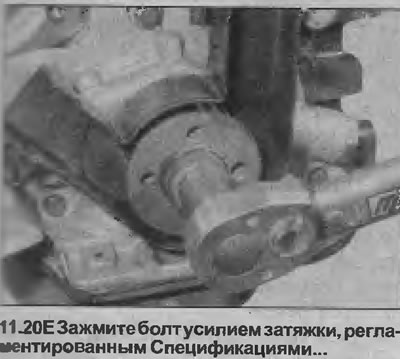
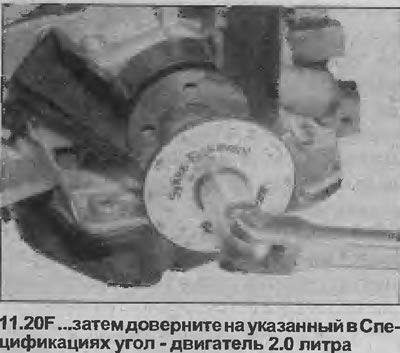
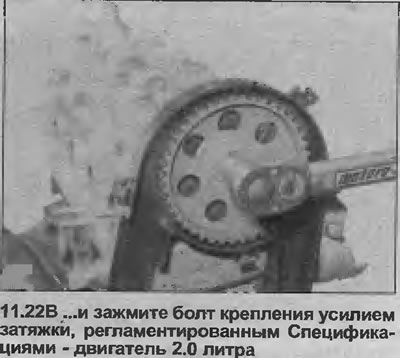
20. On C16NZ2, 1.8 and 2.0 liter engines, install the thrust washer and key on the end of the crankshaft. Then install the crankshaft sprocket, tighten the fastening bolt in two stages with a tightening torque regulated specifications. Make sure the washer is properly placed under the head of the bolt, keep the crankshaft from rotating, as you did when removing the sprocket (see illustrations).
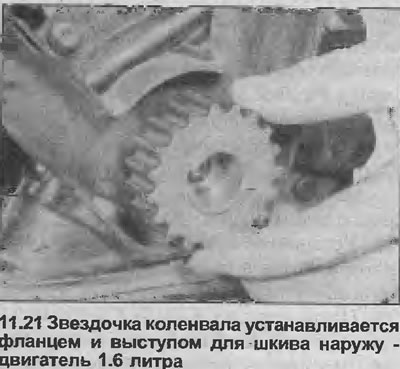
21. On 1.4 and 1.6 liter engines (except С16NZ2), install a segment key on the end of the crankshaft. Then install the crankshaft sprocket with the flange and the locating lug for the crankshaft pulley out (see illustration).
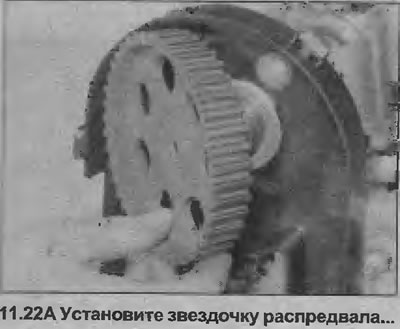
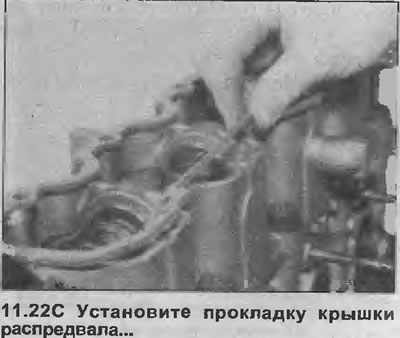
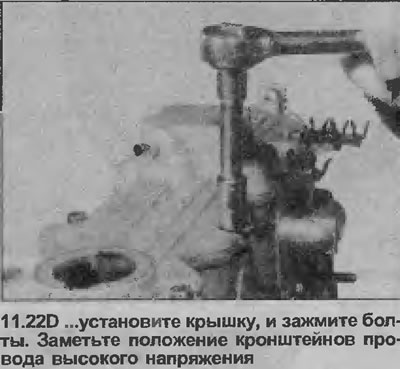
22. Install the camshaft sprocket. Make sure that the dowel pin on the end of the camshaft fits into the hole in the sprocket, and tighten the fastening bolt with the tightening torque specified specifications. Prevent the camshaft from rotating as you did when removing. Check the condition of the camshaft cover gasket, replace if necessary, then install the cover. Make sure that the brackets for the high voltage wire and other electrical wiring are correctly positioned, then connect the breather hose (see illustrations).
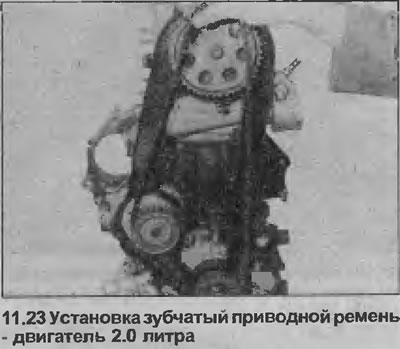
23. Temporarily install the crankshaft pulley and make sure that the alignment marks on the crankshaft pulley and camshaft sprocket are aligned as described in step 7, then put the toothed drive belt on the sprockets (see illustration), starting from the crankshaft sprocket.
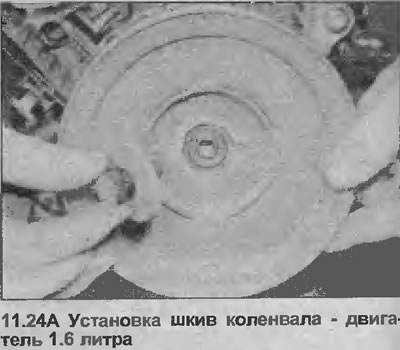
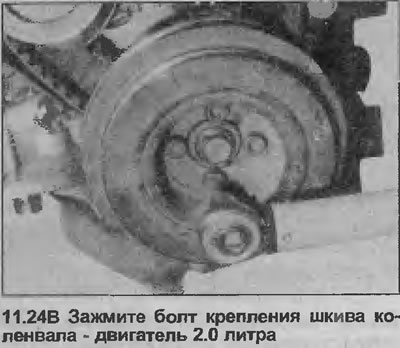
24. Install the crankshaft pulley, tighten the fastening bolts with a tightening torque regulated specifications (see illustrations). If necessary, hold the crankshaft as you did when removing it.
25. Adjust the timing belt tension as described in Chapter 11.
26. On 1.6 liter models with power steering, install the power steering pump as described in Section 10.
27. Install the outer toothed belt covers, and on C16NZ2, 1.8 and 2.0 liter engines, reconnect the temperature gauge sensor wiring.
28. Install the alternator drive belt, adjust the tension as described in Section 5.
29. On engines C16NZ2, 1.8 and 2.0 liters with power steering, install the power steering pump drive belt, adjust the belt tension as described in Section 1 and Section 10.
30. Connect the negative battery cable.
Adjustment
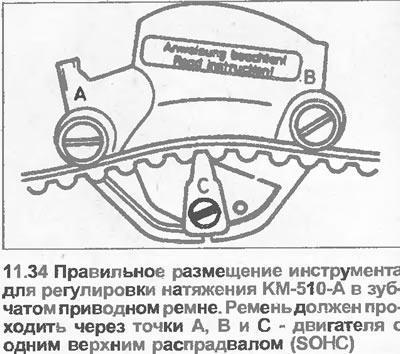
Note: To check the tension of the toothed drive belt, the manufacturer recommends using a special Opel tool No. KM-510-A. If this tool is not available, it is strongly recommended that you contact your dealer to properly tension the belt.
31. The tension of a used toothed drive belt should be checked with the engine warmed up to normal operating temperature. The tension of a new toothed drive belt should be checked with a cold engine.
32. Release the retaining clips, remove the main outer drive belt cover, then unfasten the smaller outer cover from the coolant pump.
33. Turn the crankshaft clockwise at least a quarter of a turn.
34. If there is a special template, place it in the center between the sprockets of the water pump and camshaft. The template should be located on the drive belt (see illustration).
35. Slowly release the control lever on the template, then lightly hit the template two or three times and note its reading on the scale (see illustration).

36. If the tension is different from the specified, loosen the three bolts securing the cooling system pump, turn the pump in the required direction to obtain the desired tension. Turning it clockwise will increase the belt tension, while turning it counterclockwise will decrease the tension.
37. Lightly tighten the cooling pump mounting bolts.
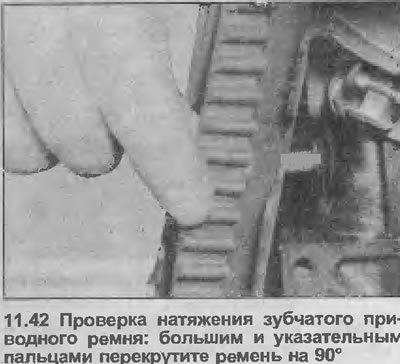
38. Remove the tension template, turn the crankshaft one full turn clockwise.
39. Check the belt tension again as described in points 4 and 5.
40. If the tension is different from the specified, repeat the steps described in paragraphs 6-9 inclusive until you get the desired tension.
41. At the end of the adjustment, remove the template, tighten the cooling system pump bolts with a tightening torque regulated specifications, install the outer timing belt covers.
42. If there is no special template, you can approximately check the tension of the drive belt by twisting it with your thumb and forefinger in the center between the sprockets of the cooling system pump and the camshaft. With the correct tension, the belt can only be twisted 90° (at moderate pressure) (see illustration). If adjustment is necessary, proceed as described earlier in this Chapter, but we advise you to check the belt tension at an Opel dealer as soon as possible.
Visitor comments