
OpelBook.ru
Cars AvtoVAZ Cars Mitsubishi Cars BMW Cars Mercedes Cars Nissan Cars Toyota Cars Chevrolet
English Русский
Български
Беларускі
Український
Српски
Hrvatski
Română
Polski
Slovenský
Magyar
 |  Sitemap  |  Contacts  |    


Main Astra Corsa Insignia Kadett Omega Vectra Zafira Others Articles
Zafira A (1999-2005, petrol)
  • Main
  • Zafira
  • Zafira A
  • Power unit
  • Engine repair
  • Accessory Drive Belt — Tensioner Replacement

Accessory Drive Belt — Tensioner Replacement (Opel Zafira A)

            0

Contents: Replacing the tensioner roller ⬇ Replacing the tensioner ⬇
The tensioner is automatic. The device is subject to replacement if there are signs of insufficient tension of the auxiliary drive belt: with a sharp increase in the crankshaft speed, when powerful electrical consumers or the air conditioner are turned on, a squeal (whistle) is heard from the engine compartment. If play or jamming occurs, the roller can be replaced separately, without resorting to removing the entire device.

Recommendation: Replace the tensioner assembly with the roller.


Note: The work is shown on the example of replacing a 1.6 DOHC engine. On other engines, the operation is performed similarly.


Replacing the tensioner roller


1. Loosen the tension of the auxiliary drive belt and fix the tensioner in this position (see "Accessory Drive Belt - Checking Condition and Replacing").

2. Using a 15 mm open-end wrench, unscrew the bolt securing the roller to the device.

Warning! The roller mounting bolt has a left-hand thread - turn it clockwise!
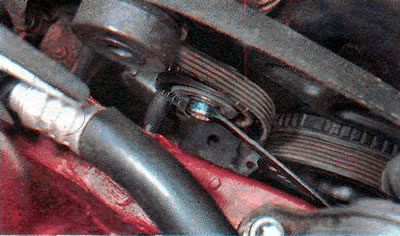

Warning! The roller mounting bolt has a left-hand thread - turn it clockwise!


3. Remove the roller and its mounting bolt.
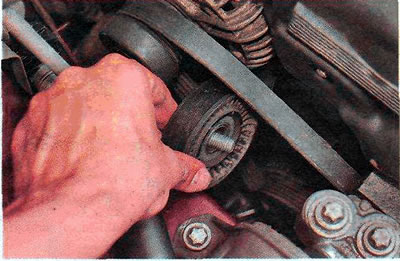
3. Remove the roller and its mounting bolt.


4. Install the parts in reverse order.


Replacing the tensioner


1. Prepare the car for work (see "Preparing the car for maintenance and repair"),

2. Remove the accessory drive belt (see "Accessory Drive Belt - Checking Condition and Replacing"),

3. Using an 8 mm socket wrench, unscrew the rear mudguard mounting bolt.
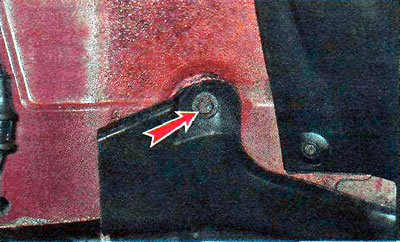
3. Using an 8 mm socket wrench, unscrew the rear mudguard mounting bolt.


4. Unscrew the bolts securing the mudguard to the front bumper trim (see "Front fender liner - removal and installation").

5. Move the mudguard back and use an 8 mm wrench to unscrew the front mudguard mounting bolt.
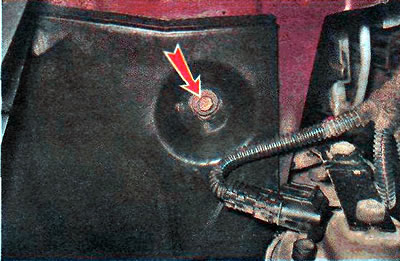
5. Move the mudguard back and use an 8 mm wrench to unscrew the front mudguard mounting bolt.


6. Using the same key, unscrew the two lower bolts securing the mudguard and remove it.
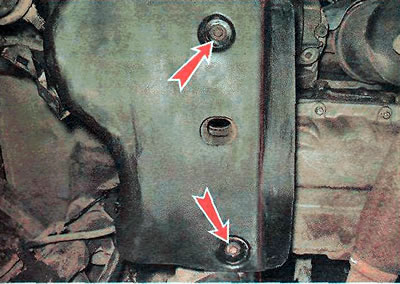
6. Using the same key, unscrew the two lower bolts securing the mudguard and remove it.


7. Using the TORX E14 key, unscrew the tensioner mounting bolt.
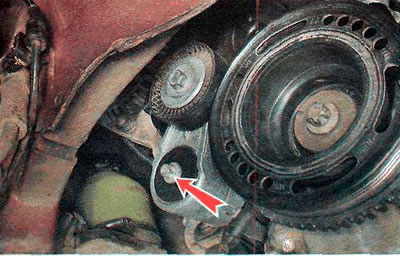


7. Using the TORX E14 key, unscrew the tensioner mounting bolt.


8. Remove the tensioner.
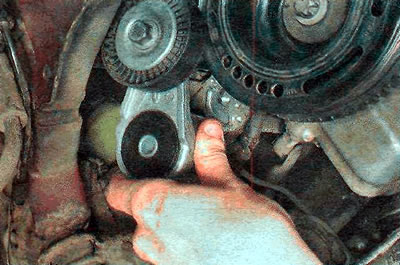
8. Remove the tensioner.


9. Install the parts in the reverse order. When installing, align the protrusions on the tensioner...
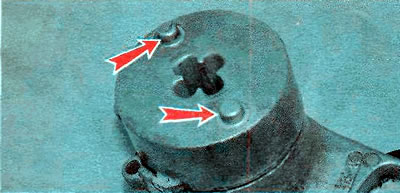
9. Install the parts in the reverse order. When installing, align the protrusions on the…


...with recesses on the cylinder block.
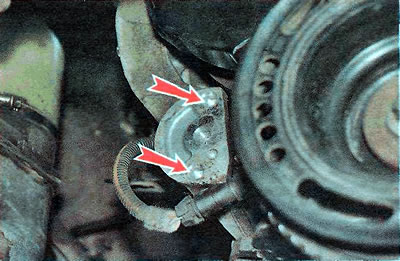
...with recesses on the cylinder block.


This article is available at russian, bulgarian, belarusian, ukrainian, serbian, croatian, romanian, polish, slovak, hungarian
Checking the article: Chernov Alexander

Share information:

Previous articles
Opel Zafira A: Engine repair
Next articles

Accessory Drive Belt — Checking Condition and Replacing
Engine lubrication system 1.8 DOHC — oil and oil filter replacement
Lubrication system of 1.4 and 1.6 DOHC engines — oil and oil filter replacement
Lubrication system — checking oil pressure
Checking the compression in the engine cylinders
Engine trim panel — removal and installation
Timing Belt — Checking Condition, Adjusting Tension and Replacing
Timing Belt — Tensioner Replacement
Cylinder head cover for 1.4 and 1.6 DOHC engines — removal, gasket replacement and installation
1.8 DOHC Engine Cylinder Head Cover — Removal, Gasket Replacement and Installation
Camshaft Seals — Replacement
Hydraulic valve lifters — replacement


See similar ones from other Opel car manuals:
▶ Generator Drive Belt Tensioner — Removal and Installation Opel Astra G (1998-2004, petrol)
▶ Removal and installation the accessory drive belt Opel Corsa C (2000-2006)
▶ Checking the tension of the accessory drive belt Opel Insignia A (2008-2017)
▶ Toothed drive belt, sprockets, tensioner pulley and idler… Opel Vectra A (1988-1995, petrol)
▶ Adjusting the engine accessory drive belt Opel Vivaro A (2001-2014)
Link to this page in different formats

Visitor comments


No comments yet


How much will 40 + 15 =


Zafira A (1999-2005, petrol) 
  • General information
  • Governing bodies
  • User manual
  • Maintenance
  • Power unit
  • Engine repair
  • Control system
  • Cooling system
  • Exhaust system
  • Transmission
  • Clutch
  • Mechanical gearbox
  • Automatic gearbox
  • Front wheel drives
  • Chassis
  • Hubs, wheels and tires
  • Front suspension
  • Rear suspension
  • Steering
  • Brake system
  • Body
  • Maintenance and care
  • Exterior
  • Side doors
  • Climate control
  • Electrical equipment
  • Equipment and devices
  • Power devices
  • Lighting and signaling
  • Windshield wipers and washers
  • Electrical circuits
OpelBook.ru © 2017–2026 · Mobile version · · Sitemap: EN BG BY UA RS HR RO PL SK HU · Feedback · Site search
Astra F, petrol · Astra G, petrol · Astra G · Astra H · Astra J, petrol · Corsa B · Corsa C, petrol · Corsa C · Insignia A · Kadett D · Kadett E · Omega A · Omega B · Omega B2 · Vectra A, petrol · Vectra A · Vectra B, petrol · Vectra B · Vectra C · Zafira A, petrol · Frontera A, petrol · Frontera B · Ascona C · Vivaro A ·
We want your visit to be comfortable 🤝! We use cookies 🍪 to make that happen.