
Comment. The belt should be replaced earlier than the period established by the maintenance schedule, if during the inspection it turns out that there are tears, abrasions, cracks or traces of oil and coolant on the belt surface.
Execution sequence
Comment. The work is shown on the example of replacing a 1.6 DOHC engine. On other engines, the operation is performed similarly.
1. We prepare the car for work (see «Preparing the car for maintenance and repair»).
2. On vehicles with manual transmission, we turn on the fourth or fifth gear.
3. For convenience, remove the air filter (see «Air filter - removal and installation»).
4. Raise the right front side of the car with a jack (see «Preparing the car for maintenance and repair»).
5. Rotate the right front wheel clockwise (the engine crankshaft will also rotate) and inspect the belt for breaks, cracks and scuffs.
Comment. On vehicles with automatic transmission, it is necessary to rotate the crankshaft by the bolt securing its pulley (see «Timing belt - condition check, tension adjustment and replacement»).
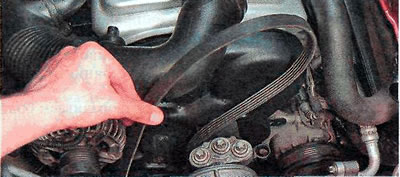
6. If the inspection showed the need to replace the auxiliary drive belt, remove the right front wheel (see «Wheel - replacement»).
7. If the drive belt is removed not for replacement, mark the direction of its rotation and do not change the direction of rotation of the belt during installation.
8. With a 15 mm key, turn the tensioner counterclockwise, loosening the belt tension.
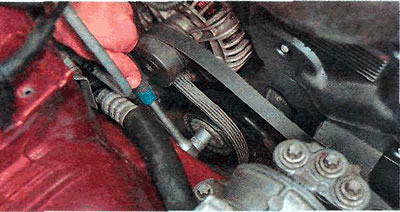
9. Remove the belt first from the alternator pulley, then from all other pulleys.
Recommendation. To facilitate the removal process, and to a greater extent the installation of the belt, the tensioner can be fixed.
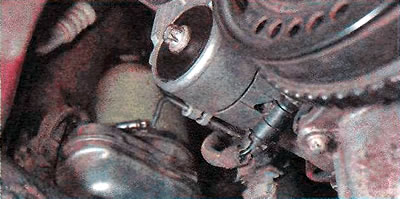
10. We check the ease of rotation and the absence of play in the tensioner roller. If there is a malfunction, it must be replaced (see «Accessory Drive Belt - Tensioner Replacement»).
11. Check the condition of the generator bearings and (if installed) air conditioner compressor (see «Generator - check without removing it from the car» And «Air conditioning system - checking the technical condition»).
12. We install the parts in the reverse order.
Visitor comments