
- device for cracking valves;
- tweezers;
- special pliers for removing valve stem seals;
- mandrel for pressing caps;
- magnet.
Execution sequence
Comment. The work is shown on the example of replacing a 1.6 DOHC engine. On other engines, the operation is performed similarly.
1. We prepare the car for work (see «Preparing the car for maintenance and repair»).
Comment. The valve stem seals are replaced in the same way on each valve. The replacement sequence for the cylinders is as follows: 1, 4, then turn the crankshaft 180°, then 2, 3.
2. To facilitate the work and eliminate the installation of the hydraulic pusher in the wrong place, remove the hydraulic pusher of one of the valves of the first cylinder (see «Valve lifters - replacement»).
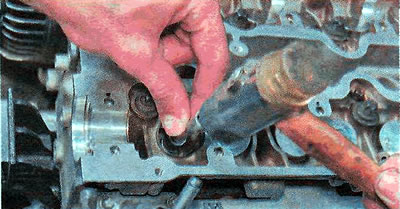
3. Install the device for drying the valves according to the instructions attached to it.
4. Install the cracker stop on the spring plate.
Warning! When performing the following operation, do not scratch the walls of the mounting holes of the hydraulic pushers with a cracker!
Recommendation. To prevent accidental damage to the hydraulic pusher mounting hole, you can cut a strip of a suitable size from a plastic bottle and, bending it into a ring, insert it into the hydraulic pusher mounting hole.
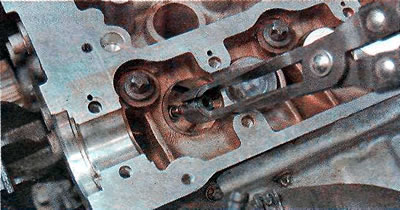
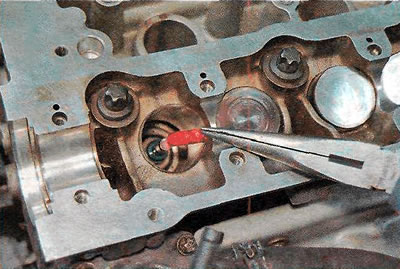
5. By pressing on the handle of the cracker, we compress the valve spring and, holding the spring compressed, remove the two valve crackers with tweezers or a magnet.

6. Slowly lower the spring and move the cracker stop to the side.
7. Remove the spring plate with tweezers or a magnet.
8. Remove the valve spring in the same way.
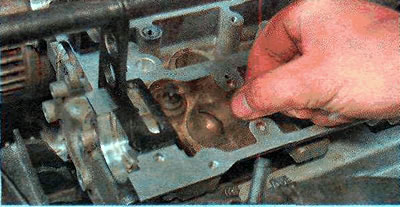
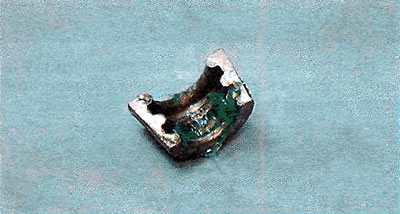
9. Using special pliers, remove the valve stem seal.
10. We put a mandrel on the valve stem for installing valve stem seals (usually included in the kit).

11. We apply clean engine oil to the working edge of the new cap and carefully put the cap on the valve stem.
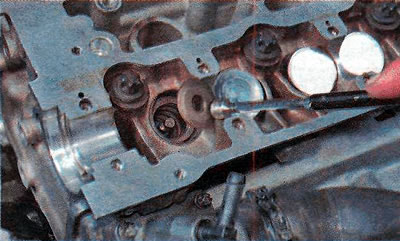
12. We press in the valve stem seal, using a 10 mm high socket head with an extension as a mandrel.
13. Remove the mandrel from the valve stem.
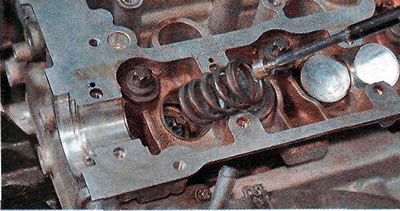
14. We install the valve spring and the spring plate and, compressing the spring with a cracker, install the valve crackers.
Recommendation. Apply a small amount of grease to the inside surface of the valve cotters to facilitate installation of the valve cotters on the valve stem.
15. Gently and smoothly release the spring and make sure that the valve crackers are aligned with the grooves on the valve stem and with the spring plate.
16. Similarly, we replace the caps of the remaining valves of the 1st and 4th cylinders.
17. Turn the engine crankshaft 180°.
18. We replace the valve stem seals of the 2nd and 3rd cylinders.
19. Turn the engine crankshaft another 180°.
20. Install the remaining parts in reverse order.
Visitor comments