
To perform the work, you will need an impact screwdriver, a set of flat probes, a caliper. It is more convenient to perform work on a flyover or a viewing ditch.
Removing
1. We prepare the car for work (see «Preparing the car for maintenance and repair»).
2. Remove the engine oil pan (see «Engine oil pan - removal and installation»).
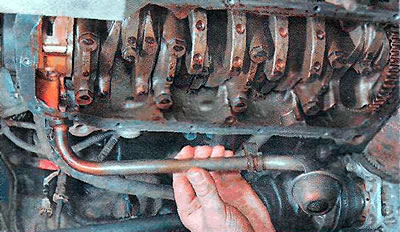
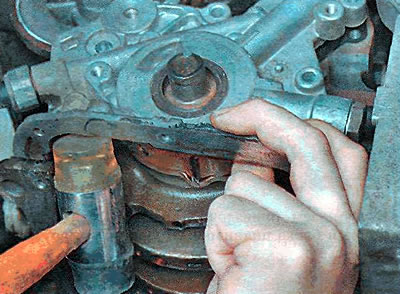
3. Using a 10 mm socket wrench, unscrew the three bolts securing the oil intake.
4. Remove the oil intake.
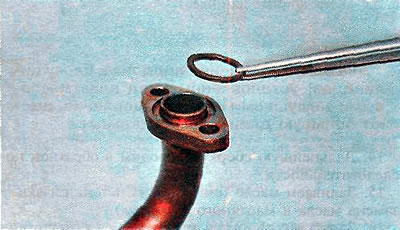
5. Remove the sealing ring of the oil intake. When assembling, it must be replaced with a new one.
6. Remove the rear timing belt cover (see «Camshaft seals - replacement») and disconnect the wiring harness block from the emergency oil pressure sensor (see «Emergency oil pressure sensor - check and replace»).
7. If the crankshaft position sensor is installed at its pulley, move the sensor to the side without disconnecting the wiring harness block (see «Crankshaft position sensor - replacement»).
Further operation is similar for all cars. There are only visual differences in the shape of the front cover of the oil pump: on the part of the cars, it has a tide for mounting the crankshaft position sensor.
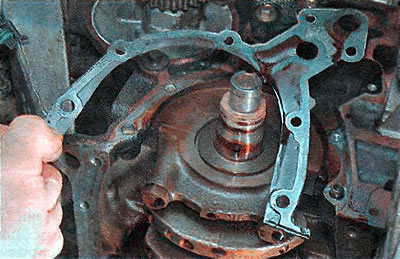
8. Using a 10 mm socket wrench, unscrew the seven bolts securing the oil pump to the cylinder block.
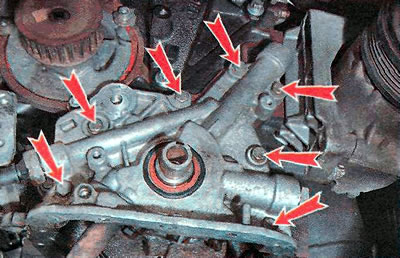
9. Lightly tapping the oil pump housing with a rubber-headed hammer, separate it from the cylinder block.
10. Remove the oil pump gasket. When assembling, it must be replaced with a new one.
Examination
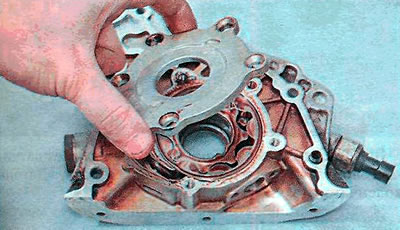
1. Using an impact screwdriver, carefully unscrew...
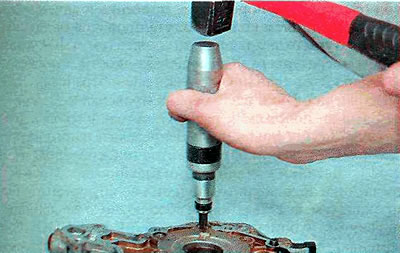
... five screws securing the oil pump cover.
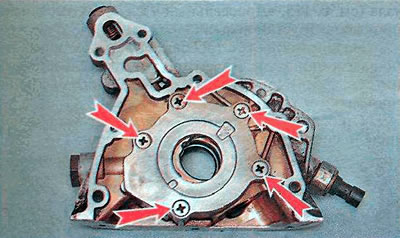
2. Remove the oil pump cover and clean the oil pump parts from oil deposits.
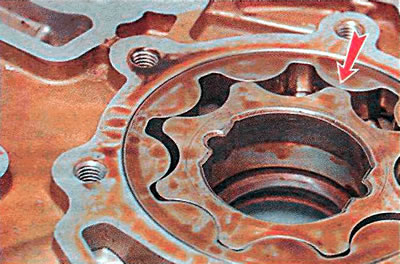
3. With an edge, we apply a caliper to the oil pump housing. We measure the gap between the pump housing and the output rotor. The gap should be within 0.400-0.484 mm. If the gap is greater than the specified value, then the pump will not develop the required pressure, it must be replaced.
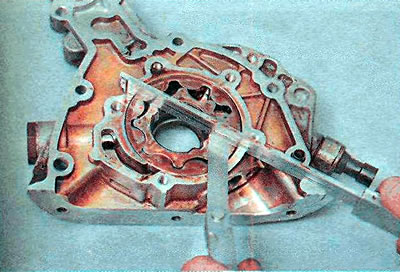
4. Measure the side clearance of the inner rotor. The gap should be within 0.035-0.085 mm. If the gap is greater than the specified value, then the pump will not develop the necessary pressure, it should be replaced.
5. Using a 24 mm wrench, unscrew the plug of the pressure reducing valve.

6. Remove the sealing ring 2 from the plug 1 (must be replaced with a new one during reassembly) and remove the pressure reducing valve spring 3 and valve 4 from the oil pump housing. We clean the parts from oil deposits.
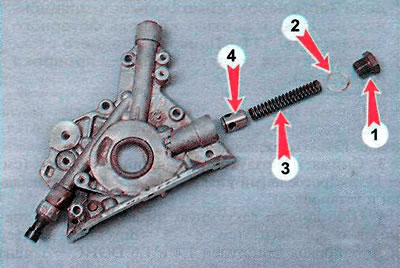
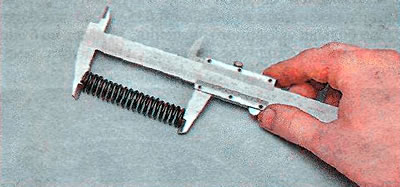
7. We measure the length of the spring in the free state. It should be 81 mm. In case of deviations from the specified values, the spring must be replaced.
8. We examine the pressure reducing valve. Its holes must not be clogged with oil deposits and its surface must not be damaged. If there is damage and the holes cannot be cleared, the valve must be replaced.
9. We assemble the oil pump in the reverse order. Apply Loctite 242 sealant to the screws securing the oil pump cover and tighten the screws to a torque of 8 Nm. We tighten the plug of the pressure reducing valve with a torque of 30 Nm.
Installation
Install the parts in reverse order. We apply RTV sealant to the new oil pump gasket, and apply Loctite 242 sealant to its fastening screws and tighten with a torque of 30 Nm.
Visitor comments