
Note: Use new flywheel mounting bolts when installing. Some models are equipped with a pot-shaped flywheel.
Removing
1. Remove the clutch (Section 6) and starter (Section 5).
2. If the engine is in a vehicle, remove the release bearing and guide sleeve as described in Section 6.
3. Although the bolt holes in the flywheel are offset so that the flywheel only mounts in one position, make marks between the flywheel and the end of the crankshaft to facilitate installation.
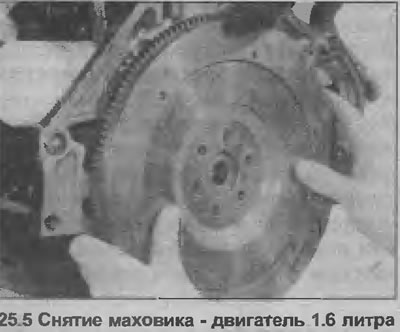
4. Block the flywheel from rotating by pinching the ring gear with a large screwdriver or other suitable tool. If the engine is in the car, the easiest way to get there is through the starter hole.
5. Turn off bolts of fastening, remove a flywheel (see illustration).
Inspection
6. After removing the flywheel, inspect it as follows.
7. If the teeth on the flywheel starter ring are badly worn, or if some of them are missing, remove the ring and install a new one.
8. The old ring can be broken with a metal chisel by making a small cut between two teeth with a hacksaw. Be careful not to damage the flywheel and protect your eyes.
9. A new ring gear must be heated to 180-230°C, so if there is no special means for heating, contact your dealer or engine repair specialist. A new ring gear must not be overheated, otherwise the hardening of the metal will change.
10. The heated crown is simply located on the flywheel and left to cool - when cooled, the metal will shrink and the crown will be fixed.
11. If the contact surface of the clutch friction disc on the flywheel has a large output, or small cracks are visible upon close inspection (caused by overheating), this flywheel surface can be reground. But this is provided that the total thickness of the flywheel does not decrease too much. Consult an engine repair specialist and if this is not possible, simply replace the flywheel.
Installation
12. Install in reverse order, paying attention to the following.
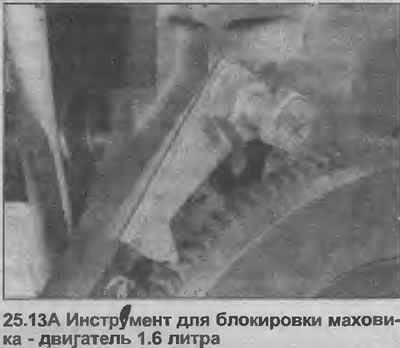
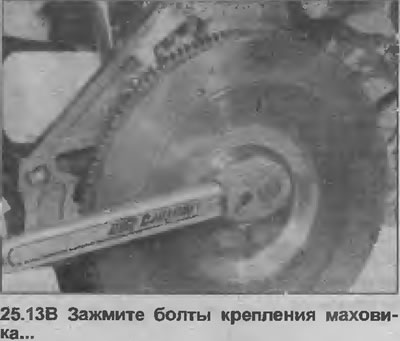
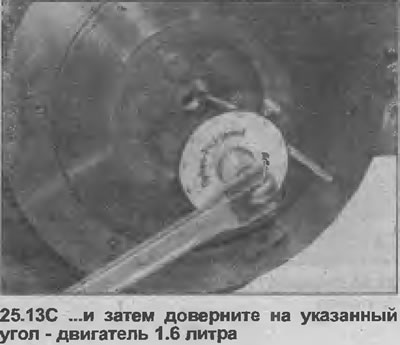
13. Align the pre-made marks on the flywheel and crankshaft, install new flywheel mounting bolts. Tighten them in two steps to the specified tightening torque, locking the flywheel as you did when removing it (see illustrations).
14. Where necessary, install the release bearing, guide sleeve and clutch as described in Section 6.
Visitor comments