


Contents: Inspection ⬇ Recovery ⬇
Inspection
1. Check the mating surfaces of the connecting rod caps to see if there have been any attempts to assemble them in the wrong orientation. This is unlikely, but if such damage is found, the connecting rods and caps must be replaced.
2. Check visually that the connecting rods are not bent, if a more detailed check is required, contact your Opel dealer.
3. Piston pins are used to secure the piston to the connecting rod. Special tools are required to separate the pistons and connecting rods, so we recommend that you contact your dealer when performing this work.
4. Inspect the pistons for ovality and scratches.
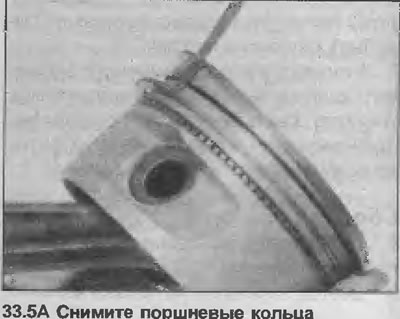
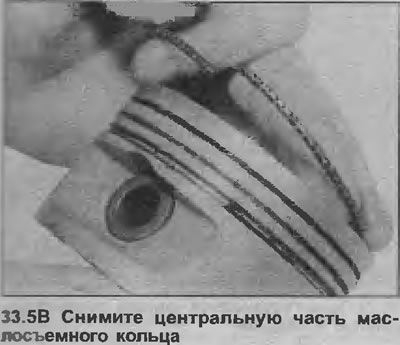
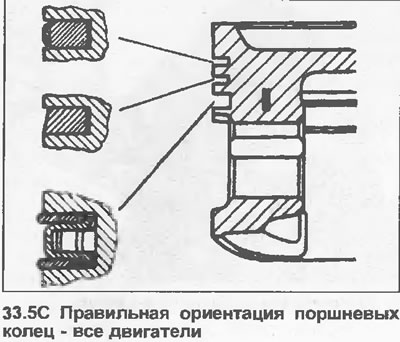
5. If new rings are to be installed on the old pistons, remove the old ones through the top of the pistons. Use three old feeler gauges for this. Note that the oil scraper ring consists of three parts. Also, note the orientation of each ring (see illustrations).
Recovery
6. Before installing new rings on the pistons, insert them into the corresponding cylinder channels and use feeler gauges to check that the gaps between the ring cuts are within the limits specified in Specifications (see illustration). Check the clearances of the ring cuts at the top and bottom of the piston stroke in the cylinder bore.
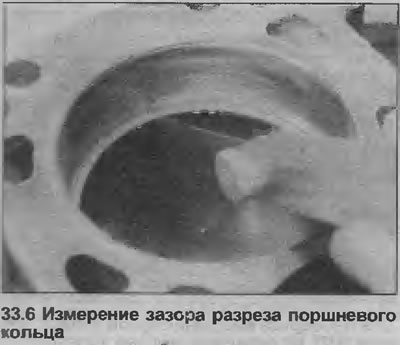
7. If the gap of any ring cut exceeds that specified in Specifications tolerance, these rings must be replaced, and if the ring grooves in the pistons are worn, new pistons will also be required.
8. Clean the piston ring grooves with a piece of old piston ring. Be careful not to scratch the surface of the pistons. Also check the oil return holes in the grooves to make sure they are not clogged.
9. Check that there are no wear ridges at the tops of the cylinder bores.
If there is a step caused by wear, when installing new piston rings, the top edge of the top ring must be filed down so that it does not hit the protrusion caused by wear, or the protrusion must be filed down.
10 Install the oil scraper ring parts so that the lower part is offset 25-50 mm to the right of the gap in the center section, and the upper part is offset the same distance to the left of the gap in the center section.
11. When installing the lower compression ring, remember that the ring has a conical cross-section. It should be installed with the word "TOP" facing up.
12. Install the upper compression ring, offsetting the ring split gap by 180° relative to the lower compression ring split gap. If a stepped ring is installed, install it with the smaller diameter facing up.
13. If new pistons are to be installed, they must be selected from the available oversize sizes, having first measured the cylinder bore diameter as described in Chapter 36.
14. Usually the required pistons of oversize are provided by the dealer after boring the cylinder block.
15. Whenever new piston rings are installed, the cylinder bores must be honed (i.e. remove the gloss from them), you can use sandpaper or a special tool for this. If you use sandpaper, make movements at an angle of 60° to the center line of the channel to form cross-hatching strokes.
Visitor comments