
OpelBook.ru
Cars AvtoVAZ Cars Mitsubishi Cars BMW Cars Mercedes Cars Nissan Cars Toyota Cars Chevrolet
English Русский
Български
Беларускі
Український
Српски
Hrvatski
Română
Polski
Slovenský
Magyar
 |  Sitemap  |  Contacts  |    


Main Astra Corsa Insignia Kadett Omega Vectra Zafira Others Articles
Vectra A (1988-1995, petrol) Vectra A (1988-1995) Vectra B (1995-2002, petrol) Vectra B (1995-2002) Vectra C (2002-2008)
  • Main
  • Vectra
  • Vectra A
  • Power unit
  • SOHC engine
  • Pallet — removal and installation

Pallet — removal and installation (Opel Vectra A)

            0

Contents: Removal ⬇ Installation ⬇
Note: When installing the pan, replace the gaskets and use sealant on the oil pump and rear main bearing.


Removal


1. If the engine is in the vehicle, proceed as described below, otherwise proceed to step 9.

2. Disconnect the negative cable from the battery.

3. Drain the engine oil, following the instructions Section 1, then install and tighten the drain plug.

4. Apply the handbrake, then jack up the front of the vehicle and support it on axle stands.

5. Remove the front section of the exhaust system as described in Section 4C.

(The source is on the online website: OpelBook)

6. Where applicable, disconnect the electrical wiring from the oil level sensor.

7. Unscrew the mounting bolts and remove the engine-to-transmission locking plate from the clutch housing.

8. Unscrew the mounting bolts, remove the sump. Note that on most models the sump deflector can be moved far away from the cylinder block together with the sump, but it cannot be removed until the oil pump inlet pipe is removed.

9. On 1.6, 1.8 and 2.0 liter models, to remove the sump deflector, you need to unscrew the bracket that secures the oil pump inlet pipe to the cylinder block. Then the deflector can be removed through the inlet pipe. On C16NZ2, 1.8 and 2.0 liter models, use a screwdriver to remove the rubber gasket from the sump deflector.

10. If required, the oil pump intake pipe can be removed by unscrewing one bolt securing the bracket to the cylinder block. Then unscrew the two bolts securing the end of the pipe to the oil pump. Remove the O-ring.


11. Clean the mating surfaces of the cylinder block, deflector (where it is applied) and the tray from the old gasket and sealant.

Installation


12. Apply sealant (Opel #90485251 or equivalent) to the joint between the oil pump and the cylinder block, and between the rear main bearing cap and the cylinder block (see illustrations).
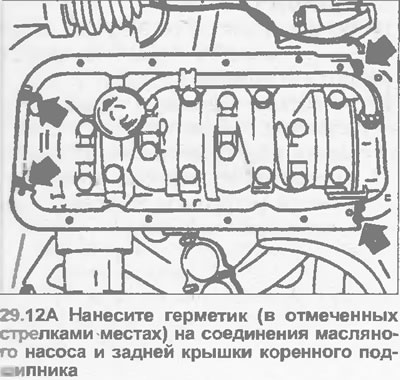
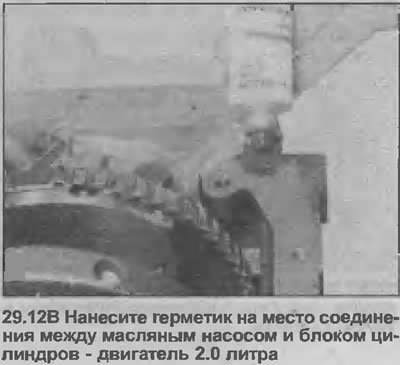
12. Apply sealant (Opel #90485251 or equivalent) to the joint between the oil pump and the cylinder…


12. Apply sealant (Opel #90485251 or equivalent) to the joint between the oil pump and the cylinder…


13. On C16 NZ2, 1.8 2.0 litre models, position the new rubber gasket over the sump deflector flange; make sure it is placed correctly (see illustration).
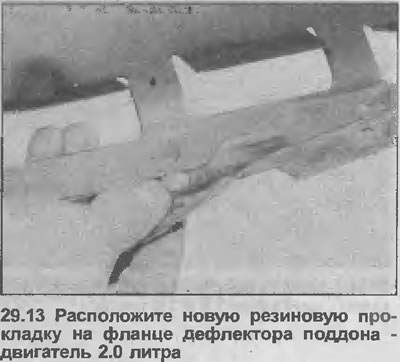
13. On C16 NZ2, 1.8 2.0 litre models, position the new rubber gasket over the sump deflector…


14. On 1.6, 1.8 and 2.0 liter models, install the oil pan deflector in the cylinder block, positioning it through the oil pump intake pipe.


15. If the pickup tube has been removed, install it onto the oil pump using a new O-ring and tighten the bolts to the specified torque Specifications (see illustrations).
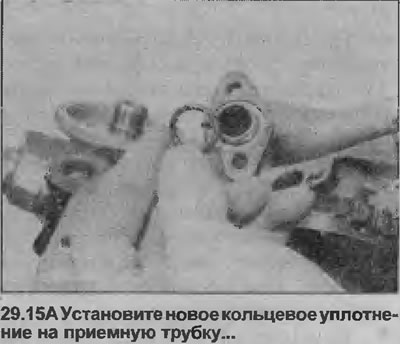
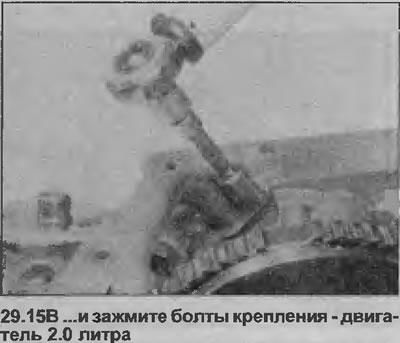
15. If the pickup tube has been removed, install it onto the oil pump using a new O-ring and…


15. If the pickup tube has been removed, install it onto the oil pump using a new O-ring and…


16. Where applicable, install the bracket securing the intake pipe to the cylinder block; make sure it goes through the appropriate hole in the under-deck deflector, if any (see illustration).
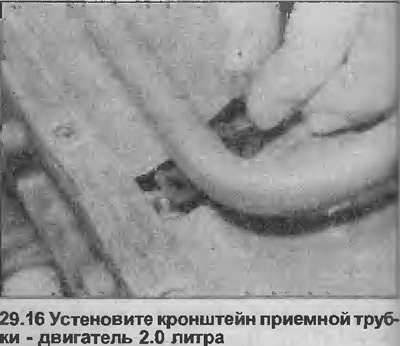
16. Where applicable, install the bracket securing the intake pipe to the cylinder block; make sure…


17. Coat the oil pan mounting bolts with thread locking compound (Opel #90167347), then install under the oil pan and tighten the bolts to the specified tightening torque Specifications (see illustrations).
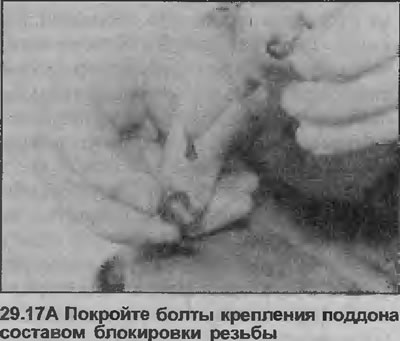
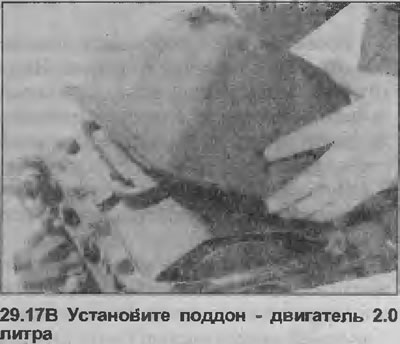

17. Coat the oil pan mounting bolts with thread locking compound (Opel #90167347), then install…


17. Coat the oil pan mounting bolts with thread locking compound (Opel #90167347), then install…


18. If the engine is in the car, further installation is carried out in the reverse order of removal. Then install the front section of the exhaust system, following Section 4C. Finally, fill the engine with oil as described in Section 1.


This article is available at russian, bulgarian, belarusian, ukrainian, serbian, croatian, romanian, polish, slovak, hungarian
Checking the article: Chernov Alexander

Share information:

Previous articles
Opel Vectra A: SOHC engine
Next articles

Rear Crankshaft Oil Seal — Replacement
Front Crankshaft Oil Seal — Replacement
Drive Disc (Automatic Transmission) — Removal and Installation
Flywheel — removal, inspection and installation
Hydraulic valve lifters — inspection
Cylinder head — inspection and restoration
Oil pump — removal and installation
Oil pump — disassembly, inspection and assembly
Pistons and connecting rods — removal and installation
Pistons and connecting rods — inspection and maintenance
Crankshaft and bearings — removal and installation
Crankshaft and bearings — inspection


See similar ones from other Opel car manuals:
▶ Pallet — removal and installation with engine in car Opel Omega A (1986-1993)
▶ Pallet — removal and installation Opel Ascona C (1981-1988)
Link to this page in different formats

Visitor comments


No comments yet


How much will 23 + 19 =


Vectra C (2002-2008) 
  • General information
  • User manual
  • Vehicle device
  • Maintenance
  • Troubleshooting
  • Power unit
  • Engine repair
  • Cooling system
  • Power and control system
  • Engine electrics
  • Transmission
  • Clutch
  • Car gearbox
  • Drive shafts
  • Chassis
  • Car suspension
  • Steering
  • Brake system
  • Body
  • Exterior
  • Interior
  • Doors, locks and windows
  • Heating and ventilation
  • Electrical equipment
  • Equipment and devices
  • Headlights and lighting
  • Electrical circuits
Vectra B (1995-2002) 
  • General information
  • User manual
  • Weekly checks
  • Maintenance (gasoline)
  • Maintenance (diesel)
  • Troubleshooting
  • Power unit
  • SOHC gasoline engine
  • DOHC petrol engine
  • Diesel engine 1.7 liter
  • Diesel engine 2.0 liters
  • Engine repair
  • Cooling system
  • Fuel system (gasoline)
  • Fuel system (diesel)
  • Charging system
  • Launch system
  • Ignition and preheat
  • Transmission
  • Clutch
  • Mechanical gearbox
  • Automatic gearbox
  • Drive shafts
  • Chassis
  • Brake system
  • Wheel suspension
  • Steering
  • Body
  • Exterior
  • Interior
  • Doors and windows
  • Heating and ventilation
  • Electrical equipment
  • Equipment and devices
  • Electrical circuits
Vectra B (1995-2002, petrol) 
  • General information
  • Maintenance
  • Help with malfunctions
  • Power unit
  • Engine repair
  • Exhaust system
  • Cooling system
  • Fuel system
  • Multec injection system
  • Four point injection
  • Transmission
  • Clutch
  • Gearbox and drive
  • Chassis
  • Wheel suspension
  • Steering
  • Brake system
  • Wheels and tires
  • Body
  • Exterior
  • Interior
  • Electrical equipment
  • Fuses and electronics
  • Power devices
  • Ignition system
  • Lighting and signaling
  • Equipment and devices
  • Heating and ventilation
  • Electrical circuits
Vectra A (1988-1995) 
  • Power unit
  • Engine repair
  • Ignition system
  • Lubrication system
  • Cooling system
  • Injection system
  • Fuel system (carburetor)
  • Fuel system (diesel)
  • Exhaust system
  • Transmission
  • Clutch
  • Car gearbox
  • Chassis
  • Front suspension
  • Rear suspension
  • Steering
  • Brake system
  • Wheels and tires
  • Body
  • Exterior
  • Interior
  • Electrical equipment
  • Electrical circuits
Vectra A (1988-1995, petrol) 
  • General information
  • User manual
  • Maintenance
  • Power unit
  • SOHC engine
  • DOHC engine
  • Cooling and ventilation
  • Fuel system (carburetor)
  • Fuel system (injector)
  • Exhaust converter
  • Transmission
  • Clutch
  • Mechanical gearbox
  • Automatic gearbox
  • Drive shafts
  • Chassis
  • Brake system
  • Car suspension
  • Steering
  • Body
  • Body elements
  • Electrical equipment
  • Power devices
  • Equipment and devices
  • Electrical circuits
OpelBook.ru © 2017–2026 · Mobile version · · Sitemap: EN BG BY UA RS HR RO PL SK HU · Feedback · Site search
Astra F, petrol · Astra G, petrol · Astra G · Astra H · Astra J, petrol · Corsa B · Corsa C, petrol · Corsa C · Insignia A · Kadett D · Kadett E · Omega A · Omega B · Omega B2 · Vectra A, petrol · Vectra A · Vectra B, petrol · Vectra B · Vectra C · Zafira A, petrol · Frontera A, petrol · Frontera B · Ascona C · Vivaro A ·
We want your visit to be comfortable 🤝! We use cookies 🍪 to make that happen.