
Note: When installing, replace all gaskets and/or O-rings.
Examination
1. Periodically check the exhaust system for signs of leaks or damage. Also check the rubber suspensions, replace if necessary.
2. Small holes or cracks can be repaired using exhaust system repair products, but serious damage requires replacement.
Removing
3. The stock exhaust system originally installed consists of four separate sections that can be replaced individually.
4. On models with a catalytic converter, an oxygen sensor is installed on the front section of the exhaust system. The catalytic converter is mounted in a box in front of the conventional exhaust system. Manufacturers do not specify any intervals for replacing the catalytic converter.
5. Before replacing individual parts of the exhaust system, it is recommended to inspect all parts. If more than one part of the system is corroded or damaged, it is more cost effective to replace the entire system.
6. Separate parts of the exhaust system can be removed as follows. Front Section - Single Overhead Cam Models (SOHC).
7. On models with a catalytic converter, disconnect the negative wire from the battery, disconnect the electrical wiring from the oxygen sensor, which is located behind the coolant expansion tank.
8. Raise the car and install on the axial props placed under the sidewalls of the body frame.
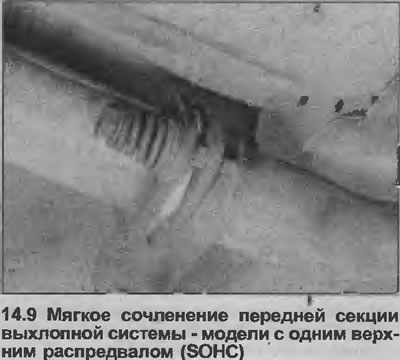
9. Unscrew the two mounting bolts, and disconnect the front section of the exhaust system from the front box or catalytic converter (depending on the model). Remove O-ring and springs (see illustration).
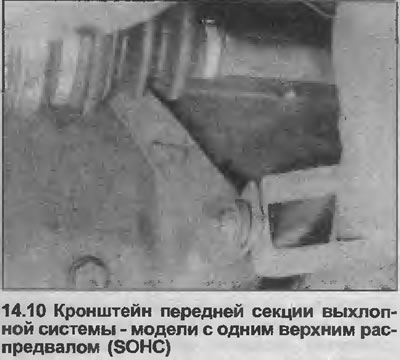
10. Unscrew the front section of the exhaust system from the bracket on the cylinder block (see illustration).
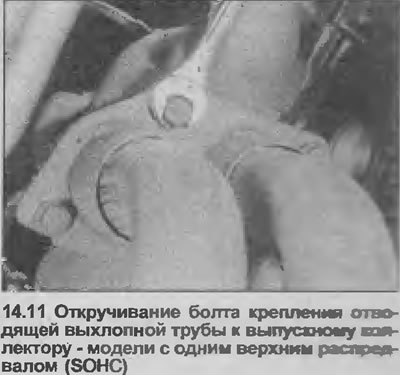
11. Unscrew and remove the four bolts securing the outlet pipe to the exhaust manifold, remove the front section of the exhaust system (see illustration). Remove the gasket between the manifold and the discharge pipe.
Installation
12. Install in reverse order, but use a new gasket when connecting the exhaust pipe to the manifold, and a new O-ring when connecting the soft joint. Tighten all fasteners with a torque specified specifications.
Front Section - Double Overhead Cam Models (DOHC).
Removing
13. Proceed as described in points 7 and 8.
14. Remove the bottom motor skid plate as described in Section 11.
15. Proceed as described in points 9 and 10.
16. Working in the engine compartment, remove the bolts securing the exhaust manifold heat shield to the cylinder head
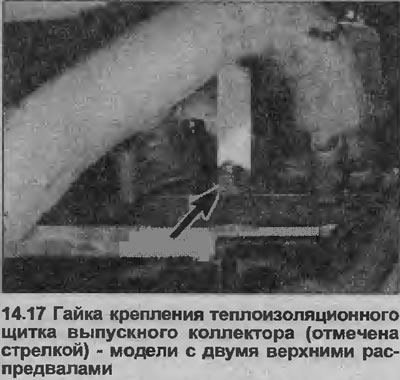
17. Remove the two lower exhaust manifold mounting nuts that also secure the heat shield brackets and remove the shield (see illustration).
18. Remove the remaining manifold mounting nuts, then remove the manifold/front section of the exhaust system from the vehicle. Remove the manifold gasket.
19. Some manifold struts may loosen from the cylinder head when loosening the manifold mounting nuts. In this case, the struts must be screwed back into the cylinder head as soon as the manifold is removed.
Installation
20. Install in reverse order, but use a new manifold gasket and a new O-ring on the soft joint Tighten all fasteners to the specified torque specifications.
Front expansion box/catalytic converter
Removing
21. Proceed as described in points 8 and 9.
22. Turn off nuts and bolts, disconnect an expansion box/catalytic converter from a connecting flange of the central section of an exhaust system. Remove the gasket.
23. Remove the expansion box/catalytic converter from the vehicle.
Installation
24. Install in reverse order, but use a new O-ring on the soft joint and a new gasket on the connecting flange. Tighten all fasteners with the tightening force specified in the Specifications.
Central section
Removing
25. Raise the vehicle and place it on axle stands placed under the sidewalls of the body frame.
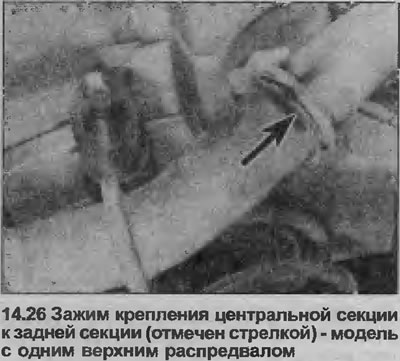
26. Unscrew the pinch bolt, disconnect the center section of the exhaust system from the rear section (see illustration). If necessary, tap around the joint with a hammer to ease separation. Note that the end of the center section goes inside the back section.
27. Proceed as described in paragraph 22.
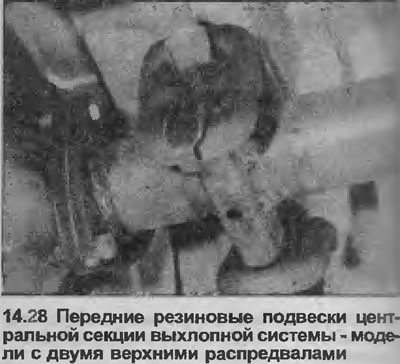
28. Release the center section from the rubber suspension on the bottom, and remove it from under the car (see illustration).
Installation
29. Install in reverse order, but use a new gasket on the connecting flange, and when connecting the center and rear sections, lubricate the pipes with a special paste for assembling the exhaust system. Tighten all fasteners to the specified tightening torque
Rear section
Removing
30. Proceed as described in paragraphs 25 and 26.
31. Release the rear section from the rubber cushions on the bottom, and remove it from under the car.
Installation
32. Install in reverse order, but when connecting the center and rear sections, lubricate the pipes with a special paste for assembling the exhaust system. Tighten the tie bolt with a tightening torque specified specifications.
Visitor comments