
Note: Use a new crankshaft front oil seal when assembling.
Disassembly
1. After removing the oil pump as described in Chapter 30, then proceed as follows.
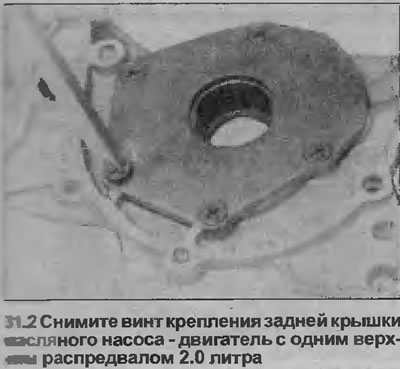
2. Remove the mounting screws, remove the back cover (see illustration).
Inspection
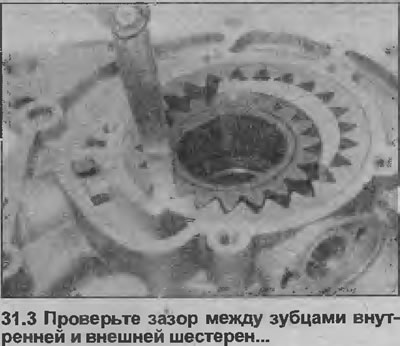
3. Check the gap between the teeth of the inner and outer gears with a feeler gauge (see illustration).
4. Check clearance between gears shroud (side clearance), using the edge of the ruler and feeler gauge (see illustration).

5. If any of the clearances are outside those specified in Specifications limits, replace worn components.
6. Check before assembly that the gears and the inside of the pump housing are absolutely clean, note that the outer gear is marked (point) on the side that should be facing out.
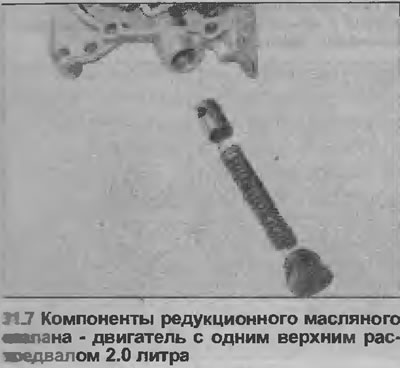
7. Oil pressure reducing valve components can be removed from the pump by unscrewing the cap (see illustration). Check the condition of the spring and plunger, replace if necessary.
Assembly
8. Thoroughly clean all components before installation.
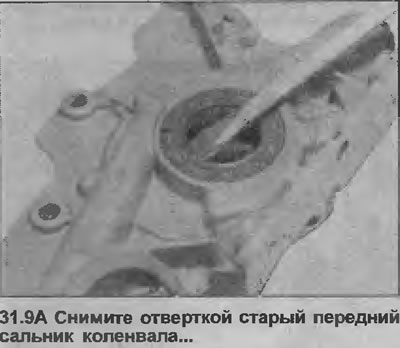
9. Always replace the front crankshaft oil seal on the front side of the oil pump housing. Remove the old oil seal with a screwdriver, and install a new one using a socket or tube (see illustrations).

10. Check that the mating surfaces of the rear cover and pump housing are clean, then coat the mating surface of the pump housing with sealant (Opel #90485251 or equivalent) and install the back cover. Install and tighten the fixing screws.
11. Install the pump as described in Chapter 30.
Visitor comments