
Comment. The belt should be replaced earlier than the period established by the maintenance schedule, if during the check it turns out that there are tears, abrasions, cracks or traces of oil and coolant on the belt on its surface. The performance of the work is shown on the example of adjusting the 1.6 DOHC engine. On other engines, the operation is carried out similarly.
Status check
1. We prepare the car for work (see «Preparing the car for maintenance and repair»).
2. Remove the air filter (see «Air filter - removal and installation»),
3. Disconnect the camshaft position sensor wiring harness from the top cover.
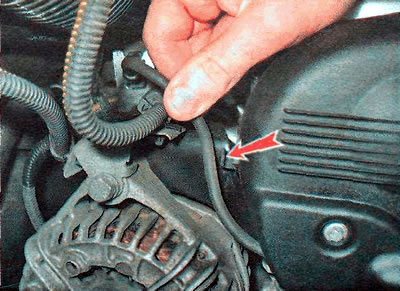
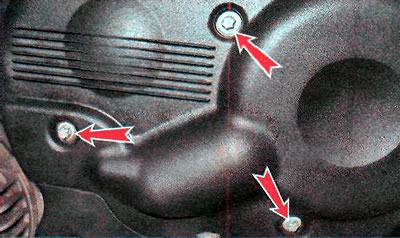
4. Using the TORX E10 key, we unscrew the three bolts securing the front upper cover of the timing belt.
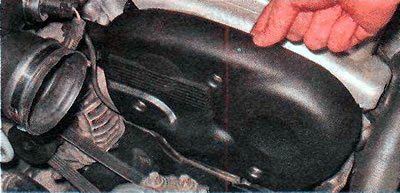
5. Remove the top timing belt cover.
6. On vehicles with manual transmission, we turn on the fourth or fifth gear.
7. Raise the right front side of the car with a jack (see «Preparing the car for maintenance and repair»).
8. Rotate the right front wheel clockwise (the engine crankshaft will also rotate) and inspect the timing belt for breaks, cracks and scuffs. If damaged, the belt must be replaced (see below).
Comment. On vehicles with automatic transmission, turn the crankshaft by the bolt securing its pulley.
Checking and adjusting the tension, replacing
1. Remove the accessory drive belt (see «Accessory drive belt - condition check and replacement»).
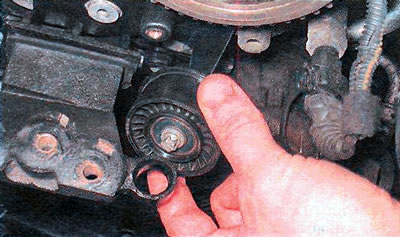
2. Remove the accessory drive belt tensioner (see «Accessory Drive Belt - Tensioner Replacement»).
3. On vehicles with a manual gearbox, the assistant presses the brake pedal, at this time, using a TORX E18 socket wrench, we unscrew the bolt securing the crankshaft pulley.
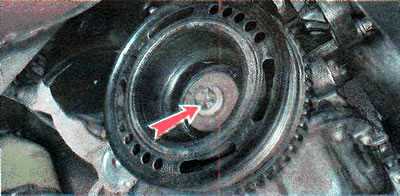
Comment. On vehicles with automatic transmission, it is necessary to block the crankshaft from turning with a strong screwdriver through the hole in the crankcase.
4. Remove the crankshaft pulley and screw its fastening bolt into place.
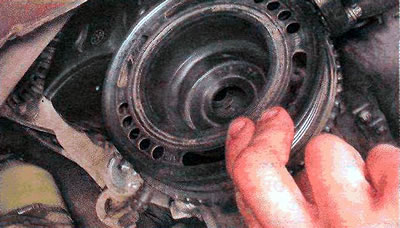
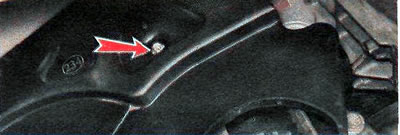
5. Using the TORX E10 key, unscrew the bolt securing the bottom cover.
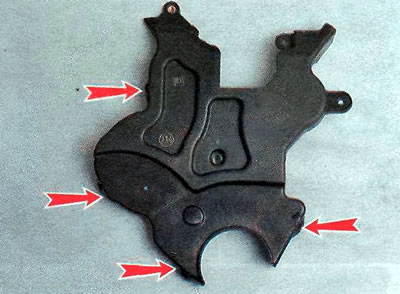
6. Alternately disengage the four holders of the bottom cover (for clarity, the location of the holders is shown on the removed cover).
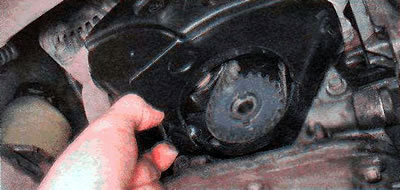
7. Remove the bottom cover.
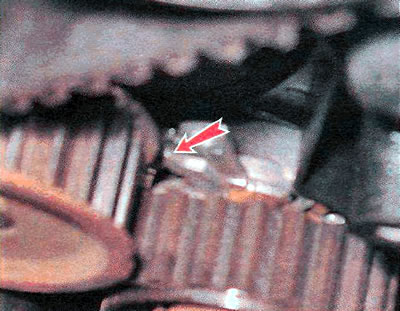
8. With a TORX E18 key with an extension, we rotate the engine crankshaft by the bolt securing its pulley, achieving alignment of the timing marks on the camshaft pulleys.
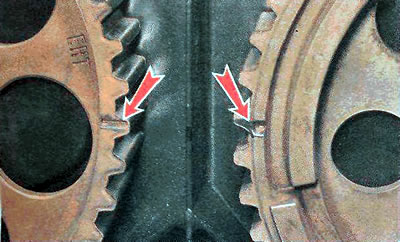
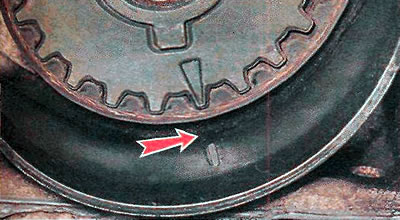
In this case, the mark on the crankshaft pulley must match the mark on the rear cover of the timing belt.
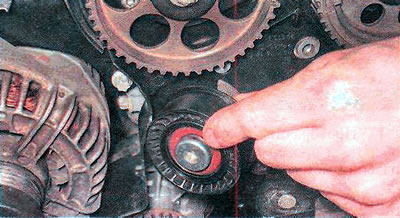
With normal timing belt tension, the protrusion on the movable part of the tensioner must match the cutout on its fixed part.
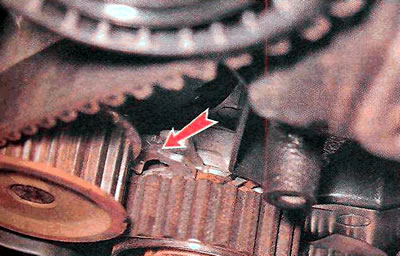
If the protrusion is offset counterclockwise relative to the cutout, then the belt tension is insufficient and therefore the tension should be adjusted (see below). If the protrusion is displaced clockwise, two options are possible: the timing belt is over tightened or the automatic tensioner is faulty. In this case, you first need to adjust the tension (see below), and then, if this does not help or the timing belt is clearly loose, it is necessary to replace the tensioner (see «Timing Belt - Tensioner Replacement»).
The following steps are required to adjust the timing belt tension.
9. Using the TORX T40 wrench, we loosen the tightening bolt of the timing belt tension roller.
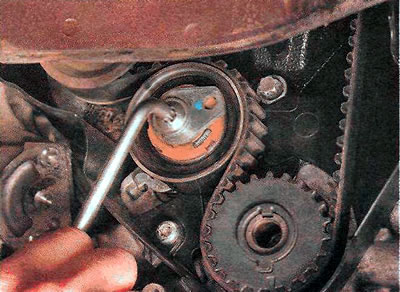
10. With a 6 mm hex wrench, we adjust the timing belt tension (clockwise increase the tension, counterclockwise - weaken), so as to align the marks on the tensioner.
11. We turn the engine crankshaft two turns and check the alignment of the marks. If the marks do not match, the belt must be rearranged.
The following operations are necessary to remove the timing belt.
Comment. The timing belt must be replaced after removal, regardless of mileage and the degree of wear.
12. Once again we check the alignment of the timing marks of the valve timing.
13. Disconnect the camshaft position sensor wiring harness block (see «Camshaft position sensor - replacement»).
14. We loosen the belt tension as much as possible (see above).
15. Remove the right support of the power unit (see «Supports and rods of the power unit - replacement»).
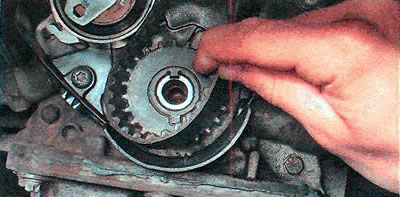
16. Remove the timing belt from all toothed pulleys.
17. We check the absence of backlash and jamming when rotating the tensioner pulley 1, the coolant pump pulley 2 and the guide rollers 3, 4.
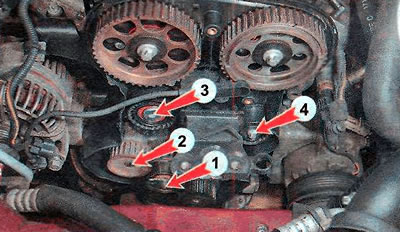
In the presence of the indicated malfunctions, we replace the damaged parts (see «Coolant pump - replacement», «Timing Belt - Tensioner Replacement»).
To replace the guide roller 3 with a TORX T50 wrench, unscrew the mounting bolt and remove it.
To replace the guide roller 4 with a TORX E10 key, unscrew the bolt of its fastening and remove it.
18. We install the parts in the reverse order. After installing the timing belt, adjust its tension (see above).
Comment.
- 1. The direction of rotation may be indicated on the timing belt.
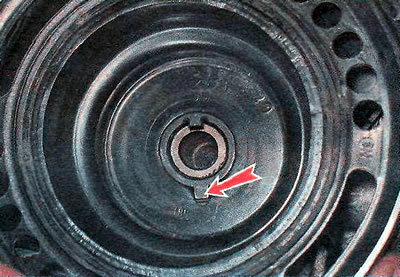
- 2. The notch on the crankshaft pulley must align with the lip on the crankshaft sprocket.
Visitor comments