


Brake system of the car Opel Insignia A

General information
The car is equipped with a TRW EBC450 braking system. The Electronic Brake Control Unit (EBCM) and the brake pressure modulator valve are serviced separately....
The car is equipped with a TRW EBC450 braking system. The Electronic Brake Control Unit (EBCM) and the brake pressure modulator valve are serviced separately....
Vacuum brake booster
To provide the vacuum required for the brake booster to operate, the vehicle is equipped with a vacuum pump that creates a vacuum in addition to or separately...
To provide the vacuum required for the brake booster to operate, the vehicle is equipped with a vacuum pump that creates a vacuum in addition to or separately...
Hydraulic brake system
The hydraulic brake system includes the following components: 1. Expansion tank on the master brake cylinder: serves to store the working fluid of the...
The hydraulic brake system includes the following components: 1. Expansion tank on the master brake cylinder: serves to store the working fluid of the...
Disc brakes
Disc brake mechanisms include the following components: 1. Brake pads: transmit mechanical force from the brake calipers to the friction surfaces of the brake...
Disc brake mechanisms include the following components: 1. Brake pads: transmit mechanical force from the brake calipers to the friction surfaces of the brake...
Anti-lock braking system (ABS)
If a wheel slip is detected while the vehicle is braking, the ABS anti-lock braking system is activated. At the same time, the pressure in the brake line for...
If a wheel slip is detected while the vehicle is braking, the ABS anti-lock braking system is activated. At the same time, the pressure in the brake line for...
Anti-slip system
When slippage of the drive wheels is detected, the electronic brake control unit switches on the anti-slip system mode. Using wheel speed sensors, the...
When slippage of the drive wheels is detected, the electronic brake control unit switches on the anti-slip system mode. Using wheel speed sensors, the...
Electronic stability control system
The stability control system helps maintain vehicle stability during aggressive maneuvering. Vehicle yaw is the acceleration of the vehicle body rotation...
The stability control system helps maintain vehicle stability during aggressive maneuvering. Vehicle yaw is the acceleration of the vehicle body rotation...
Electronic Brakeforce Distribution System
The electronic brake force distribution system serves to replace the mechanical distributor valve. Under certain driving conditions, the electronic brake...
The electronic brake force distribution system serves to replace the mechanical distributor valve. Under certain driving conditions, the electronic brake...
Emergency Brake Assist System
This system is designed to improve the efficiency of brakes during emergency braking of the vehicle. The electronic brake control unit receives signals from...
This system is designed to improve the efficiency of brakes during emergency braking of the vehicle. The electronic brake control unit receives signals from...
Slope assist system
When starting off on a hill, this system prevents the vehicle from rolling during the time the driver's foot moves from the brake pedal to the accelerator...
When starting off on a hill, this system prevents the vehicle from rolling during the time the driver's foot moves from the brake pedal to the accelerator...
Parking brake system
Note: Plastic coated parking brake cables do not require periodic lubrication. Parking brake cables with a special coating are used to reduce the force applied...
Note: Plastic coated parking brake cables do not require periodic lubrication. Parking brake cables with a special coating are used to reduce the force applied...

Checking the brake pedal travel
1. With the ignition off and the brake system cooled, press the brake pedal 3-5 times until the pedal becomes hard, to use up the vacuum reserve in the vacuum...
1. With the ignition off and the brake system cooled, press the brake pedal 3-5 times until the pedal becomes hard, to use up the vacuum reserve in the vacuum...
Checking the vacuum in the brake booster system
Note. Engine temperature, auxiliary load and the altitude at which the vehicle is operated affect the amount of vacuum in the intake manifold. The vacuum value...
Note. Engine temperature, auxiliary load and the altitude at which the vehicle is operated affect the amount of vacuum in the intake manifold. The vacuum value...
Checking for external brake fluid leaks
1. Check the brake fluid level in the master cylinder reservoir. While a slight decrease in brake fluid due to wear of the brake pads is normal, a significant...
1. Check the brake fluid level in the master cylinder reservoir. While a slight decrease in brake fluid due to wear of the brake pads is normal, a significant...

Checking brake lines and hoses
1. Visually inspect all brake lines for the following: Bends, improper installation, damage or missing holders. Leaks at connections, excessive corrosion. 2....
1. Visually inspect all brake lines for the following: Bends, improper installation, damage or missing holders. Leaks at connections, excessive corrosion. 2....
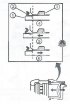
Visual inspection of the performance of the hydraulic brake system components
1. Remove the wheel from the vehicle and visually inspect the sealing area of the caliper piston boot (2) for brake fluid leaks. 2. If traces of brake fluid...
1. Remove the wheel from the vehicle and visually inspect the sealing area of the caliper piston boot (2) for brake fluid leaks. 2. If traces of brake fluid...
Bleeding the brake system
Attention. Use only DOT-4+ brake fluid from a clean, airtight container when adding fluid to the brake system expansion tank or to the clutch hydraulic drive...
Attention. Use only DOT-4+ brake fluid from a clean, airtight container when adding fluid to the brake system expansion tank or to the clutch hydraulic drive...

Replacing the pedal assembly
Versions with manual transmission 1. Remove the front floor console. 2. Remove the lower instrument panel trim. 3. Remove the outer instrument panel trim...
Versions with manual transmission 1. Remove the front floor console. 2. Remove the lower instrument panel trim. 3. Remove the outer instrument panel trim...

Replacing the master brake cylinder
1. With the engine off, press the brake pedal several times until the pedal becomes firm to use up the vacuum reserve in the vacuum booster. 2. Using a...
1. With the engine off, press the brake pedal several times until the pedal becomes firm to use up the vacuum reserve in the vacuum booster. 2. Using a...

Replacing the brake booster
1. With the engine off, press the brake pedal several times until it becomes firm to use up the vacuum reserve in the vacuum booster. 2. Pull the brake pedal...
1. With the engine off, press the brake pedal several times until it becomes firm to use up the vacuum reserve in the vacuum booster. 2. Pull the brake pedal...

Replacing the brake system expansion tank
1. With the engine off, press the brake pedal several times until it becomes firm to use up the vacuum reserve in the vacuum booster. 2. Using a syringe,...
1. With the engine off, press the brake pedal several times until it becomes firm to use up the vacuum reserve in the vacuum booster. 2. Using a syringe,...

Replacing the front brake line
1. Raise and secure the vehicle. 2. Remove the front wheel from the vehicle. 3. Remove the brake fluid expansion tank. 4. Loosen the connection (1) of the...
1. Raise and secure the vehicle. 2. Remove the front wheel from the vehicle. 3. Remove the brake fluid expansion tank. 4. Loosen the connection (1) of the...

Replacing brake hoses
Replacing the front brake hose J60, J61 1. Raise and secure the vehicle. 2. Remove the front wheel from the vehicle. 3. Loosen the connection (1) of the front...
Replacing the front brake hose J60, J61 1. Raise and secure the vehicle. 2. Remove the front wheel from the vehicle. 3. Loosen the connection (1) of the front...

Replacing the modulator valve lines
Replacement of primary pipeline 1. Remove the brake system expansion tank. 2. Unscrew the two connections (1) of the brake pipes. Close the terminals of the...
Replacement of primary pipeline 1. Remove the brake system expansion tank. 2. Unscrew the two connections (1) of the brake pipes. Close the terminals of the...

Checking brake pads
It is necessary to check the brake pads regularly or whenever a wheel is removed from the vehicle. If brake pad replacement is necessary, always replace the...
It is necessary to check the brake pads regularly or whenever a wheel is removed from the vehicle. If brake pad replacement is necessary, always replace the...

Replacing the front brake pads
J60, J61 1. Check the brake fluid level in the brake system expansion tank: If the brake fluid level is halfway between the lower and upper marks, no...
J60, J61 1. Check the brake fluid level in the brake system expansion tank: If the brake fluid level is halfway between the lower and upper marks, no...

Checking the hardware for mounting the front brake pads
1. Check the brake fluid level in the expansion tank of the master brake cylinder. If the brake fluid level is halfway between the lower and upper marks, no...
1. Check the brake fluid level in the expansion tank of the master brake cylinder. If the brake fluid level is halfway between the lower and upper marks, no...

Replacing the front brake caliper
J60, J61 1. Raise and secure the vehicle. 2. Remove the front wheel from the vehicle. Caution: Do not press the brake pedal when the caliper is removed from...
J60, J61 1. Raise and secure the vehicle. 2. Remove the front wheel from the vehicle. Caution: Do not press the brake pedal when the caliper is removed from...

Replacing the brake caliper bracket
Caution: Support the brake caliper with a strong wire or something similar to prevent the weight of the caliper from placing pressure on the brake hose, which...
Caution: Support the brake caliper with a strong wire or something similar to prevent the weight of the caliper from placing pressure on the brake hose, which...

Checking the technical condition of the brake caliper
Front brake caliper: 1. Caliper body. 2. Caliper piston dust boot. 3. Caliper piston. 4. Caliper piston seal. 5. Bleeding nipple. 6. Caliper cap. 1. Inspect...
Front brake caliper: 1. Caliper body. 2. Caliper piston dust boot. 3. Caliper piston. 4. Caliper piston seal. 5. Bleeding nipple. 6. Caliper cap. 1. Inspect...

Replacing the front brake disc
J60, J61, J62 1. Raise and secure the vehicle. 2. Remove the front wheel from the vehicle. 3. Unscrew the two bolts (1) of the caliper bracket. Note: Replace...
J60, J61, J62 1. Raise and secure the vehicle. 2. Remove the front wheel from the vehicle. 3. Unscrew the two bolts (1) of the caliper bracket. Note: Replace...

Checking the technical condition of brake discs
1. If the inner surfaces of the brake disc are not accessible, remove and set aside the brake caliper with pads. 2. Clean the working surfaces of the brake...
1. If the inner surfaces of the brake disc are not accessible, remove and set aside the brake caliper with pads. 2. Clean the working surfaces of the brake...
Regrinding of brake discs
Note: Brake discs do not require resurfacing as part of normal brake system maintenance. Do not resurface brake discs to correct the following defects:...
Note: Brake discs do not require resurfacing as part of normal brake system maintenance. Do not resurface brake discs to correct the following defects:...

Replacing rear brake pads
J60 1. Check the brake fluid level in the expansion tank of the master brake cylinder. If the brake fluid level is halfway between the lower and upper marks,...
J60 1. Check the brake fluid level in the expansion tank of the master brake cylinder. If the brake fluid level is halfway between the lower and upper marks,...

Checking the equipment for fastening the rear brake pads
1. Remove the brake caliper from the mounting bracket. 2. Remove the brake pads from the caliper bracket. 3. Check the brake shoe mounting hardware for the...
1. Remove the brake caliper from the mounting bracket. 2. Remove the brake pads from the caliper bracket. 3. Check the brake shoe mounting hardware for the...

Replacing the rear brake caliper
J60 1. Raise and secure the vehicle. 2. Remove the rear wheel from the vehicle. 3. Loosen the parking brake cable. 4. Disconnect the parking brake cable from...
J60 1. Raise and secure the vehicle. 2. Remove the rear wheel from the vehicle. 3. Loosen the parking brake cable. 4. Disconnect the parking brake cable from...

Replacing the rear brake caliper bracket
1. Remove the brake caliper. 2. Remove the brake pads. 3. Unscrew the two bolts (1) of the caliper bracket. Note. Replace bolts with new ones after each...
1. Remove the brake caliper. 2. Remove the brake pads. 3. Unscrew the two bolts (1) of the caliper bracket. Note. Replace bolts with new ones after each...
Checking the technical condition of the rear brake caliper
See similar section for front brake mechanisms .
See similar section for front brake mechanisms .

Replacing rear brake discs
J60 1. Remove the rear brake caliper bracket. 2. Loosen the bolt (1) holding the rear brake disc. Note: Tightening torque: 10 Nm. 3. Remove the rear brake disc...
J60 1. Remove the rear brake caliper bracket. 2. Loosen the bolt (1) holding the rear brake disc. Note: Tightening torque: 10 Nm. 3. Remove the rear brake disc...
Checking the technical condition of the rear brake discs
See similar section for front brake mechanisms .
See similar section for front brake mechanisms .

Adjusting the parking brake
1. Remove the front floor console. 2. Adjust the parking brake cables by releasing the latch (1) and moving the adjusting rod in the required direction.
1. Remove the front floor console. 2. Adjust the parking brake cables by releasing the latch (1) and moving the adjusting rod in the required direction.

Replacing the parking brake lever
1. Remove the front floor console. 2. Release the parking brake lever completely. 3. Raise and secure the vehicle. 4. Carefully slide the transmission tunnel...
1. Remove the front floor console. 2. Release the parking brake lever completely. 3. Raise and secure the vehicle. 4. Carefully slide the transmission tunnel...

Replacing the parking brake lever handle
1. Remove the parking brake lever boot. 2. Unhook the rod (1) of the parking brake lever handle by pressing the lock. 3. Remove the parking brake handle (2)....
1. Remove the parking brake lever boot. 2. Unhook the rod (1) of the parking brake lever handle by pressing the lock. 3. Remove the parking brake handle (2)....

Replacing the Parking Brake Indicator Switch
1. Remove the front floor console. 2. Loosen the screw (1) securing the parking brake indicator switch. Note: Tightening torque: 2.5 Nm. 3. Remove the parking...
1. Remove the front floor console. 2. Loosen the screw (1) securing the parking brake indicator switch. Note: Tightening torque: 2.5 Nm. 3. Remove the parking...

Replacing the Parking Brake Switch
1. Remove the front floor console. 2. Disconnect the electrical connector and remove the parking brake switch (1). 3. Installation is carried out in the...
1. Remove the front floor console. 2. Disconnect the electrical connector and remove the parking brake switch (1). 3. Installation is carried out in the...

Replacing the parking brake cable
Mechanically operated parking brake Removal Note: To remove the parking brake lever, the automatic parking brake lever adjuster must be in the installed...
Mechanically operated parking brake Removal Note: To remove the parking brake lever, the automatic parking brake lever adjuster must be in the installed...

Electric parking brake (J71)
1. Release the electric parking brake: Turn the ignition to "Run" position and place your foot over the parking brake switch. Press and hold the parking brake...
1. Release the electric parking brake: Turn the ignition to "Run" position and place your foot over the parking brake switch. Press and hold the parking brake...

Electronic Parking Brake System Control Unit
1. Release the electric parking brake using the electric drive: Turn the ignition to "Run" position and place your foot over the parking brake switch. Press...
1. Release the electric parking brake using the electric drive: Turn the ignition to "Run" position and place your foot over the parking brake switch. Press...
Centering the steering wheel angle sensor
Caution: A poorly centered or completely off-center steering angle sensor may limit vehicle control, which could lead to an accident. Often the steering angle...
Caution: A poorly centered or completely off-center steering angle sensor may limit vehicle control, which could lead to an accident. Often the steering angle...
Calibration of the brake pressure modulator pressure sensor
The brake pressure sensor does not require frequent calibration. Calibration of this sensor is necessary after service procedures such as: Replacing the...
The brake pressure sensor does not require frequent calibration. Calibration of this sensor is necessary after service procedures such as: Replacing the...
Calibrating the Yaw Rate Sensor
The yaw rate sensor does not require frequent calibration. Calibration of the yaw rate sensor should be performed after service procedures such as: Replacing...
The yaw rate sensor does not require frequent calibration. Calibration of the yaw rate sensor should be performed after service procedures such as: Replacing...

Replacing the electronic brake control unit
With separate modulator valve 1. With the engine off, press the brake pedal several times until it becomes firm enough to use up the vacuum in the vacuum...
With separate modulator valve 1. With the engine off, press the brake pedal several times until it becomes firm enough to use up the vacuum in the vacuum...

Replacing the front wheel speed sensors
GNA suspension 1. Raise and secure the vehicle. 2. Remove the front wheel from the vehicle. 3. Loosen the bolt (1) securing the front wheel speed sensor. Note:...
GNA suspension 1. Raise and secure the vehicle. 2. Remove the front wheel from the vehicle. 3. Loosen the bolt (1) securing the front wheel speed sensor. Note:...

Replacing the rear wheel speed sensors
1. Raise and secure the vehicle. 2. Remove the rear wheel from the vehicle. 3. Loosen the bolt (1) securing the rear wheel speed sensor. Note: Tightening...
1. Raise and secure the vehicle. 2. Remove the rear wheel from the vehicle. 3. Loosen the bolt (1) securing the rear wheel speed sensor. Note: Tightening...

Replacing the yaw rate sensor
1. Remove the front floor console. 2. Remove the front insulation (1) of the tunnel. 3. Loosen the two nuts (2) securing the yaw rate sensor. Note: Tightening...
1. Remove the front floor console. 2. Remove the front insulation (1) of the tunnel. 3. Loosen the two nuts (2) securing the yaw rate sensor. Note: Tightening...

Replacing the wheel angle position sensor
1. Remove the contact disk of the passive safety system from the steering column. 2. Squeeze the clips on the contact disk of the passive safety system and...
1. Remove the contact disk of the passive safety system from the steering column. 2. Squeeze the clips on the contact disk of the passive safety system and...

Specification
Note*: All brake discs have a wear limit; if the thickness of the brake disc is less than the specified value, replace the brake disc with a new one.
Note*: All brake discs have a wear limit; if the thickness of the brake disc is less than the specified value, replace the brake disc with a new one.


Checking the level and topping up the power steering fluid
Attention. For refueling or in the event of a complete replacement of the power steering working fluid, it is necessary to use the specified type of fluid. The...
Attention. For refueling or in the event of a complete replacement of the power steering working fluid, it is necessary to use the specified type of fluid. The...

Replacing the outer tie rod end
1. Raise and secure the vehicle. 2. Remove the front wheel from the vehicle. 3. Loosen the nut (1) of the outer tie rod end. Caution: This component is...
1. Raise and secure the vehicle. 2. Remove the front wheel from the vehicle. 3. Loosen the nut (1) of the outer tie rod end. Caution: This component is...
This section is available on russian, bulgarian, belarusian, ukrainian, serbian, croatian, romanian, polish, slovak, hungarian
See similar ones from other Opel car manuals:
▶ Chassis: Brake system Opel Vectra B (1995-2002)
▶ Chassis: Brake system Opel Zafira A (1999-2005, petrol)
▶ Chassis: Brake system Opel Astra F (1991-1998, petrol)
▶ Chassis: Brake system Opel Kadett E (1984-1995)
▶ Chassis: Brake system Opel Corsa B (1993-2000)
▶ Chassis: Brake system Opel Vectra B (1995-2002)
▶ Chassis: Brake system Opel Zafira A (1999-2005, petrol)
▶ Chassis: Brake system Opel Astra F (1991-1998, petrol)
▶ Chassis: Brake system Opel Kadett E (1984-1995)
▶ Chassis: Brake system Opel Corsa B (1993-2000)
Share information:
- General information
- Repair on the road
- Daily checks
- Operation and maintenance
- Safety and tool
- Power unit
- Petrol engines 1.6 l
- Petrol engines 2.0 l
- Diesel engines 2.0 l
- Diesel engines 2.8 l
- Cooling system
- Lubrication system
- Supply system
- Engine management
- Intake and exhaust system
- Engine electrical equipment
- Transmission
- Clutch
- Mechanical gearbox
- Automatic gearbox
- Transfer case
- Drive shafts
- Chassis
- Wheel suspension
- Brake system
- Steering
- Body
- Exterior
- Interior
- Passive safety
- Heater and air conditioner
- Electrical equipment
- Electrical circuits