


Contents: J60 ⬇ J61, J62 ⬇
J60
1. Check the brake fluid level in the expansion tank of the master brake cylinder.
- If the brake fluid level is halfway between the lower and upper marks, no additional operations with the brake fluid are required.
- If the brake fluid level is above the midpoint between the lower and upper marks, it is necessary to remove some of the brake fluid using a syringe before starting work.
2. Raise and secure the vehicle.
3. Remove the rear wheel from the vehicle.
4. Hand tighten the two wheel nuts on the wheel hub to secure the brake disc during brake servicing.
Note.
- Do not use power tools to remove or install guide pin bolts. Use hand tools only.
- Use an open-end wrench to secure the brake caliper guide pin when loosening or tightening the guide pin bolt. Do not allow the open-end wrench to come into contact with the brake caliper, as this may cause pulsating brake operation later.
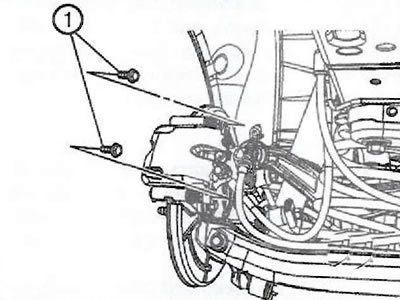
5. While holding the brake caliper guide pins from turning, loosen the bolts (1).
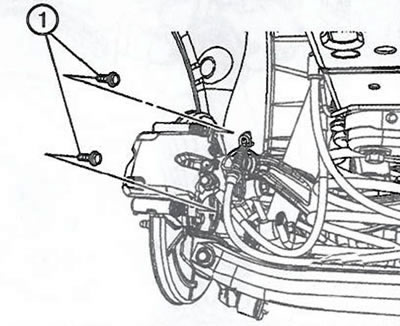
Caution: Support the brake caliper with a strong wire or something similar to prevent the weight of the caliper from placing pressure on the brake hose, which may damage the brake hose and cause brake fluid leaks.
6. Remove the brake caliper from the bracket and hang it using strong wire or something similar.
7. Loosen the brake caliper bracket bolts (1).
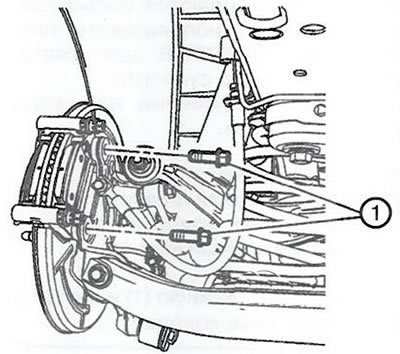
8. Remove the brake caliper bracket assembly (1).
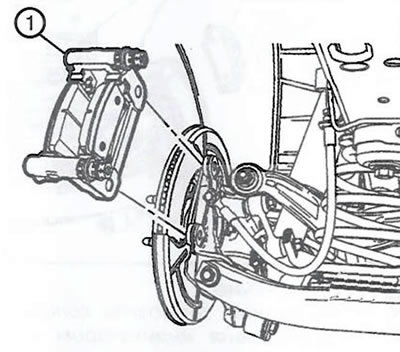
9. Remove the outer brake shoe (1).
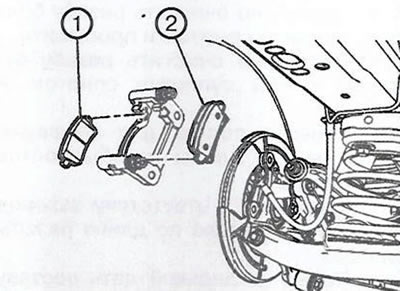
Note: The inner brake shoe is equipped with a wear indicator.
10. Remove the inner brake shoe (2).
11. Remove the upper and lower brake shoe spring holders (1).
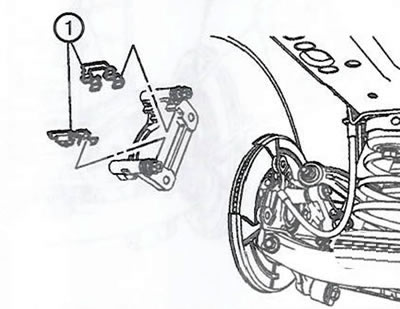
Note: If new brake pads are installed, replace the spring retainers with new ones.
12. If new brake pads are installed, use the SN-6007-B device to press the brake caliper piston.
13. Install the brake shoe spring retainers.
Note: If new brake pads are installed, replace the spring retainers with new ones.
14. Install the outer (1) and inner (2) brake pads.
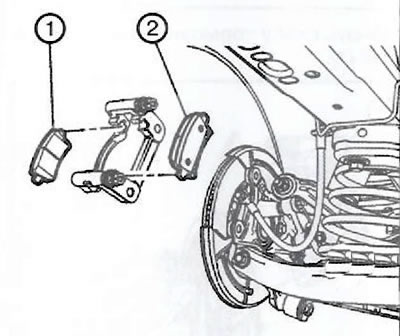
Note: The inner brake shoe is equipped with a wear indicator.
15. Prepare the bolts and threaded holes in the caliper bracket:
- Thoroughly clean the bolt threads with methyl alcohol and dry.
- Thoroughly clean the threads of the caliper bracket holes with alcohol and dry.
- Apply thread locking compound to 2/3 of the length of the caliper bracket bolt threads.
- Make sure there are no gaps in the application of the compound along the length of the bolt threads.
- Allow the thread locking compound to dry for ten minutes before installation.
16. Install the brake caliper bracket assembly (1).
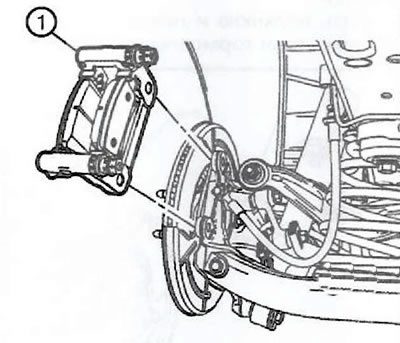
17. Install the caliper bracket bolts (1) and tighten to a torque of 100 Nm, then tighten another 60°.
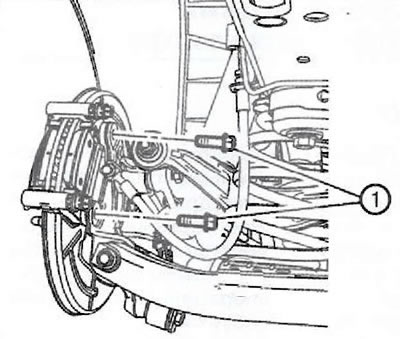
18. Install the brake caliper onto the mounting bracket.
19. Using an open-end wrench to prevent the brake caliper guide pins from turning, install the bolts (1) and tighten to a torque of 32 Nm.
20. Install the rear wheel on the vehicle.
21. With the engine off, gradually press the brake pedal approximately ⅔ of the total travel and slowly release the brake pedal.
22. Wait 15 seconds, then repeat the previous step two or three more times. This will ensure that the pistons and pads are correctly positioned in the working position.
23. Fill the expansion tank of the master brake cylinder to the required level.
J61, J62
1. Check the brake fluid level in the expansion tank of the master brake cylinder.
- If the brake fluid level is halfway between the lower and upper marks, no additional operations with the brake fluid are required.
- If the brake fluid level is above the midpoint between the lower and upper marks, it is necessary to remove some of the brake fluid using a syringe before starting work.
2. Raise and secure the vehicle.
3. Remove the rear wheel from the vehicle.
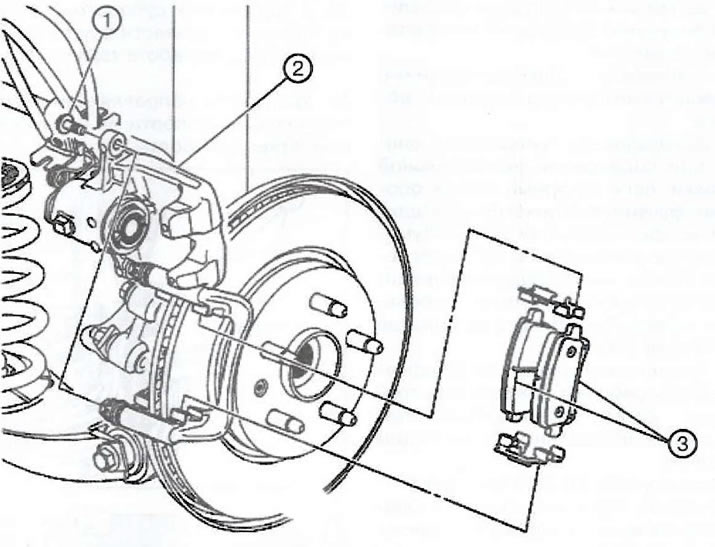
4. Loosen the guide pin bolt (1).
Note: Tightening torque: 27 Nm.
6. Use one or two wheel nuts to secure the brake disc in place to service the brake pads.
7. Remove the brake pads (3).
Note: If the brake shoes (3) are removed for servicing the brake system, mark the inner and outer shoes for correct installation later.
Information taken from the website: www.opelbook.ru
8. Using needle-nose pliers, screw the piston into the hole in the brake caliper.
9. If new brake pads are installed, replace the spring retainers with new ones.
10. Install the brake pads.
11. Install all components in the reverse order of removal.
12. With the engine off, gradually press the brake pedal approximately ⅔ of the total travel and slowly release the brake pedal.
13. Wait 15 seconds, then repeat the previous step two or three more times. This will ensure that the pistons and pads are correctly positioned in the working position.
14. Fill the expansion tank of the master brake cylinder to the required level.
Visitor comments