
Attention: It is necessary to replace all the brake pads of one vehicle axle at the same time, even if only one of them has reached the wear limit! Use only pads approved by the manufacturer!
1. Support the front wheels with wheel chocks, jack up the rear of the vehicle and support it on jack stands. Remove both rear wheels.
2. Fully release the parking brake and loosen the drive cable by loosening the adjusting nut (see Section 12).
3. Using a screwdriver, press the actuating lever on the rear wheel brake caliper and disconnect the tip of the cable from it, release the latch and release the cable from the support bracket (see resist. illustration).
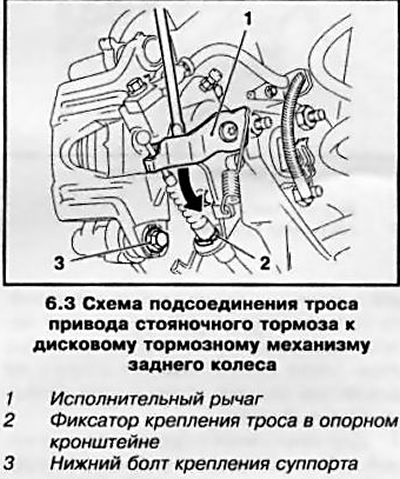
4. Remove the bottom bolt (see illustration 6.3) fixing the caliper, holding the guide pin from turning with a second wrench.
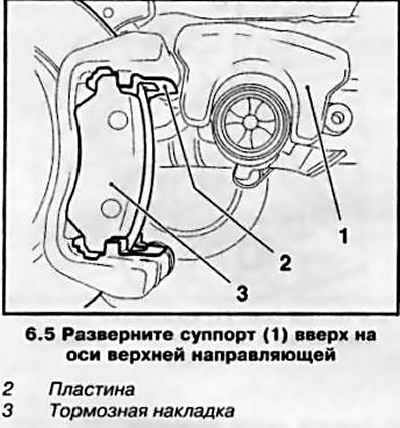
5. Turn the caliper up on the axis of the upper guide (see resist. illustration).
6. Depress the brake piston with a special tool (see resist. illustration) to the stop - the piston at the same time creates significant resistance.
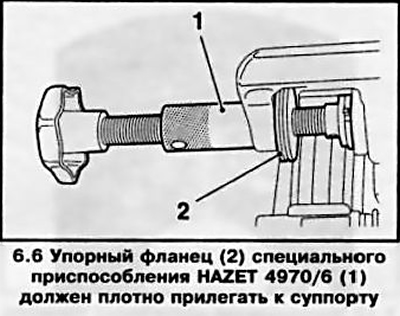
Attention: Do not press the piston with a tool at hand - this can lead to a violation of the parking brake adjustment.
Keep an eye on the level of brake fluid in the reservoir while pushing the piston. To prevent leakage of brake fluid, first check its level - if necessary, pump out the excess.
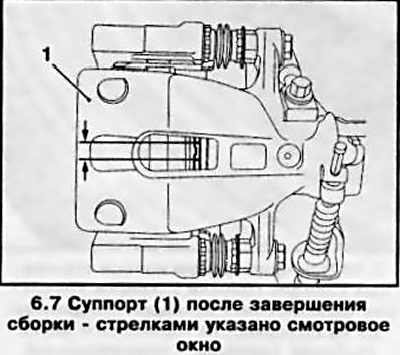
7. Then unscrew the piston again so that its groove is in line with the viewing window of the caliper (see resist. illustration).
8. Turn out the top bolt of fastening of a support, keeping directing from turning by the second wrench. Remove the caliper and tie it with wire to the rear suspension spring.
9. Remove the brake pads from the guide, mark the installation position of the pads. Remove the plates from the guide.
10. Perform all checks and recommendations given in paragraphs 7 to 10 Section 5.
11. When installing, it is imperative to replace the plates on the guide, after lubricating them with heat-resistant grease (e.g. Liqui Moly).
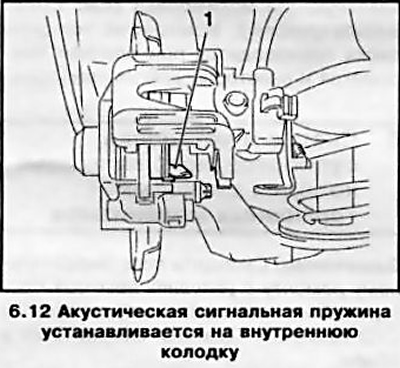
12. Fill in between plates new brake pads. Install pad with acoustic wear indicator (with appropriate equipment) (see resist. illustration). At the same time, make sure that the brake pads are in the correct position in the guide plates.
13. After installing the pad, remove the protective film from its reverse side - an adhesive is applied to it to connect to the caliper.
14. Place the caliper on the guide and pads, being careful that the plates do not bend and that the brake pads do not stick too early to the caliper.
15. Clean and lubricate the guide bushing bolt threads with locking compound (e.g. Loctite Tour 243), install new bolts if necessary. Screw in the bolts and tighten them to the required torque, holding the bolts from turning with a second wrench.
16. Insert the parking brake cable into the support bracket and secure with the retainer. Squeeze out the actuating lever (see illustration 6.3) brake and connect the end of the cable to it.
17. Depress the foot brake pedal several times until you feel «hardness» her move.
18. In the same manner, replace the brake pads on the opposite wheel.
19. Adjust parking brake cable (see Section 12).
20. Install the wheels, lower the vehicle to the ground and tighten the wheel bolts to specification.
21. Check the brake fluid level, correct if necessary (see chapter 1).
22. Before starting intensive use, let the brake pads get used a little, for which brake the car several times from a speed of 80 km / h to a speed of 40 km / h by gently pressing the pedal. Then let the brake cool down.
Note: After changing the pads for about 200 km, try to avoid sudden braking as much as possible.
Visitor comments