
Astra models
2. Remove the cover of the diagnostic socket under the parking brake lever.
3. Pry with a plastic wedge or other improvised tool and release the boot of the parking brake lever from the console and lift it in order to provide access to the adjusting nut in front of the lever (see resist. illustration).
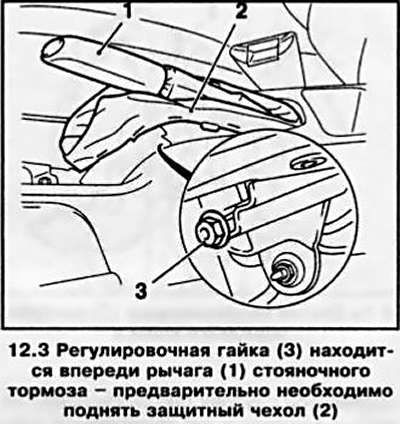
4. Special key (HAZET 4965-1) Loosen the adjusting nut, fully release the parking brake lever and back out the nut slightly to get some slack in the cable.
5. Depress the foot brake pedal at least five times until there is significant resistance to its pedal travel.
Note: The brake pedal must fully return to its original position after each application.
6. Fully cock 5-6 times, then release the lever again.
7. Support the front wheels with wheel chocks, jack up the rear of the vehicle and place it on jack stands.
8. Raise the lever 2 clicks, then tighten the adjusting nut until the rear wheels begin to stick - it should still be possible to turn them by hand. Both rear wheels must turn with the same resistance, otherwise check the free movement of the drive cables in their shells.
9. Crank the lever to the third click - the rear wheels should be completely blocked. Release the lever and both wheels should spin freely. Repeat the adjustment if necessary.
10. Lower the vehicle onto its wheels, attach the parking brake lever boot to the center console, and reinstall the diagnostic connector cover.
11. To allow the brake linings to wear in, drive the vehicle for about 300 m at low speed and with the parking brake lightly applied.
Models Zafira
12. Release the parking brake lever and remove the cover above the diagnostic socket on the center console (see resist. illustration).
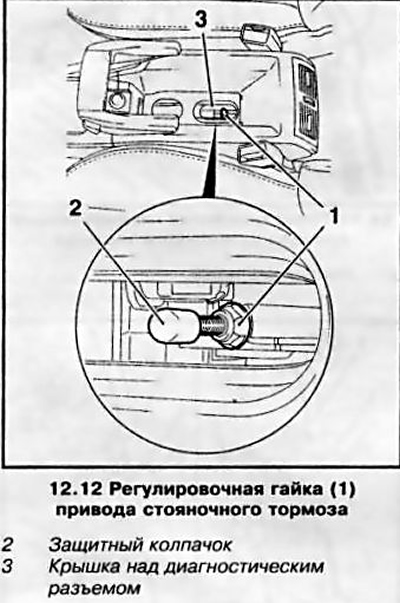
13. Remove the protective cap (see illustration 12.12) rear threaded rod and turn out the adjusting nut to the end of the thread stroke.
14. Depress the foot brake pedal at least five times until there is significant resistance to the pedal travel.
Note: The brake pedal must fully return to its original position after each application.
15. Support the front wheels with wheel chocks, jack up the rear of the vehicle and place it on jack stands.
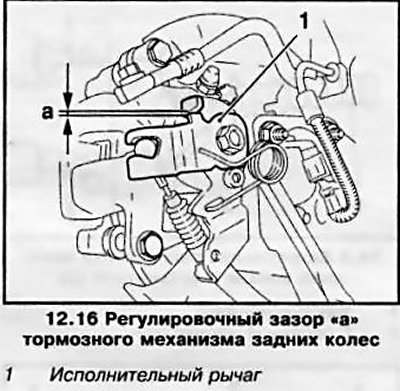
16. Turn the adjusting nut so that when the parking brake is released, the distance «A» (see resist. illustration) between the parking brake actuating lever and the corresponding caliper stop was 0.1 mm. The same measurement on the caliper of the other wheel should not exceed 0.1 mm.
17. Engage the parking brake lever to the first click - the parking brake is adjusted correctly if the rear wheels are hard to move or are almost locked. The braking force on both rear wheels should be the same. When the lever is released, the rear wheels should turn freely. Repeat the adjustment if necessary.
18. To allow the brake linings to wear in, drive the vehicle for about 300 m at low speed and with the parking brake lightly applied.
Visitor comments