


Gasoline engines 1.6 l car Opel Insignia A

General information
Camshafts The engine uses two camshafts: one for the intake valves and one for the exhaust valves. The camshafts are made of hardened steel. Timing drive The...
Camshafts The engine uses two camshafts: one for the intake valves and one for the exhaust valves. The camshafts are made of hardened steel. Timing drive The...
Checking the compression in the cylinders
1. Remove the throttle body assembly. 2. Remove the spark plugs. 3. Remove the relay holder cover. 4. Remove the fuel pump relay. Note: Cranking the engine to...
1. Remove the throttle body assembly. 2. Remove the spark plugs. 3. Remove the relay holder cover. 4. Remove the fuel pump relay. Note: Cranking the engine to...

Checking the tension of the accessory drive belt
The inspection procedure includes checking the operation of the automatic tensioner, as well as a visual inspection of the belt itself and associated...
The inspection procedure includes checking the operation of the automatic tensioner, as well as a visual inspection of the belt itself and associated...

Replacing the accessory drive belt
Removal 1. Open the hood. 2. If equipped, remove the power steering pump drive belt. 3. Raise and secure the vehicle. 4. Remove the front engine compartment...
Removal 1. Open the hood. 2. If equipped, remove the power steering pump drive belt. 3. Raise and secure the vehicle. 4. Remove the front engine compartment...

Cylinder head cover
Removal 1. Open the hood. 2. Remove the ignition coils. 3. Disconnect the engine wiring harness guide (1) from the cylinder head cover. 4. Disconnect the...
Removal 1. Open the hood. 2. Remove the ignition coils. 3. Disconnect the engine wiring harness guide (1) from the cylinder head cover. 4. Disconnect the...

Gas distribution mechanism drive device
1. Upper front timing belt cover. 2. Camshaft sprocket bolts. 3. Camshaft sprocket washers. 4. Intake camshaft sprocket. 5. Exhaust camshaft sprocket. 6. Rear...
1. Upper front timing belt cover. 2. Camshaft sprocket bolts. 3. Camshaft sprocket washers. 4. Intake camshaft sprocket. 5. Exhaust camshaft sprocket. 6. Rear...

Checking the timing belt of the gas distribution mechanism
Camshafts without phase shifters 1. Remove the upper front accessory drive belt cover. 2. Turn the crankshaft pulley in the direction of normal rotation to set...
Camshafts without phase shifters 1. Remove the upper front accessory drive belt cover. 2. Turn the crankshaft pulley in the direction of normal rotation to set...

Replacing or adjusting the timing belt
1. Remove the upper front timing belt cover. 2. Turn the crankshaft pulley in the direction of normal rotation to set the piston of the first cylinder to the...
1. Remove the upper front timing belt cover. 2. Turn the crankshaft pulley in the direction of normal rotation to set the piston of the first cylinder to the...

Cylinder head structure
1. Ignition unit cover. 2. Cylinder head cover bolt. 3. Cylinder head cover. 4. Plug. 5. Oil filler cap. 6. Oil filler cap gasket. 7. Cylinder head cover bolt....
1. Ignition unit cover. 2. Cylinder head cover bolt. 3. Cylinder head cover. 4. Plug. 5. Oil filler cap. 6. Oil filler cap gasket. 7. Cylinder head cover bolt....

Replacing the cylinder head
Removal 1. Remove the intake manifold. 2. Remove the exhaust manifold. 3. Remove the timing belt tensioner. 4. Remove the cylinder head cover. 5. Remove the...
Removal 1. Remove the intake manifold. 2. Remove the exhaust manifold. 3. Remove the timing belt tensioner. 4. Remove the cylinder head cover. 5. Remove the...

Disassembling the cylinder head
Disassembly 1. Install the EN-6215-5 side brackets (1) onto the EN-6215-4 mounting stand. 2. Install the EN-6215-4 crossbar (1). 3. It is necessary to clean...
Disassembly 1. Install the EN-6215-5 side brackets (1) onto the EN-6215-4 mounting stand. 2. Install the EN-6215-4 crossbar (1). 3. It is necessary to clean...

Cleaning and checking the technical condition of the cylinder head
Cleaning 1. Remove any remaining sealant and gaskets or seals. 2. Clean all surfaces of the cylinder head with a non-corrosive solvent. 3. Blow out the oil...
Cleaning 1. Remove any remaining sealant and gaskets or seals. 2. Clean all surfaces of the cylinder head with a non-corrosive solvent. 3. Blow out the oil...

Construction of the cylinder block and crank mechanism
1. Piston pin retaining rings. 2. Piston. 3. Piston rings. 4. Connecting rod. 5. Connecting rod bolt. 6. Cylinder head dowel pin. 7. Cylinder block. 8. Oil...
1. Piston pin retaining rings. 2. Piston. 3. Piston rings. 4. Connecting rod. 5. Connecting rod bolt. 6. Cylinder head dowel pin. 7. Cylinder block. 8. Oil...

Replacing the crankshaft pulley
Removal 1. Open the hood. 2. Raise and secure the vehicle. 3. Remove the front engine compartment splash guard. 4. Remove the accessory drive belt. 5. Loosen...
Removal 1. Open the hood. 2. Raise and secure the vehicle. 3. Remove the front engine compartment splash guard. 4. Remove the accessory drive belt. 5. Loosen...

Replacing pistons with connecting rods
Removal 1. Install the crankshaft pulley bolt. 2. Set the pistons of the first and fourth cylinders to the top dead center position by turning the crankshaft...
Removal 1. Install the crankshaft pulley bolt. 2. Set the pistons of the first and fourth cylinders to the top dead center position by turning the crankshaft...

Visual inspection and cleaning of the connecting rod and piston group
Connecting rods 1. Clean the connecting rods in solvent and dry with compressed air. Caution: When using compressed air, it is necessary to wear protective...
Connecting rods 1. Clean the connecting rods in solvent and dry with compressed air. Caution: When using compressed air, it is necessary to wear protective...

Measuring pistons and connecting rods
Piston ring gap 1. Install the piston ring into the cylinder as shown in the figure and measure the gap in the lock using a set of flat feeler gauges (1)....
Piston ring gap 1. Install the piston ring into the cylinder as shown in the figure and measure the gap in the lock using a set of flat feeler gauges (1)....

Removal and installation the crankshaft
Removal 1. Remove the pistons with connecting rods. 2. Mark the crankshaft main bearing caps. 3. Loosen the ten mounting bolts and remove the crankshaft main...
Removal 1. Remove the pistons with connecting rods. 2. Mark the crankshaft main bearing caps. 3. Loosen the ten mounting bolts and remove the crankshaft main...

Checking the axial play of the crankshaft
Note: The crankshaft is installed with main bearing caps. 1. Install the GE-571-B dial indicator: Install the holder on the front surface of the cylinder...
Note: The crankshaft is installed with main bearing caps. 1. Install the GE-571-B dial indicator: Install the holder on the front surface of the cylinder...
Checking the radial runout of the crankshaft
1. Insert the crankshaft into the cylinder block. 2. Install the GE-571-B dial indicator: Install the dial indicator bracket to the cylinder block. Place the...
1. Insert the crankshaft into the cylinder block. 2. Install the GE-571-B dial indicator: Install the dial indicator bracket to the cylinder block. Place the...

Checking the clearance in the crankshaft main bearings
Method using calibrated Plastigage wire Caution: Do not rotate the crankshaft during the inspection. 1. Place a piece of calibrated Plastigage along the...
Method using calibrated Plastigage wire Caution: Do not rotate the crankshaft during the inspection. 1. Place a piece of calibrated Plastigage along the...
Cylinder Block Cleaning Procedure
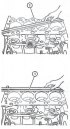
1. Remove any remaining sealant, gasket or gaskets. 2. Clean the following areas with solvent: Sealing surfaces. Cooling system channels. Lubrication system...
1. Remove any remaining sealant, gasket or gaskets. 2. Clean the following areas with solvent: Sealing surfaces. Cooling system channels. Lubrication system...
Checking the technical condition of the cylinder block
Visual inspection 1. Check the crankshaft main bearings in the cylinder block for damage or deformation. The main bearings cannot be repaired if they are...
Visual inspection 1. Check the crankshaft main bearings in the cylinder block for damage or deformation. The main bearings cannot be repaired if they are...

Removal and installation a turbocharger
Removal 1. Disconnect the negative battery terminal. 2. Disconnect the electrical connector of the heated oxygen sensor No.1. 3. Raise and secure the vehicle....
Removal 1. Disconnect the negative battery terminal. 2. Disconnect the electrical connector of the heated oxygen sensor No.1. 3. Raise and secure the vehicle....


Tightening torques for threaded connections
Note. *1 : use a new bolt/nut. *2 : Before using the bolt, renew the thread and insert the bolt after applying a locking compound. *3 : apply a locking...
Note. *1 : use a new bolt/nut. *2 : Before using the bolt, renew the thread and insert the bolt after applying a locking compound. *3 : apply a locking...
This section is available on russian, bulgarian, belarusian, ukrainian, serbian, croatian, romanian, polish, slovak, hungarian
See similar ones from other Opel car manuals:
▶ Power unit: Injection system (gasoline) Opel Astra G (1998-2004)
▶ Power unit: Petrol engine F4R Opel Vivaro A (2001-2014)
▶ Power unit: Petrol 4-cylinder Opel Omega B2 (1999-2003)
▶ Power unit: Injection system (gasoline) Opel Corsa B (1993-2000)
▶ General information: Maintenance (gasoline) Opel Vectra B (1995-2002)
▶ Power unit: Injection system (gasoline) Opel Astra G (1998-2004)
▶ Power unit: Petrol engine F4R Opel Vivaro A (2001-2014)
▶ Power unit: Petrol 4-cylinder Opel Omega B2 (1999-2003)
▶ Power unit: Injection system (gasoline) Opel Corsa B (1993-2000)
▶ General information: Maintenance (gasoline) Opel Vectra B (1995-2002)
Share information:
- General information
- Repair on the road
- Daily checks
- Operation and maintenance
- Safety and tool
- Power unit
- Petrol engines 1.6 l
- Petrol engines 2.0 l
- Diesel engines 2.0 l
- Diesel engines 2.8 l
- Cooling system
- Lubrication system
- Supply system
- Engine management
- Intake and exhaust system
- Engine electrical equipment
- Transmission
- Clutch
- Mechanical gearbox
- Automatic gearbox
- Transfer case
- Drive shafts
- Chassis
- Wheel suspension
- Brake system
- Steering
- Body
- Exterior
- Interior
- Passive safety
- Heater and air conditioner
- Electrical equipment
- Electrical circuits