


Contents: Removal ⬇ Installation ⬇
Removal
1. Disconnect the negative battery terminal.
2. Disconnect the electrical connector of the heated oxygen sensor No.1.
3. Raise and secure the vehicle.
4. Remove the drain plug and drain the engine oil.
Note: After draining the engine oil, install the drain plug with a new O-ring.
5. Remove the intercooler inlet hose.
6. Remove the turbocharger oil return hose.
7. Remove the front exhaust pipe.
8. Remove the catalytic converter.
9. Lower the vehicle.
10. Open the drain hole of the cooling system.
11. Remove the air filter assembly.
12. Remove the elastic drive belt (1) from the power steering pump (2).
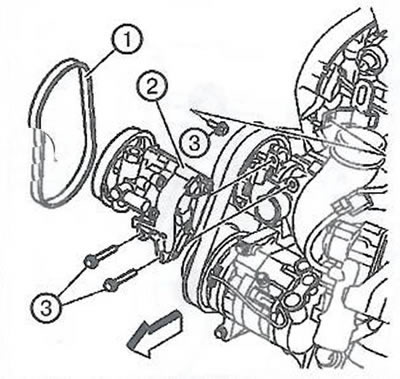
13. Loosen the three mounting bolts (3) of the power steering pump.
Note: Secure the power steering pump with a wire loop.
14. Remove the turbocharger flap control solenoid valve.
15. Remove the turbocharger air intake adapter:
- Loosen the clamp (3) and remove the pipe (1) from the boost bypass valve (2).
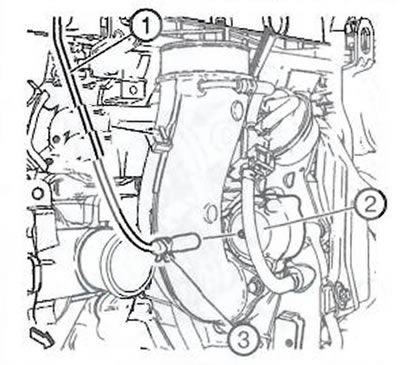
- Loosen the clamp and remove the hose (2) from the turbocharger flap drive (3).
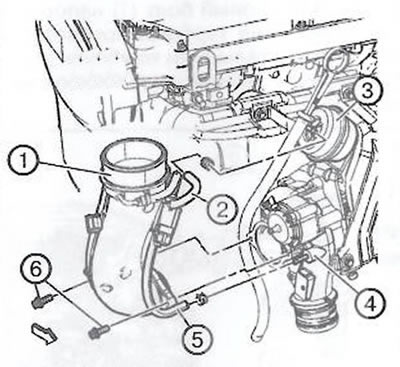
- Loosen the clamp and remove the turbocharger flap control solenoid valve hose (5) from the turbocharger (4).
- Loosen the two bolts (6) of the turbocharger air intake pipe.
- Remove the turbocharger air intake pipe (1).
- Remove and discard the gasket.
16. Loosen the bolt (1) and remove the oil dipstick guide pipe.
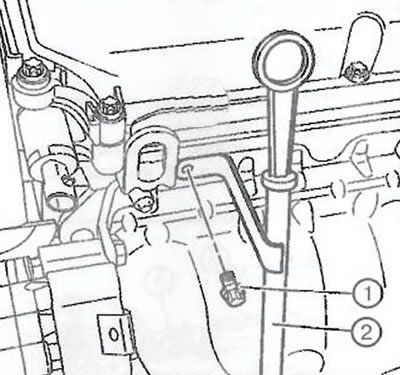
17. Remove the two exhaust manifold heat shield bolts.
18. Remove the vacuum hose from the turbocharger.
19. Remove the vacuum hose from the turbocharger.
20. Remove the hose from the turbocharger cooling return pipe.
21. Remove the cooling pressure pipe from the turbocharger.
(The article was published on the website: opelbook.ru)
22. Remove the pressure oil line (2) from the turbocharger.
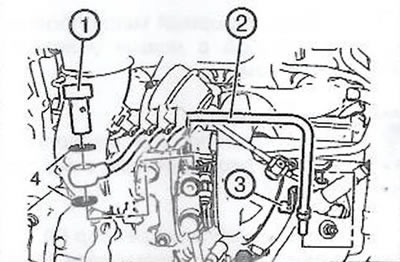
Note: After removing the exhaust manifold assembly, turn the turbocharger oil pressure line 90 to release the holder (3).
23. Unscrew the hollow bolt (1) of the turbocharger pressure oil line with two sealing rings (4).
24. Unscrew the nine turbocharger nuts (1).
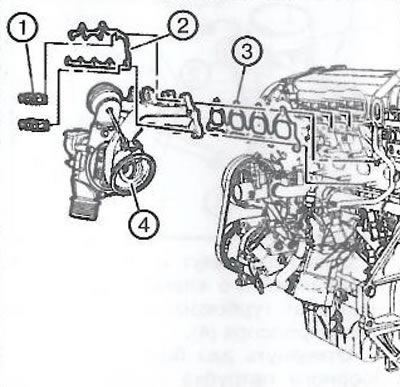
25. Remove the turbocharger gasket (2).
26. Remove the turbocharger (4).
27. Remove the exhaust manifold gasket (3).
28. Remove the hollow bolt of the cooling return pipe from the exhaust manifold assembly.
Installation
1. Clean the contact surface of the exhaust manifold.
2. Install a new exhaust manifold gasket (2) onto the exhaust manifold.
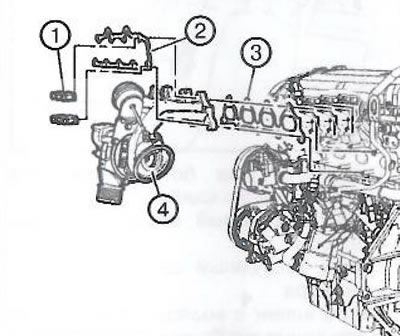
3. Install the hollow bolt with new sealing rings and secure the exhaust manifold cooling return line assembly.
4. Install the turbocharger pressure oil line with a new sealing ring.
Note: Insert the turbocharger oil pressure line into the port and turn 90°.
5. Install the turbocharger (3).
6. Install nine new nuts (1) and tighten to 8 Nm.
7. Install the pressure oil line (2) onto the turbocharger.
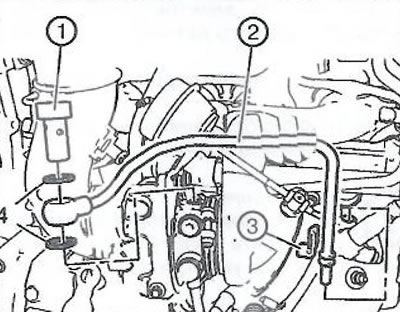
8. Install the turbocharger oil pressure line hollow bolt (1) with two new sealing rings (4) and tighten to 30 Nm.
9. Install the coolant supply line to the turbocharger.
10. Install the return hose to the turbocharger cooling return pipe.
11. Install and hand tighten the two exhaust manifold heat shield nuts.
12. Install the dipstick guide tube with two new O-rings.
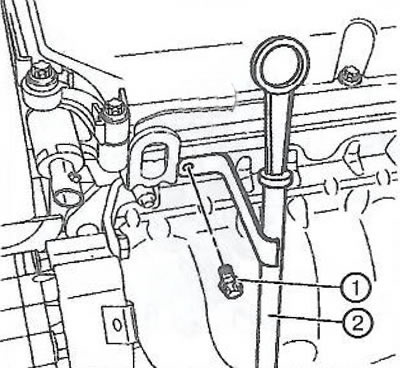
13. Install the oil dipstick guide pipe mounting bolt (1) and tighten to 8 Nm.
14. Tighten the exhaust manifold heat shield fasteners to 8 Nm.
15. Install the turbocharger flap control solenoid valve to the turbocharger air intake adapter.
16. Install the turbocharger air intake adapter.
17. Install the vacuum hose to the turbocharger.
18. Install the power steering pump (2).
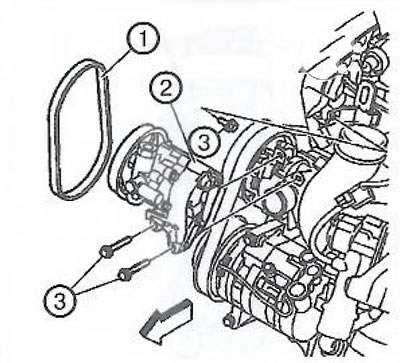
19. Install the three power steering pump bolts (3) and tighten to 22 N·m.
20. Install the tension drive belt (1) on the power steering pump:
- Install the EN-50098 tool (1) and the tension drive belt (2) onto the power steering pump pulley (3), then slowly turn the engine crankshaft clockwise.
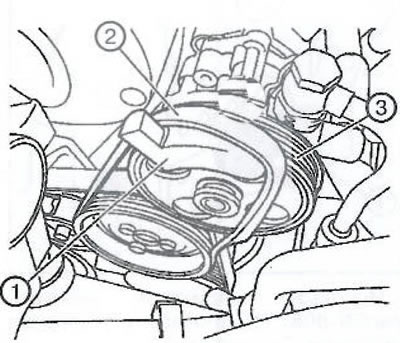
Note: When rotating the engine crankshaft, ensure that the belt is correctly installed on the water pump pulley.
- Remove the EN-50098 fixture.
21. Install the air filter assembly.
22. Connect the electrical connector to the turbocharger flap control solenoid valve.
23. Raise the car.
24. Install the turbocharger oil return hose.
25. Install the intercooler air inlet hose.
26. Install the catalytic converter.
27. Install the front exhaust pipe,
28. Lower the car.
29. Connect the electrical connector of heated oxygen sensor No.1.
30. Connect the negative terminal of the battery.
31. Fill the engine with engine oil.
32. Fill the engine cooling system.
Visitor comments