


Caution: Do not allow dirt to enter the fuel system tract!
Caution: Remember that injectors are precision equipment and must be handled with extreme care!
Caution: Before working on the fuel supply system on models equipped with engines with a fuel injection system, "Common Rail", you must wait approximately 1 minute after turning off the ignition - during this time the pressure in the fuel line is automatically reduced!
Engine Z19DT(H)
1. Disconnect the cable from the negative terminal of the battery (see Chapter 5) and remove the engine cover (see Chapter 2).
2. On the Z19DT engine, remove the 4 mounting bolts (see illustration 17.2a) and disconnect the wiring from the glow plugs. On the Z19DTH engine, simply disconnect the wiring (see illustration 17.2b)
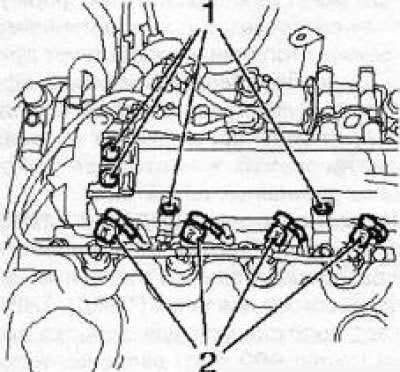
17.2a Glow plug wiring connectors (2) (z19DT engine) 1 Mounting bolts
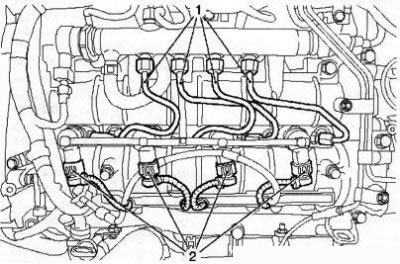
17.2b Glow plug wiring connector (2) (z19DTH engine): 1. High pressure fuel lines
3. Unscrew the 8 union nuts and remove the high-pressure fuel lines from the fuel distribution line to the injectors.
Caution: When loosening the nuts, hold the injectors with a second open-end wrench!
4. The injectors are removed using special tools EN47632 and KM-328-B. First, disconnect the lubrication system lines/hoses, unscrew the 4 nuts and remove the injectors with the mounting brackets.
5. Before installing the injectors, thoroughly clean the mounting seats for their installation. Installation is carried out in the reverse order of removal. Replace all sealing gaskets.
Z30DT Engine
6. To remove the injectors, it is necessary to remove all lines and components located on top of the engine that prevent the removal of the cylinder head covers.
7. Remove the cover of cylinder heads 1 - 3-5, unscrew and remove 4 bolts securing the oil lines together with the gaskets (see accompanying illustration), unscrew the 3 nuts of the injector mounting brackets, remove the 2 brackets and take out the injectors. If necessary, repeat the operations for the injectors of the second head.
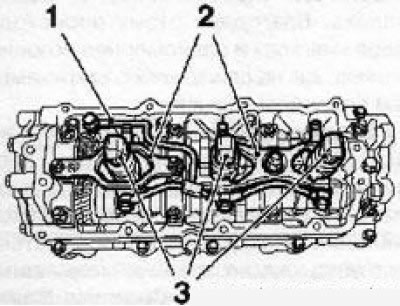
17.7 Brackets (2) for fastening injectors (3) (y30DT engine): 1. Oil lines
8. There may be old injector seals left in the mounting sockets - remove them using a suitable tool. Clean the inner surfaces of the sockets and install new seals in them (see accompanying illustration).
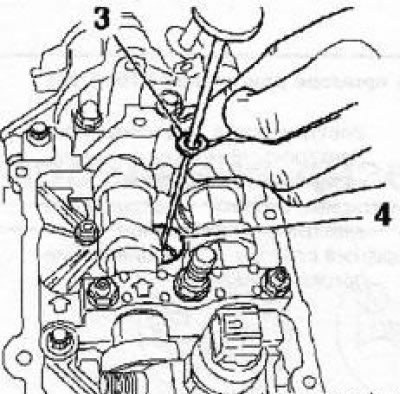
17.8 Installing a new sealing gasket (3) into the injector seat (4) (y30DT engine)
9. Further installation is carried out in the reverse order of removal.
Engines Y20DTH/Y22DTR
10. Remove the camshaft (see Chapter 2).
11. Remove the dual tappets (see accompanying illustration) valves, remember the position for their installation.
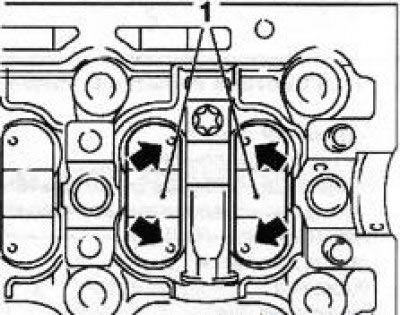
17.11 Double tappets (1) of valves (y20DTH/Y22DTR engines) the arrows indicate the installation marks
12. Carefully disconnect the 4 lubrication system hoses, then remove the bolts (see accompanying illustration) to secure the injector supply channels, slightly lift the channels and pull them out of the cylinder head, remove the injector sealing gaskets.
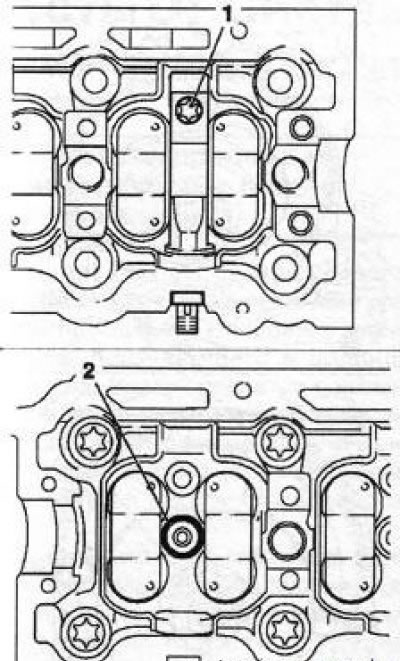
17.12 Bot (1) for fastening the injector feed channel (y20DTH/ Y22DTB engines): 2. Sealing gasket
13. Screw the KM931 device onto the injector (see accompanying illustration), attach the KM-328-V device to it and carefully pull the nozzle upwards. Repeat the operation for the remaining nozzles. Old sealing gaskets may remain in the mounting sockets - remove them using a suitable tool.
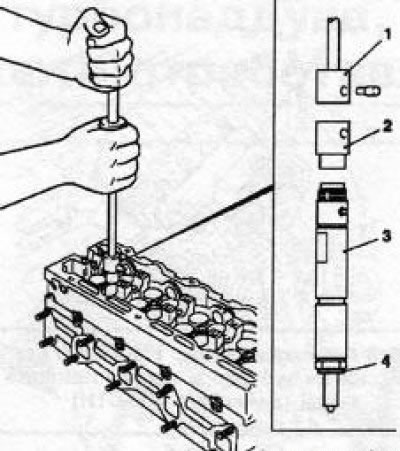
17.13 Removing the injector (3) from the seat (y20DTH/Y22DTR engines): 1. Device KM-328-V; 2. Device KM-931; 4. Sealing gasket
14. Before installing the injectors, replace all sealing gaskets, clean the surfaces of the mounting seats and install the injectors - the spherical protrusion on each of the injectors must enter the corresponding groove on the cylinder head.
15 To install the injector feed channels, in order to avoid damaging the sealing gaskets, it is mandatory to use special devices KM-6318-1 and KM-6318-2. Install the devices (see accompanying illustration) and secure them using the bearing cap mounting bolts on the second support (between the first and second cylinders) camshaft, while the stopper (6) should be on the side of the second cylinder. Move the KM6318-2 device in the direction indicated by the arrow until the stopper stops against the KM-6813-1 device.
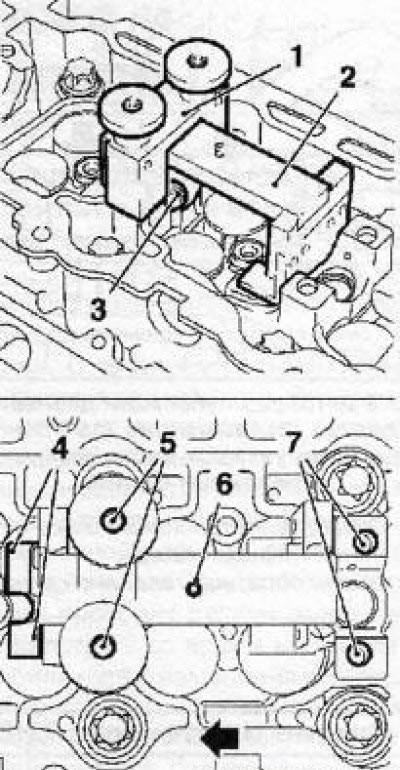
17.15 Installation of devices KM6318-1 (1) and KM-6318-2 (2) on the second support (3) of the camshaft (y20DTH/Y22DTR engines): 1. Sealing gasket; 2. Device KM-6318-1; 3. Device KM-6318-2; 4. Sliding surface; 5. Mounting bolts; 6. Stopper; 7. Threaded holes of camshaft supports
16. Replace the sealing gaskets (see accompanying illustration) injector feed channels, lubricate the gaskets with silicone grease (white color). Install the feed channels of the first and second cylinders on the sliding surfaces of the devices and push them all the way onto their seats in the cylinder head (arrow A). Disengage the device from engagement with the channels by moving it to the side (arrow B).
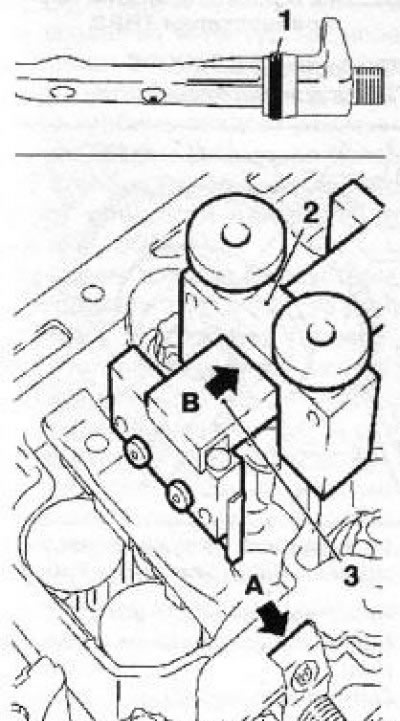
17.16 Installing the first cylinder feed channel (engines Y20DTH/ Y22DTR)
17. Remove and reinstall the fixtures on the 4th support (between 3 and 4 cylinders) camshaft and install the feed channels of the injectors of cylinders 3 and 4. Remove the tools.
18. To properly install the feed channel on the injector, you must use an L-shaped wrench with a socket head. Tighten the bolt with the wrench without using the lever of the wrench handle (see accompanying illustration). Then tighten the bolt using the lever handle of the wrench.
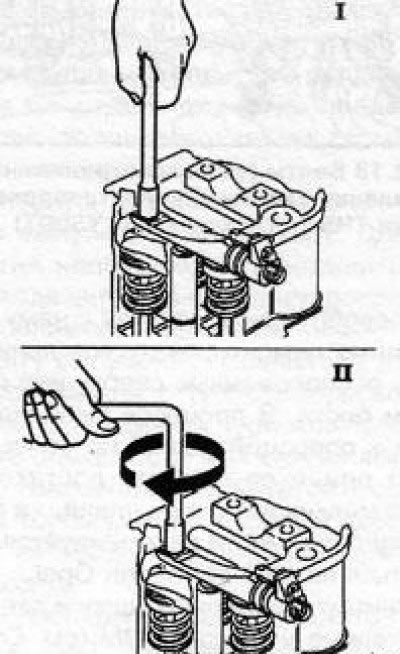
17.18 Tightening the injector feed channel mounting bolt (y20DTH/Y22DTR engines) - first (I) and second (II) phases
19. Further installation is carried out in the reverse order of removal.
Visitor comments