
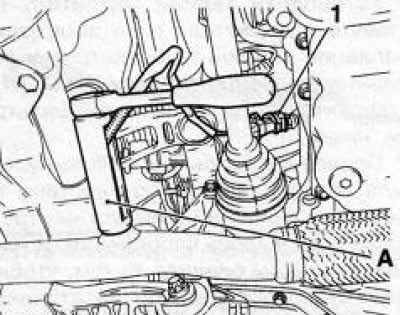
21.31 Removing the post-catalytic lambda probe using the end cap (A): 1. Wiring connector
Lambda probes are designed to control and adjust the composition of exhaust gases. The sensors are screwed into the pipe before and after the catalyst. To remove the probes, as a rule, a special socket wrench with a slotted hole for the electrical wire is used. Depending on the length and location of the sensor, the keys may have different designs. The procedure for removing / installing the probe is not complicated, but requires accuracy.
Remove the engine cover.
The pre-catalytic lambda probe is installed in the intake section of the catalytic converter or on the exhaust manifold. Disconnect the lambda probe wiring connector, cut (with appropriate equipment) wiring harness clamp. Using the special wrench, carefully unscrew and remove the probe.
A post-catalytic lambda probe is usually installed on the first (reception) sections of the exhaust system. Raise the car on a lift, disconnect the probe wiring connector.
Note: On models equipped with the Z22YH engine, the downpipe must be disconnected and slightly lowered to access the sensor.
Carefully unscrew the lambda probe using the socket (see resist. illustration) and take it off.
Installation is carried out in the reverse order of removal. Before installation, lubricate the lambda probe thread with a thin layer of Opel heat-resistant mounting paste (petrol engine: black grease, diesel engine: white grease), put it in place.
Attention! Mounting paste should only be applied to the thread, do not allow it to get on the body of the lambda probe!
Note: If the lambda probe is installed without the use of a heat-resistant lubricant, the thread will begin to stick over time. As a result, it will not be possible to unscrew the probe at the next service. New sensors already have the necessary lubrication.
Visitor comments