
OpelBook.ru
Cars AvtoVAZ Cars Mitsubishi Cars BMW Cars Mercedes Cars Nissan Cars Toyota Cars Chevrolet
English Русский
Български
Беларускі
Український
Српски
Hrvatski
Română
Polski
Slovenský
Magyar
 |  Sitemap  |  Contacts  |    


Main Astra Corsa Insignia Kadett Omega Vectra Zafira Others Articles
Frontera A (1991-1998, petrol) Frontera B (1998-2004) Ascona C (1981-1988) Vivaro A (2001-2014)
  • Main
  • Opel
  • Frontera B
  • Power unit
  • Diesel engines 2.2 l
  • Exhaust manifold

Exhaust manifold (Opel Frontera B)

            0

Contents: Removal ⬇ Installation ⬇

Removal


Disconnect the cable from the negative battery terminal.

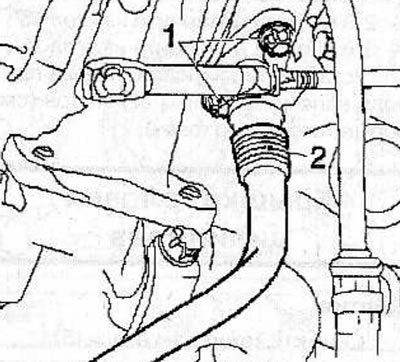
Loosen the clamps (1) and disconnect the 3 air intake pipes (2) from the turbocharger.
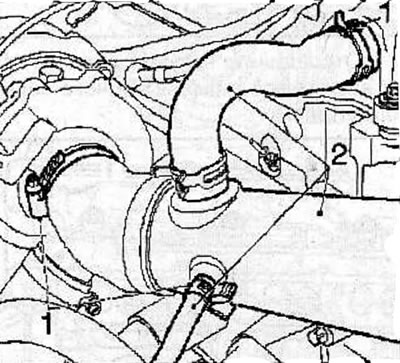
Loosen the clamps (1) and disconnect the 3 air intake pipes (2) from the turbocharger.


Loosen the nut (1) and remove the mounting bracket from the cylinder block.
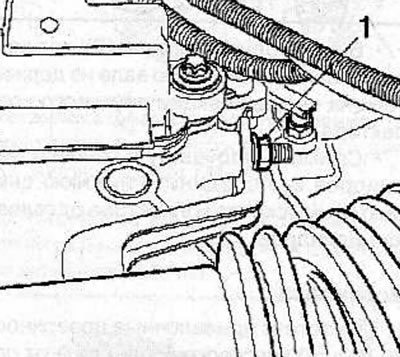
Loosen the nut (1) and remove the mounting bracket from the cylinder block.


Loosen the clamps (2), carefully disconnect the air intake pipe (1) from the air flow meter (3) and remove the air intake pipe from the engine.
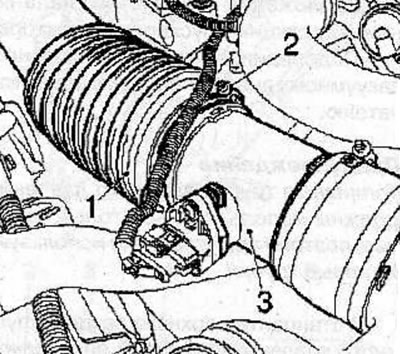
Loosen the clamps (2), carefully disconnect the air intake pipe (1) from the air flow meter (3) and…


Remove 3 bolts (1), move the expansion tank to the side and disconnect the connector (2) from the tank.


Remove 3 bolts and remove the engine cover.
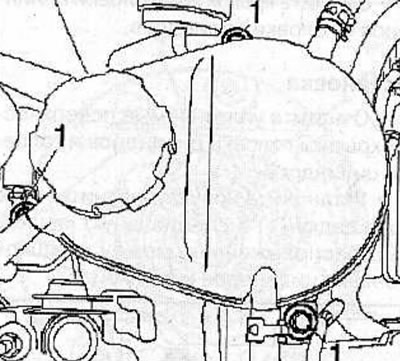
Remove 3 bolts and remove the engine cover.
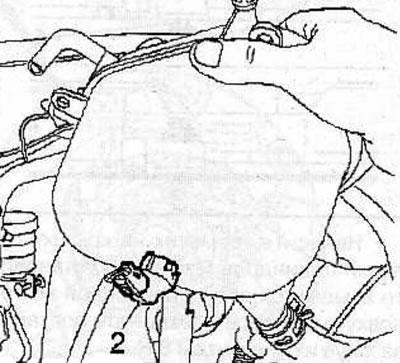

Remove 3 bolts and remove the engine cover.


Using special pliers KM-717, disconnect the connectors (1) from the glow plugs and move them to the side.
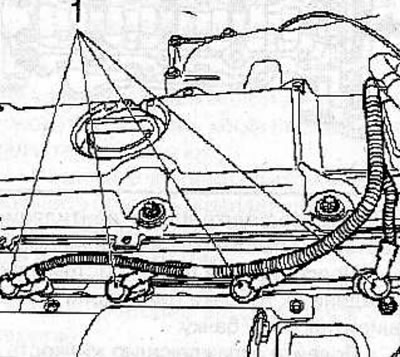
Using special pliers KM-717, disconnect the connectors (1) from the glow plugs and move them to the…


Remove 3 bolts (1) and remove the turbocharger heat shield.
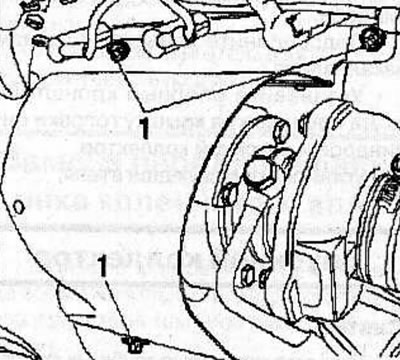
Remove 3 bolts (1) and remove the turbocharger heat shield.


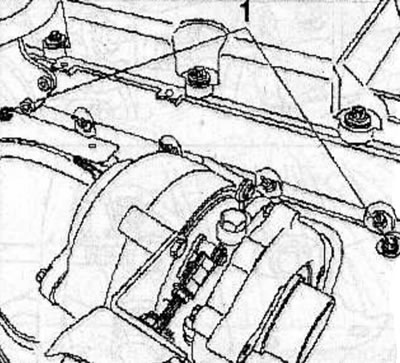
Remove 2 bolts and heat shield from exhaust manifold.


Disconnect the vacuum hose (1) from the turbocharger pipe.
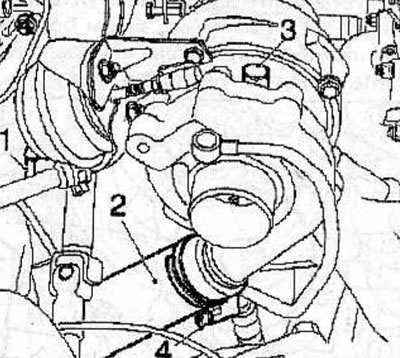
Disconnect the vacuum hose (1) from the turbocharger pipe.


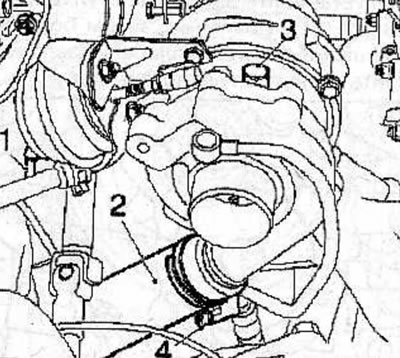
Loosen the clamp (4) and disconnect the intercooler hose (2) (intercooler) from the turbocharger.

Disconnect the engine oil supply pipe (3) with two sealing washers from the turbocharger.

Remove 2 bolts (1), remove gaskets and disconnect engine oil return pipe (2) from turbocharger.
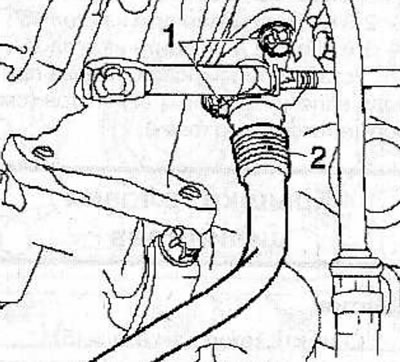
Remove 2 bolts (1), remove gaskets and disconnect engine oil return pipe (2) from turbocharger.


Remove 2 bolts (1 and 2) and remove the manifold support bracket.
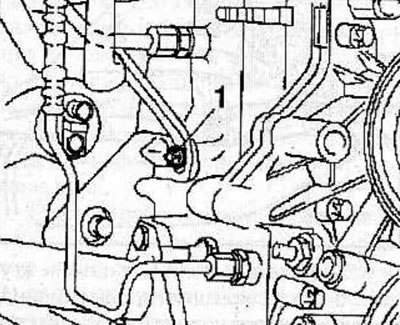
Remove 2 bolts (1 and 2) and remove the manifold support bracket.
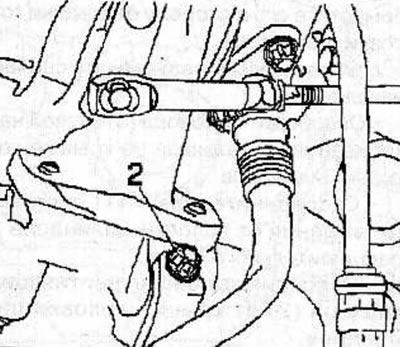

Remove 2 bolts (1 and 2) and remove the manifold support bracket.


Remove bolt (1) and disconnect the second exhaust manifold support bracket from the transmission.
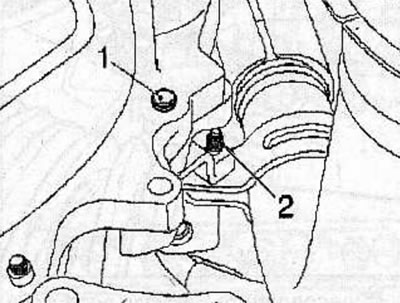


Remove bolt (1) and disconnect the second exhaust manifold support bracket from the transmission.


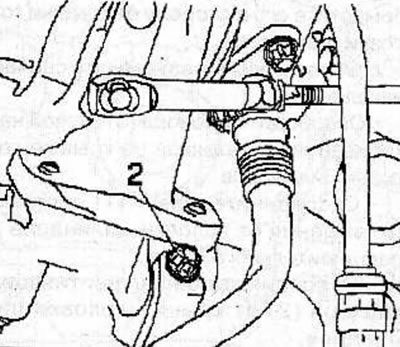
Remove the bolt (2) and detach the second exhaust manifold support bracket from the front exhaust pipe.

Remove 3 bolts, disconnect the front exhaust pipe (1) from the turbocharger (2) and remove the gasket.
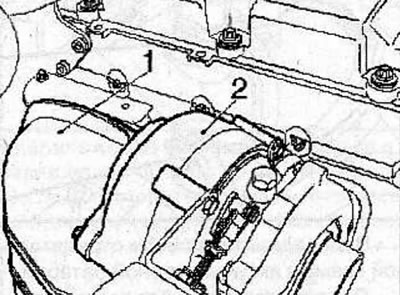
Remove 3 bolts, disconnect the front exhaust pipe (1) from the turbocharger (2) and remove the…


Remove 2 bolts (1), disconnect the turbocharger from the bypass manifold and remove the gasket.

Remove 2 bolts (1), disconnect the turbocharger from the bypass manifold and remove the gasket.
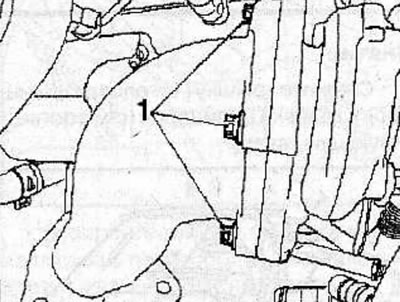

Unscrew 10 nuts (1), remove the exhaust manifold with the turbocharger and remove the gasket.
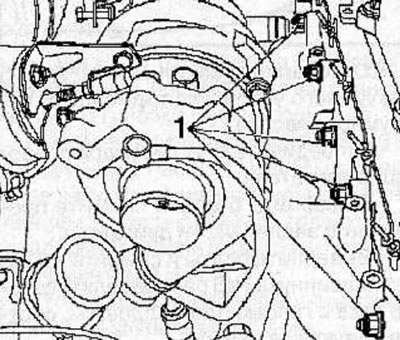


Unscrew 10 nuts (1), remove the exhaust manifold with the turbocharger and remove the gasket.


Installation


Install the new gasket and exhaust manifold with turbocharger, then secure with 10 nuts, tightening them to a torque of 22 N·m.
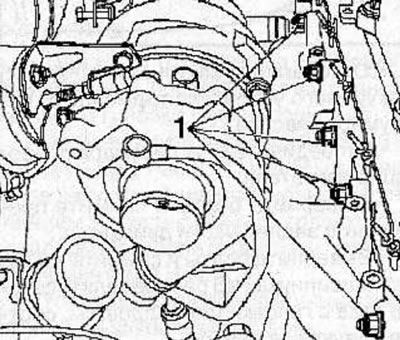
Install the new gasket and exhaust manifold with turbocharger, then secure with 10 nuts, tightening…


Install a new gasket, connect the bypass manifold to the turbocharger and secure with 3 bolts, tightening them to a torque of 30 Nm.
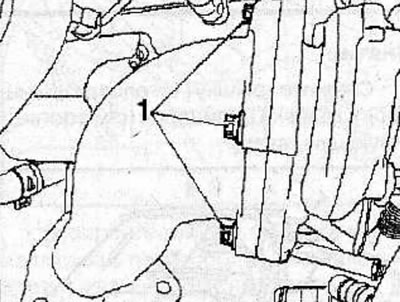
Install a new gasket, connect the bypass manifold to the turbocharger and secure with 3 bolts,…


Warning: When connecting the front exhaust pipe, it is necessary to follow the correct tightening sequence of the bolts. Failure to tighten the bolts in the correct sequence may result in damage to the parts being connected.


Attach the front exhaust pipe (1) to the turbocharger (2) and secure with bolts. Loosely screw in the exhaust pipe mounting bolts to the turbocharger, tighten the bolts to a torque of 30 Nm, then, starting with the first bolt, check that the bolts are securely tightened.
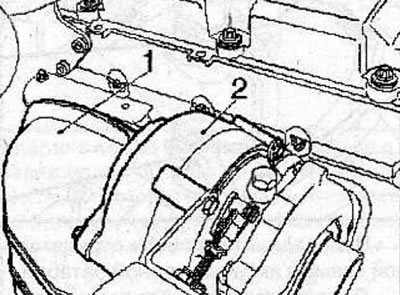
Attach the front exhaust pipe (1) to the turbocharger (2) and secure with bolts. Loosely screw in…


Attach the second exhaust manifold support bracket to the transmission and secure with bolt (1), tightening it to 70 N·m.
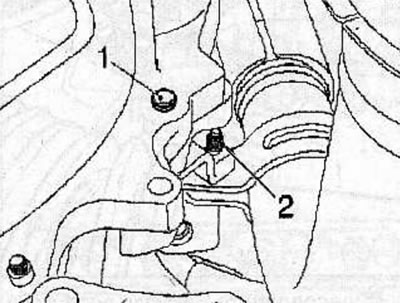
Attach the second exhaust manifold support bracket to the transmission and secure with bolt (1),…


Attach the second exhaust manifold support bracket to the front exhaust pipe and secure with bolt (2), tightening it to 24 Nm.

Install the exhaust manifold support bracket and secure with 2 bolts (1 and 2), tightening them to a torque of 25 N·m.
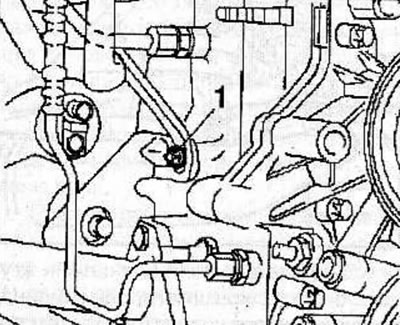
Install the exhaust manifold support bracket and secure with 2 bolts (1 and 2), tightening them to…


Install the exhaust manifold support bracket and secure with 2 bolts (1 and 2), tightening them to…


Connect the engine oil return pipe (2) with a new gasket to the turbocharger and secure with 2 bolts, tightening them to a torque of 8 Nm.


Connect the engine oil return pipe (2) with a new gasket to the turbocharger and secure with 2…


Connect the engine oil supply pipe (3) with 2 new sealing washers to the turbocharger and secure with the bolt, tightening it to a torque of 20 Nm.
Connect the engine oil supply pipe (3) with 2 new sealing washers to the turbocharger and secure…


Connect the intercooler hose (2) (intercooler) to the turbocharger and secure it with a clamp (4).

Connect the vacuum hose(1) to the turbocharger pipe.

Install the exhaust manifold heat shield and secure with 2 bolts.
Install the exhaust manifold heat shield and secure with 2 bolts.


Install the turbocharger heat shield (1) and secure with 3 bolts, tightening them to 8 Nm.
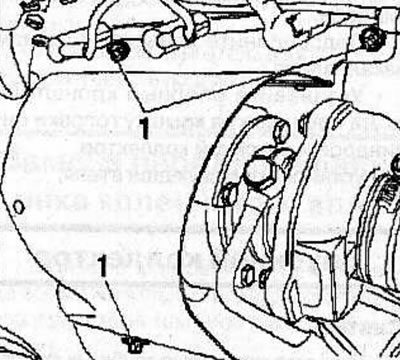


Install the turbocharger heat shield (1) and secure with 3 bolts, tightening them to 8 Nm.


Using special pliers KM-717, connect the connectors (1) to the glow plugs

Install the engine cover and secure with 3 bolts, tightening them to 8 Nm.
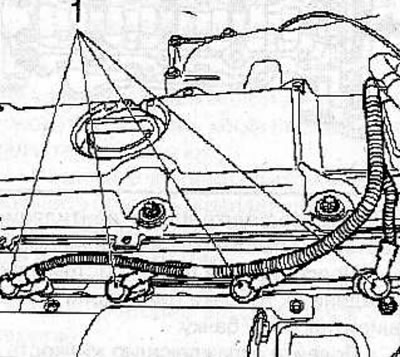
Install the engine cover and secure with 3 bolts, tightening them to 8 Nm.


Connect the connector (2) to the expansion tank, install the tank and secure with 3 bolts (1).
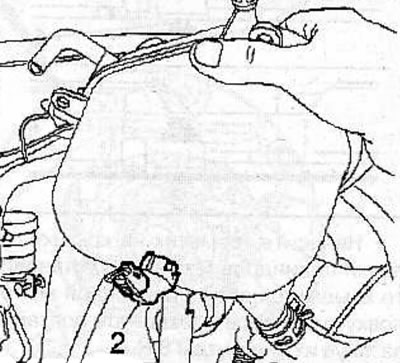
Connect the connector (2) to the expansion tank, install the tank and secure with 3 bolts (1).
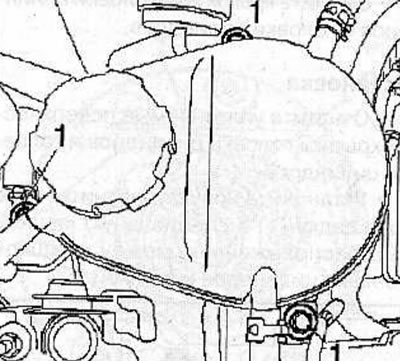

Connect the connector (2) to the expansion tank, install the tank and secure with 3 bolts (1).


Install the air intake pipe on the engine, connect the air intake pipe (1) to the air flow meter (3) and secure with a clamp (2).
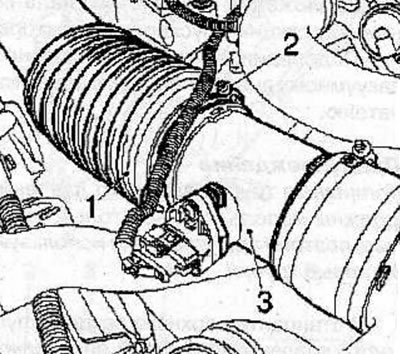
Install the air intake pipe on the engine, connect the air intake pipe (1) to the air flow meter…


Install the mounting bracket onto the cylinder block and secure with the nut (1).
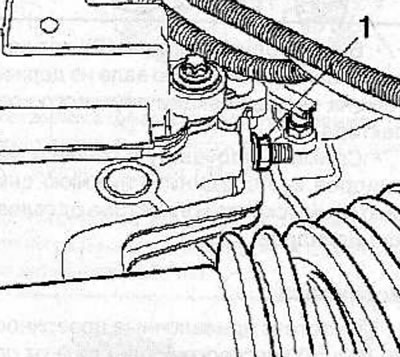
Install the mounting bracket onto the cylinder block and secure with the nut (1).


Connect the 3 air intake pipes (2) to the turbocharger and secure with clamps (1).
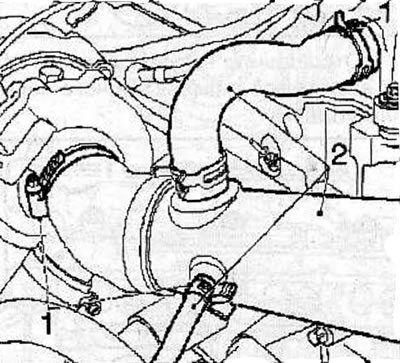
Connect the 3 air intake pipes (2) to the turbocharger and secure with clamps (1).


Connect the cable to the negative terminal of the battery.

Reprogram the memory of electronic control units.


This article is available at russian, bulgarian, belarusian, ukrainian, serbian, croatian, romanian, polish, slovak, hungarian
Checking the article: Chernov Alexander

Share information:

Previous articles
Opel Frontera B: Diesel engines 2.2 l
Next articles

Intake manifold
Cylinder head cover
Replacing the front crankshaft oil seal
Gas distribution mechanism drive housing
Single-row fuel injection pump drive chain
V-belt tensioning mechanism
Vacuum pump
Camshafts
Cylinder head
Cylinder head repair
Flywheel — removal and installation
Replacing the rear crankshaft oil seal


See similar ones from other Opel car manuals:
▶ Removal and installation the exhaust manifold Opel Astra G (1998-2004)
▶ Replacing the exhaust manifold seal (Z10XE, Z10XEP, without… Opel Corsa C (2000-2006, petrol)
▶ Exhaust manifold replacement — 1.6 and 1.8 L petrol engines Opel Insignia A (2008-2017)
▶ Exhaust manifold — removal and installation Opel Omega A (1986-1993)
▶ Exhaust manifold — removal and installation Opel Vectra A (1988-1995, petrol)
Link to this page in different formats

Visitor comments


No comments yet


How much will 32 + 17 =


Vivaro A (2001-2014) 
  • General information
  • User manual
  • Power unit
  • Petrol engine F4R
  • Diesel engine F9Q
  • Diesel engine G9U
  • Transmission
  • Clutch and drive shafts
  • Manual gearbox
  • Chassis
  • Front suspension
  • Rear suspension
  • Brake system
  • Body
  • Exterior
  • Interior
  • Electrical equipment
  • Heating and ventilation
  • Air conditioner
  • Equipment and devices
  • Electrical diagrams
Ascona C (1981-1988) 
  • General information
  • Maintenance
  • Power unit
  • Gasoline engines
  • Diesel engines
  • Cooling system
  • Fuel and exhaust system
  • Contact ignition system
  • Contactless ignition system
  • Transmission
  • Clutch
  • Mechanical gearbox
  • Automatic gearbox
  • Drive shafts
  • Chassis
  • Steering
  • Brake system
  • Car suspension
  • Body
  • Exterior
  • Interior
  • Doors and windows
  • Electrical equipment
  • Equipment and devices
  • Power devices
  • Electrical circuits
Frontera B (1998-2004) 
  • General information
  • User manual
  • Maintenance
  • Power unit
  • Petrol engines 2.2 l
  • Petrol engines 3.2 l
  • Diesel engines 2.2 l
  • Cooling system
  • Fuel system (petrol)
  • Fuel system (diesel)
  • Ignition system
  • Transmission
  • Clutch
  • Manual gearbox MUA5C
  • Automatic gearbox 4L30E
  • Chassis
  • Suspension and axles
  • Steering
  • Brake system
  • Body
  • Exterior
  • Interior
  • Doors, locks and windows
  • Heating and air conditioning
  • Electrical equipment
  • Power devices
  • Equipment and devices
  • Lighting and signaling
  • Electrical diagrams
Frontera A (1991-1998, petrol) 
  • General information
  • Introduction to guide
  • User manual
  • Maintenance
  • Power unit
  • Engine repair
  • Lubrication system
  • Cooling system
  • Power and exhaust system
  • Engine electrics
  • Transmission
  • Clutch
  • Mechanical gearbox
  • Cardan shafts
  • Chassis
  • Brake system
  • Front suspension
  • Rear suspension
  • Steering
  • Body
  • Repair and care
  • Electrical equipment
  • Equipment and devices
  • Electrical circuits
OpelBook.ru © 2017–2026 · Mobile version · · Sitemap: EN BG BY UA RS HR RO PL SK HU · Feedback · Site search
Astra F, petrol · Astra G, petrol · Astra G · Astra H · Astra J, petrol · Corsa B · Corsa C, petrol · Corsa C · Insignia A · Kadett D · Kadett E · Omega A · Omega B · Omega B2 · Vectra A, petrol · Vectra A · Vectra B, petrol · Vectra B · Vectra C · Zafira A, petrol · Frontera A, petrol · Frontera B · Ascona C · Vivaro A ·
We want your visit to be comfortable 🤝! We use cookies 🍪 to make that happen.