
10. Included in the standard equipment of the vehicles discussed in this Guide, the wheels are equipped with special wear indicators (TWI) (see resist. illustration 5.10a) located in the recesses of the tread pattern around the entire perimeter of the wheel at regular intervals - their position is marked on the side surface of the tire. The minimum allowable tread depth is 1.6mm at which the pointers protrude from the recesses. You can estimate the intermediate degree of tread wear using a special inexpensive device (see resist. illustration 5.10b), - ask in car accessories stores or service stations. If front tire wear exceeds rear tire wear, rotate them (see below). To ensure guaranteed driving safety, do not wait for the limit wear of the tread, it is recommended to replace tires with a residual tread height of 2-3 mm (winter tires - 4 mm).
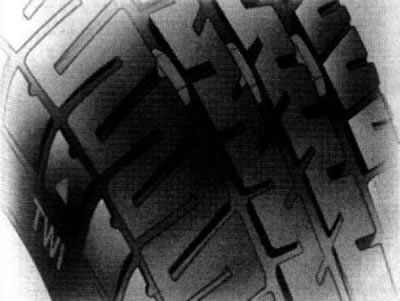
5.10a. Tread wear indicators (TWI) | 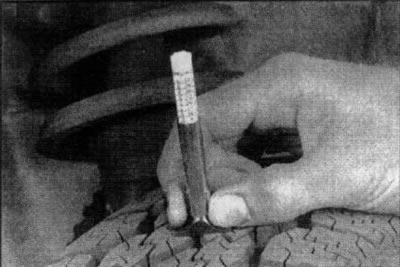
5.10b. To assess the degree of tread wear, special inexpensive profile pattern depth gauges are available |
Attention: The risk of aquaplaning increases especially if the pattern height is low!
11. Pay attention to any signs of uneven tread wear (see resist. illustration). Such local defects as bowl-shaped rubbing, flattening, etc., usually owe their occurrence to violations of the angles of the front wheels, or the balance of the latter. To identify and eliminate faults, the car should be driven to a specialized car service workshop or to a service station.
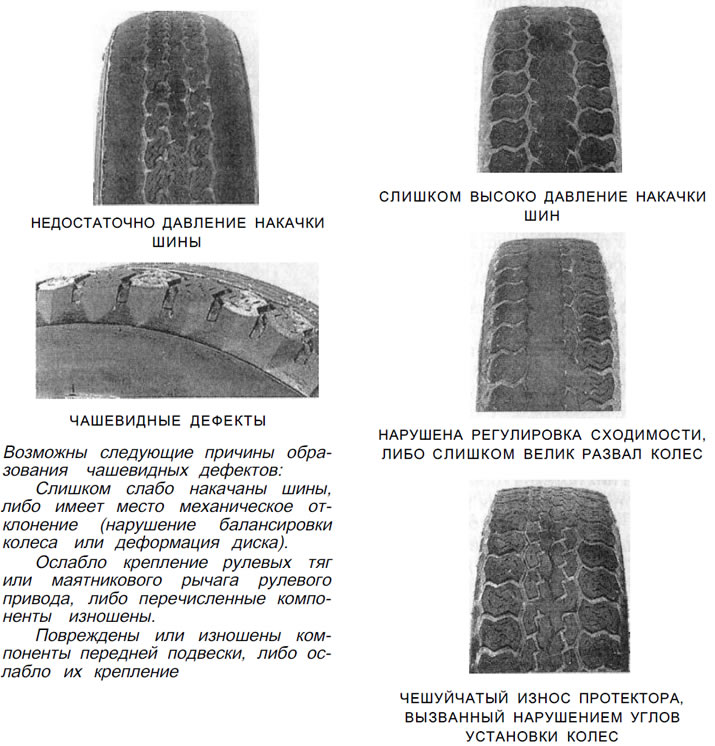
5.11. The most typical examples of tread wear
12. Carefully inspect the tires on all wheels for cuts, punctures, and foreign objects stuck in the grooves of the tread pattern. Sometimes a punctured tire continues to hold air inside itself for some more time due to the fact that the object that punctured the tire continues to be stuck into it. The reason for the slow deflation of the tire may be a defect in the nipple of the wheel inflation valve - check the condition of the nipple (see resist. illustration 5.12a). Carefully inspect the protector for the presence of foreign objects stuck in it and signs of a violation of the tightness of the fit of the repair «traffic jams», used to repair small tire punctures. Verifying the presence of a puncture is quite simple - just moisten the suspected area of the tire surface with a solution of soapy water (see resist. illustration 5.12b) - if a puncture occurs, the solution will begin to bubble. Minor punctures are usually easily repaired at tire shops.
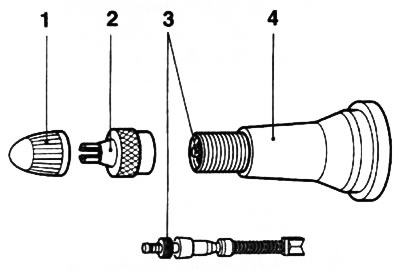
5.12a. If the wheel is constantly «descends», you should check the condition of the pump valve nipple | 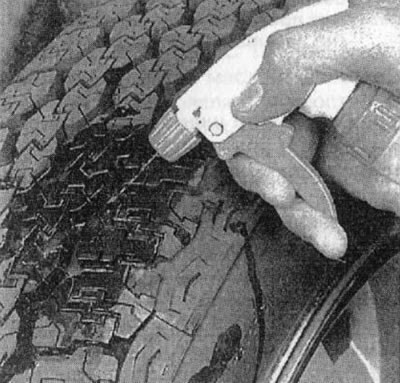
5.12b. If the nipple is in order, then there is a minor tire defect, which can be detected by wetting the tread with a solution of soapy water |
13. Carefully inspect the inner walls of the tires of all four wheels for the presence of brake fluid leaks on them. If any are found, immediately check the condition of the relevant brake mechanisms and the hydraulic lines connected to them.
14. Maintaining the required tire inflation pressure will significantly extend the life of the wheels, in addition, it will provide maximum driving comfort and will not reduce the vehicle's controllability. Excessively low pressure can lead to excessive heating of the tires, internal damage and thus, at high speeds, to the flaking of the running surface of the tires and even to rupture. Hidden tire damage cannot be repaired by subsequent air pressure adjustments. Remember that it is almost impossible to determine the correct tire pressure by eye, especially when it comes to radial tires. It is necessary to keep a suitable pressure gauge on hand at all times - the readings of the booster compressor meters at gas stations and service stations should not be trusted.
15. Check the tire inflation pressure when the tires are cold - it is understood that the car has traveled no more than one mile in the last three hours. Remember that an increase in pressure by 0.3-0.6 kgf / cm2 as a result of the heating of the wheel is a completely natural phenomenon - it is impossible to correct the pressure when the tires are hot. Checks must be carried out at least once every 14 days.
16. Remove the protective cap from the wheel inflation valve. To facilitate the removal of the caps, use the special key stored on the inside of the fuel filler cap (see resist. illustration 5.16a). Firmly press the manometer nozzle to the valve outlet by depressing the nipple stem (see resist. illustration 5.16b). Read the reading and compare it with the normative data, correct the pressure if necessary.
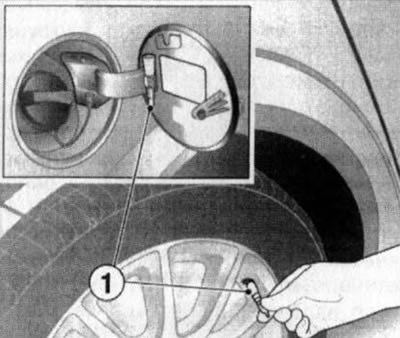
5.16a. Key for removal of caps of wheel valves | 
5.16b. Timely check of tire inflation pressure will prolong the life of the wheels (don't forget the spare) |
17. Do not forget to screw the protective cap of the valve back into place to prevent moisture and dirt from entering the nipple. Check the pressure in all tires, including the spare.
18. Tires, like any rubber products, age, even if the car is used or operated with low intensity - you should not install new or continue to use old wheels if more than 6 years have passed since they were made. If the spare wheel has not been used for 6 months, it should only be used in extreme cases and only at low speeds. Never use used tires whose origin you do not know.
19. Installation of protective/decorative caps may change the cooling conditions of the brake mechanisms - use only caps approved by Opel for this model, preferably branded ones.
Visitor comments