


Car engine repair Opel Corsa B

General information about engine overhaul
This Section of the Chapter contains descriptions of the procedures for removing and installing the power unit, as well as general overhaul of the cylinder...
This Section of the Chapter contains descriptions of the procedures for removing and installing the power unit, as well as general overhaul of the cylinder...
Removal the power unit from the car — methods and precautions
Before you begin removing the power unit from the vehicle, perform some preparatory procedures. It is extremely important to have a well-equipped work area...
Before you begin removing the power unit from the vehicle, perform some preparatory procedures. It is extremely important to have a well-equipped work area...

Removal, disconnecting and installing the engine
Removal When working in the engine compartment, it is necessary to keep in mind that the radiator fan can turn on by itself when the engine is off and the...
Removal When working in the engine compartment, it is necessary to keep in mind that the radiator fan can turn on by itself when the engine is off and the...
Alternative options for engine repair schemes
During independent engine overhaul, the reader will face the need to select the most suitable scheme of actions, determining the overall volume and nature of...
During independent engine overhaul, the reader will face the need to select the most suitable scheme of actions, determining the overall volume and nature of...
Engine disassembly sequence
The easiest way to disassemble an engine is to install it on a portable mounting stand. This kind of device can always be borrowed relatively inexpensively...
The easiest way to disassemble an engine is to install it on a portable mounting stand. This kind of device can always be borrowed relatively inexpensively...

Disassembling the cylinder head
A new or refurbished head can be ordered at an Opel service station or from the manufacturer's warehouse. Due to the fact that disassembling and checking the...
A new or refurbished head can be ordered at an Opel service station or from the manufacturer's warehouse. Due to the fact that disassembling and checking the...

Cleaning and checking the condition of the cylinder head
A thorough cleaning of the cylinder head and valve train components followed by a detailed inspection of their condition will help determine the approximate...
A thorough cleaning of the cylinder head and valve train components followed by a detailed inspection of their condition will help determine the approximate...
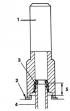
Cylinder head assembly
1. Regardless of whether the head was sent to the shop for valve service or not, before proceeding with its assembly, carefully check the cleanliness of all...
1. Regardless of whether the head was sent to the shop for valve service or not, before proceeding with its assembly, carefully check the cleanliness of all...

Removal connecting rod and piston assemblies
Before proceeding to extract the connecting rod and piston assemblies from the engine, it is necessary to remove the cylinder head, oil pan and oil pickup...
Before proceeding to extract the connecting rod and piston assemblies from the engine, it is necessary to remove the cylinder head, oil pan and oil pickup...

Removal the crankshaft
Removal of the crankshaft is only possible with the engine removed from the vehicle. This means that the flywheel/drive plate, crankshaft pulley, timing...
Removal of the crankshaft is only possible with the engine removed from the vehicle. This means that the flywheel/drive plate, crankshaft pulley, timing...

Cleaning and checking the condition of the cylinder block
Cleaning 1. Remove all externally mounted components and sensors from the unit. 2. Using a blunt punch, press the edge of the release plug and turn it in its...
Cleaning 1. Remove all externally mounted components and sensors from the unit. 2. Using a blunt punch, press the edge of the release plug and turn it in its...

Honing of cylinder mirrors
1. Before assembling the engine, honing of the cylinder mirrors is mandatory in order to achieve the correct fit of the piston rings on them, ensuring proper...
1. Before assembling the engine, honing of the cylinder mirrors is mandatory in order to achieve the correct fit of the piston rings on them, ensuring proper...

Checking the condition of the connecting rod and piston group components
All engines 1. The connecting rod and piston assemblies must be thoroughly cleaned beforehand. The piston rings must be removed. Piston rings must be replaced...
All engines 1. The connecting rod and piston assemblies must be thoroughly cleaned beforehand. The piston rings must be removed. Piston rings must be replaced...

Checking the condition of the crankshaft
1. Use a sharpening stone, file or scraper to remove burrs from the edges of the oil holes. Chamfering the edges of oil holes 2. Wash the crankshaft with...
1. Use a sharpening stone, file or scraper to remove burrs from the edges of the oil holes. Chamfering the edges of oil holes 2. Wash the crankshaft with...

Checking the condition of the main and connecting rod bearings of the crankshaft
Checking the status Although crankshaft bearings must be replaced during a major engine overhaul, the old bearings should be retained for careful examination...
Checking the status Although crankshaft bearings must be replaced during a major engine overhaul, the old bearings should be retained for careful examination...
Engine assembly procedure
Before you begin assembling the engine, make sure you have all the necessary parts, materials and tools, which include the following: Standard set of locksmith...
Before you begin assembling the engine, make sure you have all the necessary parts, materials and tools, which include the following: Standard set of locksmith...

Installing piston rings
Before installing new piston rings, check the clearances in their locks. It is assumed that the lateral clearances of the rings in the piston grooves have...
Before installing new piston rings, check the clearances in their locks. It is assumed that the lateral clearances of the rings in the piston grooves have...

Installing the crankshaft and checking the main bearing clearances
It is recommended to replace the main bearing shells regardless of their condition. Installing the crankshaft is the first step in the actual engine assembly...
It is recommended to replace the main bearing shells regardless of their condition. Installing the crankshaft is the first step in the actual engine assembly...

Installation of connecting rod and piston assemblies and checking the size of working clearances in the connecting rod bearings of the crankshaft
When performing a major overhaul of the engine, it is recommended to replace the piston wheels and connecting rod bearing liners regardless of their condition....
When performing a major overhaul of the engine, it is recommended to replace the piston wheels and connecting rod bearing liners regardless of their condition....
Test run and running-in of the engine after major repairs
When starting the engine for the first time after completing its repair, it is imperative to have a class B fire extinguisher on hand! All models After...
When starting the engine for the first time after completing its repair, it is imperative to have a class B fire extinguisher on hand! All models After...
This section is available on russian, bulgarian, belarusian, ukrainian, serbian, croatian, romanian, polish, slovak, hungarian
See similar ones from other Opel car manuals:
▶ Power unit: Engine repair Opel Astra G (1998-2004, petrol)
▶ Power unit: Gasoline engines Opel Ascona C (1981-1988)
▶ OHV power unit: Engine work Opel Kadett E (1984-1995)
▶ Power unit: Engine repair Opel Vectra B (1995-2002, petrol)
▶ Power unit: Engine overhaul Opel Omega B2 (1999-2003)
▶ Power unit: Engine repair Opel Astra G (1998-2004, petrol)
▶ Power unit: Gasoline engines Opel Ascona C (1981-1988)
▶ OHV power unit: Engine work Opel Kadett E (1984-1995)
▶ Power unit: Engine repair Opel Vectra B (1995-2002, petrol)
▶ Power unit: Engine overhaul Opel Omega B2 (1999-2003)
Share information:
- General information
- Introduction to guide
- Troubleshooting
- Vehicle device
- User manual
- Maintenance
- Power unit
- Engine repair
- Cooling system
- Power and exhaust system
- Control system
- Engine electrical equipment
- Transmission
- Clutch
- Mechanical gearbox
- Automatic gearbox
- Drive shafts
- Chassis
- Brake system
- Wheel suspension
- Steering
- Body
- Exterior
- Interior
- Doors and windows
- Heating and air conditioning
- Electrical equipment
- Equipment and devices
- Lamps and lighting
- Electrical circuits
- User manual
- Car access
- Governing bodies
- Seat control
- Heating and air conditioning
- Driving and maintenance
- Engines 1.0 and 1.2 l
- Engine repair
- Cooling and lubrication system
- Injection system
- Engines 1.4, 1.6 and 1.8 l
- Engine repair
- Cooling and lubrication system
- Injection system
- Transmission
- Clutch
- Mechanical gearbox
- Automatic gearbox
- Drive shafts
- Chassis
- Wheels and tires
- Wheel suspension
- Steering
- Brake system
- Body
- Exterior
- Doors and windows
- Electrical equipment
- Equipment and devices
- Lighting system
- Electrical circuits
- General information
- Introduction to guide
- User manual
- Maintenance
- Power unit
- SOHC gasoline engines
- DOHC gasoline engines
- Diesel engines
- Engine repair
- Cooling system
- Supply system
- Injection system (gasoline)
- Injection system (diesel)
- Exhaust systems
- Control system (gasoline)
- Preheat system (diesel)
- Charge and launch system
- Transmission
- Mechanical gearbox
- Automatic gearbox
- Clutch and drive shafts
- Chassis
- Brake system
- Front suspension
- Rear suspension
- Steering
- Body
- Ventilation and heating
- Exterior
- Interior
- Doors and windows
- Electrical equipment
- Equipment and devices
- Lamps and lighting
- Electrical circuits