


A new or refurbished head can be ordered at an Opel service station or from the manufacturer's warehouse. Due to the fact that disassembling and checking the condition of the head will require some complex and expensive devices, it may be cheaper to buy a new or refurbished head.
If equipped, immediately after removing the head, remove the oil spray jet from the engine block, clean it (them) and place it in a separate plastic bag.
Disassembling the cylinder head requires preliminary dismantling of the valve mechanism (intake and exhaust valves with associated components). It is assumed that the valve train levers and camshaft have already been removed from the head.
1. Remove the cylinder head from the engine block (see Part SOHC Gasoline Engine Repair Procedures Without Removing Them From The Vehicle, Repair procedures for DOHC gasoline engines without removing them from the vehicle or Procedures for repairing diesel engines without removing them from the vehicle of this Chapter).
2. Using a special tool, compress the spring of the first valve and remove the crackers of the split lock of the plate from the groove on the rod (use a magnetized rod, forceps, or needle-nose pliers). Carefully release the tool and remove the spring plate, spring, valve stem seal and spring seat from the valve (depending on the configuration) On SOHC engines built before September 1995, also remove the rotators.
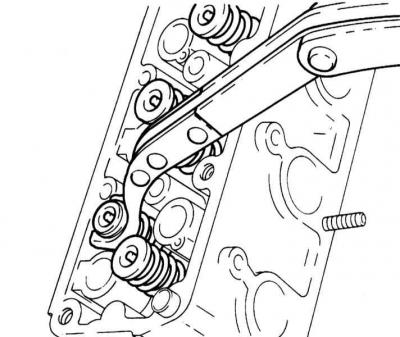
Valve spring compression for 1.0 and 1.2L SOHC engines
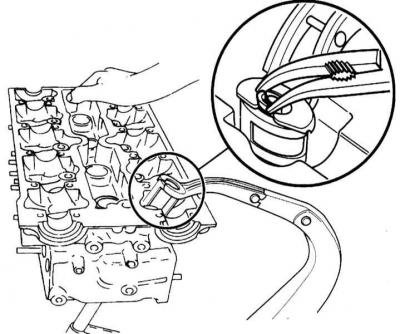
Compression of the valve spring of DOHC 1.4 and 1.6 l engines. Compression of the spring on diesel engines is performed similarly
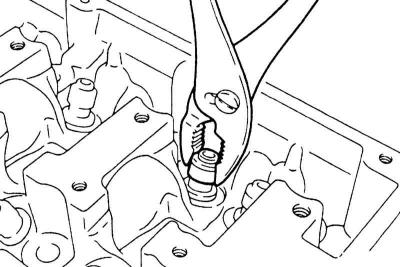
Removing the oil seal
If the crackers are "stuck" and cannot be removed, lightly tap the spring compressor tool on the retainer side with a hammer.
[Information taken from the website: OpelBook.ru]
3. Place the removed valve assembly components in a separate, clearly numbered plastic bag/plastic cup.
4. Next, remove the valve by pushing it into the combustion chamber. If the valve gets stuck in the guide bushing, push it back into the head and use a whetstone or fine-tooth file to carefully clean the edges of the groove for installing the crackers.
5. Proceed in a similar manner to dismantle the remaining valve assemblies. Place the removed components of each valve in a separate bag/cup equipped with the appropriate markings - during assembly, each part must be installed strictly in its original place.
6. Once all valve train components have been removed and stored in an organized manner, you can begin cleaning and inspecting the head (when doing a full-scale engine overhaul, first complete the engine disassembly).
Visitor comments