


Contents: General information ⬇ Tyre designation ⬇ Checking the condition of the tires ⬇ Wheel rotation ⬇
General information
1. The tire sizes approved for installation on the models described in this Manual and the standard air pressure in the tires for the front and rear wheels are given in Specifications to the Chapter "Controls and Operating Techniques". The plate with the standard air pressure values for a specific model is pasted on the inside of the fuel filler cap. Tires of the same size, the same design, the same tread pattern and the same manufacturer must be installed on one axle of the vehicle. The authors of this Manual strongly recommend that, if necessary, the entire set of tires be replaced at the same time.
Tyre designation
Example: 195/65 R 15 91 H
- 195 - Tire width in mm
- 65 - Cross-sectional ratio in % (the cross-sectional height of the tire is 65% of the width)
- R - Radial design (Radial) 15 Disc diameter in inches
- 91 - Load capacity indicator (for example: 91 corresponds to 618 kg)
- N - Designation of the permissible maximum speed (the decoding of the letter designations is given in the Specifications)
Tyre speed categories (designations):
- Q - 160 km/h
- S - 180 km/h
- T - 190 km/h
- H - 210 km/h
- V - 240 km/h
- ZR - over 240 km/h
- W - 270 km/h
- Y - over 270 km/h
Note: Note "REINFORCED" at the end of the tire marking means reinforced performance.
2. The most optimal tire size for a specific model is installed by the manufacturer. Before installing tires of a different size on a vehicle, it is imperative to consult with specialists at an Opel service station. Remember that installing other tires may change the handling characteristics, affect the braking properties and the functioning of the vehicle's electronic motion control systems.
Note: When using tires of a different size, it may be necessary to reprogram the electronic speedometer and some other electronic systems. Do not forget to change the plate with standard air pressure indicators in the tires.
3. When using tires with directional tread pattern, when installing them, make sure that the direction of the tread pattern coincides with the direction of the vehicle. As a rule, the direction of rotation is indicated by a special symbol (e.g. arrow) on the sidewall of the tire.
4. Some types of tires have protective thickenings around the entire perimeter of the disk, designed to protect alloy wheels from damage. When installing such tires on regular steel wheels, only original protective/decorative caps from Opel can be used.
5. On models equipped with a tire pressure monitoring system, when using winter tires or when installing tires of a different size, at the owner's request, sensors of the corresponding system can be additionally installed on these wheels. If the wheels are changed without installing sensors, the system will not show changes in the air pressure in the tires. It is recommended that the installation of sensors be entrusted to service station specialists.
6. Some models may be equipped with a special compact type wheel or a tire repair kit instead of a full-size spare wheel. Remember that the compact type wheel is intended only to be able to get to the nearest service station - at the first opportunity, repair the damaged wheel and perform a reverse replacement.
Note: Similar requirements apply to the use of a spare wheel with a summer tire instead of a wheel with a winter tire. When using tires with a directional tread pattern, as soon as possible (if necessary) remount the tire so that the tread pattern direction matches the direction of travel.
7. Currently, some models can be equipped with puncture-resistant tires (RFT). These tires have markings on the sidewall ROF or SSR (depending on the manufacturer) and are installed only on alloy wheels approved by Opel (this also applies to winter tires).
Note: RFT tires cannot be installed together with regular tires, even on different axles of the vehicle.
8. Puncture-resistant tires have self-supporting, reinforced sidewalls, due to which they do not lose their shape when the pressure drops, and allow you to continue driving in case of a puncture or some other damage. In this case, the controllability and running characteristics of the car may change, the braking distance is extended - it is necessary to coordinate the driving style and speed with the changed conditions. On a flat tire, you can continue driving at a maximum speed of no more than 80 km/h and at a distance of no more than 80 km.
Attention! The use of a tire repair kit is not permitted for RFT tires! Contact an Opel service station as soon as possible!
9. Installation of puncture-resistant tires is permitted only on vehicles equipped with the ESP systemPIus and tire pressure loss monitoring system/tire pressure monitoring system.
Attention! Equipping a vehicle with RFT tires does not relieve the driver from the obligation to regularly check the air pressure in them and, if necessary, make the appropriate adjustments!
10. When installing wheels with winter tires on a car, they must fully comply with the design, size and load capacity of the wheels being replaced. It is permissible to install only front or only rear wheels with winter tires, but the greatest effect is achieved by replacing the entire set of tires - when driving on snowy or slippery roads, winter tires have better grip and traction characteristics.
Attention! The maximum permissible speed for winter tires is lower than for summer tires - follow the recommendations of tire manufacturers and the requirements of the Road Traffic Regulations (RTR)!
11. If necessary, anti-skid chains can be installed on the front (driving) wheels of the vehicle. The chains must match the size of the tires and be tightly and securely fastened to them. After installing the chains, it is necessary to remove excess links to avoid damage to the body surfaces when the wheels rotate - the vehicle must be driven at low speeds up to 50 km/h. If the caps of steel wheels come into contact with the chain links, the caps should be removed. The authors of this Manual recommend using Opel-approved small-link anti-skid chains whose height, together with the connecting link of the chain, on the running surface and on the inside of the tyre does not exceed 15 mm. Snow chains are used when driving on heavily snow-covered road surfaces and are not effective on dry roads, and may also cause the chains to break.
Note: Local regulations may prohibit the use of chains - please check with your local authority for current regulations.
Warning! The installation of snow chains is prohibited for the compact emergency wheel 115/70 R! If, in the event of a puncture of the front tyre, it is necessary to continue driving with snow chains, the compact wheel must be mounted on the rear axle and the rear wheel on the front axle.
Checking the condition of the tires
12. A conscientious attitude to regularly checking the condition of the tires will allow the driver to avoid annoying delays associated with the failure of a wheel while driving. In addition, the nature of the wear of the treads can be used to identify in advance any developing defects in the components of the suspension and steering gear. Curbs should be driven over at low speed and, if possible, at a right angle. Driving over sharp curbs can lead to hidden damage to tires and wheels, which only becomes apparent later. When parking, do not press the wheels against the curb.
13. The wheels included in the standard equipment of the vehicles discussed in this Manual are equipped with special tire wear indicators (TWI) (see contrast illustration 5.13a) located in the recesses of the tread pattern around the entire perimeter of the wheel at equal intervals - their position is marked on the side surface of the tire. The minimum permissible tread depth is 1.6 mm in which the pointers protrude from the recesses.
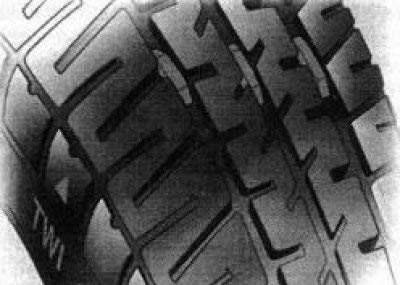
5.13a Tread Wear Indicators (TWI)
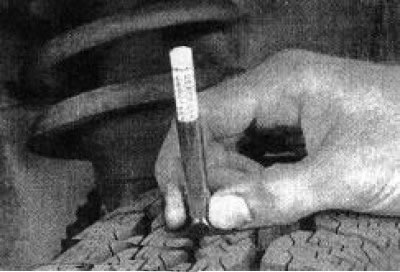
5.13b To assess the degree of tread wear, special inexpensive profile pattern depth gauges are produced
You can assess the intermediate degree of tread wear using a special inexpensive device (see accompanying illustration 5.13b), - ask in car accessory stores or at a service station. If the wear of the front tires exceeds the wear of the rear tires, rotate them (see below). To ensure guaranteed driving safety, do not wait for the tread to wear to the limit; it is recommended to replace the tires when the tread depth remains 2-3 mm (winter tires - 4 mm).
Attention! The risk of aquaplaning increases especially when the tread pattern is low!
14. Look out for any signs of uneven tread wear (see accompanying illustration). Such local defects as cup-shaped wear, flattening, etc., usually owe their occurrence to violations of the angles of installation of the front wheels, or the balancing of the latter. To identify and eliminate faults, the car should be driven to a specialized auto service workshop or service station.
15. Carefully inspect the tires of all wheels for cuts, punctures and foreign objects stuck in the grooves of the tread pattern. Sometimes a punctured wheel continues to hold air inside itself for some time due to the fact that the object that punctured the tire continues to remain stuck in it. The reason for the slow deflating of the tire may be a defective valve nipple of the tire inflation valve - check the condition of the nipple (see accompanying illustration 5.15a). Carefully inspect the tread for foreign objects stuck in it and signs of a leak in the seal of the repair "plugs" used to repair small punctures in the tire. It is quite easy to verify the presence of a puncture - just wet the suspected area of the tire surface with a solution of soapy water (see accompanying illustration 5.15b) - if there is a puncture, the solution will start to bubble. Small punctures are usually easily repaired in tire shops.
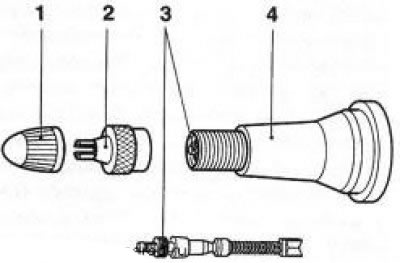
5.15a If the wheel is constantly "deflating", you should check the condition of the inflation valve nipple
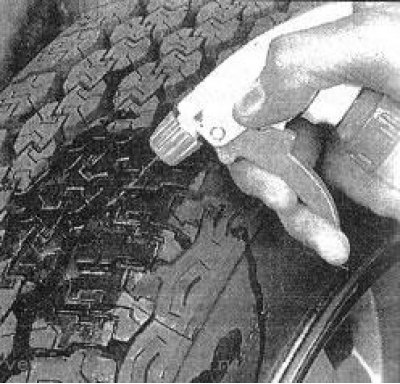
5.15b If the valve is OK, then there is a minor defect in the tyre, which can be detected by wetting the tread with a solution of soapy water
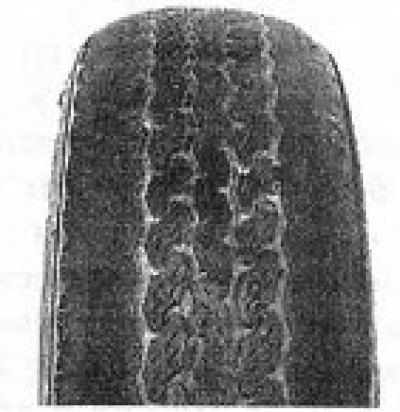
Insufficient tire inflation pressure |
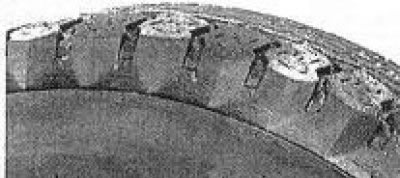
Cup-shaped defects |
The following are possible reasons for the formation of cup-shaped defects:
- The tires are underinflated or there is a mechanical deviation (wheel imbalance or disc deformation).
- The steering rods or steering pendulum arm have become loose, or the listed components are worn out.
- Front suspension components are damaged, worn, or loose.
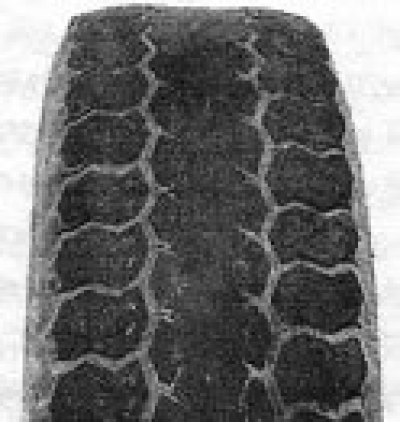
Tire inflation pressure too high |
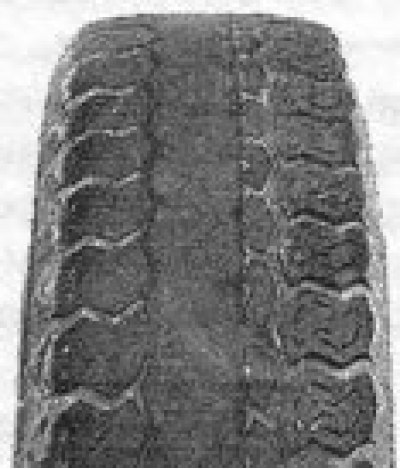
The toe-in adjustment is out of adjustment or the wheel camber is too great |
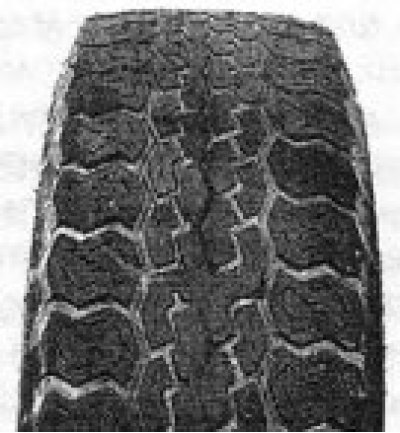
Flaky tread wear caused by wheel misalignment
16. Carefully inspect the inner walls of the tires of all four wheels for any signs of brake fluid leakage. If any are found, immediately check the condition of the corresponding brake mechanisms and the hydraulic lines connected to them.
17. Maintaining the required tire inflation pressure will significantly extend the service life of the wheels, and will also ensure maximum comfort when driving and will not reduce the car's controllability. Excessively low pressure can lead to strong heating of the tires, internal damage and, due to this, at high speeds - to peeling of the running surface of the tires and even to rupture. Hidden damage to tires cannot be eliminated by subsequent adjustment of the air pressure. Remember that it is almost impossible to correctly determine the tire pressure by eye, especially when it comes to radial tires and even more so when it comes to puncture-resistant tires. It is necessary to always have a suitable pressure gauge at hand - the readings of the compressor inflation gauges at gas stations and service stations should not be trusted.
18. Check your tire inflation pressure when the tires are cold - this means that the vehicle has not been driven more than one mile in the last three hours. Remember that increasing the pressure on 0.3-0.6 kgf/cm² as a result of the wheel heating is a completely natural phenomenon - it is impossible to adjust the pressure when the tires are hot. The check should be carried out no less often once every 14 days.
19. Remove the protective cap from the tire inflation valve. To make it easier to remove the caps, use the special key stored on the inside of the fuel filler cap (see accompanying illustration 5.19a).
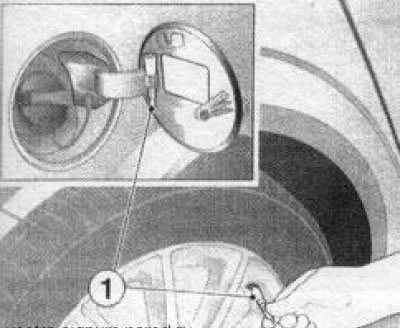
5.19a Wheel valve cap remover
Note: On vehicles with a tire pressure monitoring system, the valve cap wrench has an adapter that can be used to install a pressure gauge to check the tire pressure.
Press the pressure gauge nozzle firmly against the valve outlet, squeezing the nipple stem (see accompanying illustration 5.19b). Read the reading and compare it with the standard data, adjust the pressure if necessary.
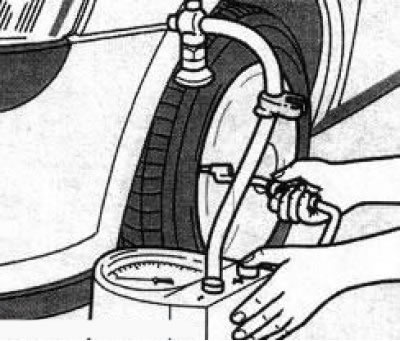
5.19b Checking tire inflation pressure regularly will extend the service life of your wheels (don't forget about the spare tire)
20. Don't forget to screw the valve cap back on to prevent moisture and dirt from getting into the valve. Check the pressure in all wheels, including the spare.
21. Tires, like any rubber products, get old, even if the car is used or operated at a low intensity - you should not install new ones or continue using old wheels if more than a year has passed since their manufacture 4 years old. If the spare tire has not been used for 6 months, its use is permissible only in extreme cases and only at low driving speeds. Never use used tires whose origin is unknown to you.
22. Installation of protective/decorative caps may change the cooling conditions of the brake mechanisms - use only caps approved by Opel for this model, preferably original ones.
Wheel rotation
23. Wheel rotation should be performed when signs of uneven tread wear are detected. The rotation procedure is shown in the accompanying illustration; the spare wheel is not involved in the rotation.
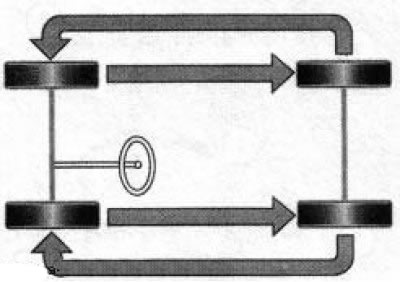
5.23 Rotation order of impellers
24. When equipping your vehicle with tires with a directional tread pattern, ensure that they are installed correctly while maintaining the direction of rotation of the wheels.
25. When rotating, the vehicle must be raised off the ground - take advantage of this opportunity and also check the condition of the brake system components. A detailed description of the wheel changing procedure is provided in Section "Jacking and towing". Make sure the vehicle is securely fixed in the raised position. Clean the wheel assemblies thoroughly from the inside at each rotation.
26. After completing the rotation, check the tire inflation pressure and adjust it according to regulatory requirements. Make sure the wheels are securely fastened with bolts (ideally, wheel bolts should be tightened with a torque wrench).
The tightening torque for wheel mounting bolts is 110 Nm.
Visitor comments