
Attention: Do not open the cap of the expansion tank and do not remove the thermostat until the engine has completely cooled down! see also Section 2.
General information
1. The thermostat is designed to speed up the engine warm-up process and divides the cooling system into two circuits: large and small. Until the coolant temperature reaches a certain value (as a rule, thermostats are adjusted to a temperature of 80-90°C) the thermostat valve is closed and the liquid circulates through the small circuit without entering the radiator. As a result, the engine quickly warms up to normal operating temperature. When a certain threshold value of the coolant temperature is exceeded, the thermostat filler begins to expand and opens the valve - the liquid begins to circulate through a large circuit through the radiator.
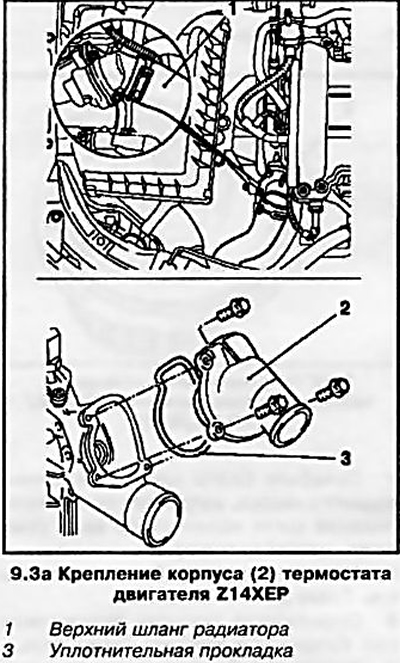
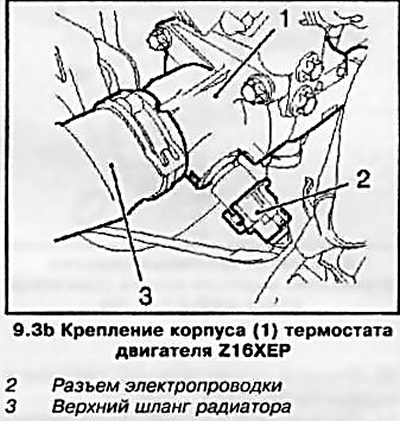
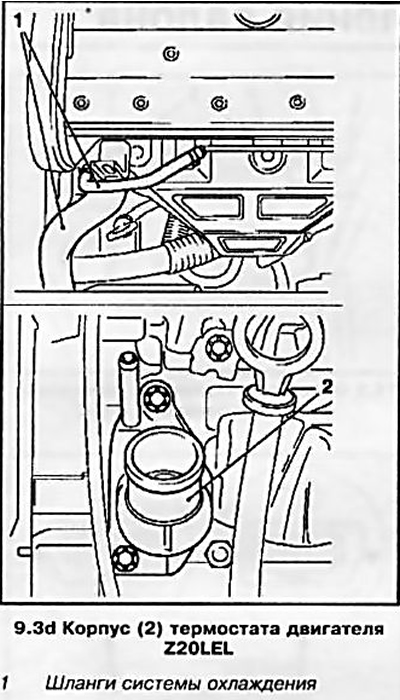
2. The thermostat housing is attached to the engine. The location of the thermostat may vary depending on the layout of the powertrain, but it is easy to find - it is always connected to the upper radiator hose.
Withdrawal
3. On gasoline models, the thermostat housing is open and does not require special preparatory work before removal (except for Z22YH engine). The cooling system needs to be emptied (see Section 3), disconnect all hoses and wiring from the thermostat housing.
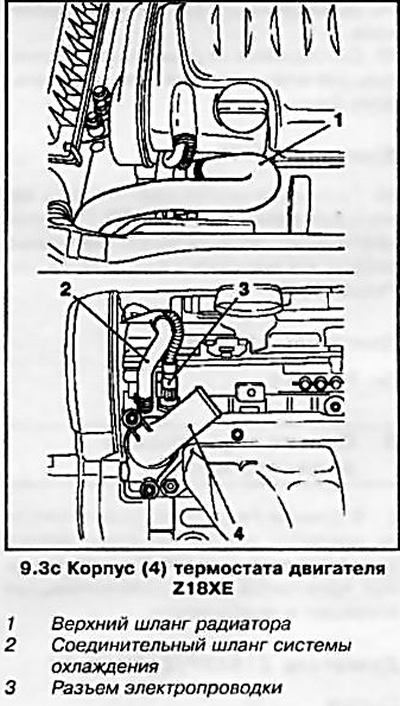

Note: On the Z18XE engine, you must first remove the engine cover (see chapter 2).
Then remove the fixing screws (see resist. illustrations), remove the thermostat housing and remove the operating element. On the 222YH engine, the thermostat housing is installed under the exhaust manifold - in addition to the above work, it is necessary to remove the manifold protection. Turn out fixing bolts and a hairpin (see illustration 19.3e) and remove the thermostat housing together with the cooling system pipe.
4. The layout of the power units of diesel models is somewhat more complicated, and in order to remove the thermostat housing, it may be necessary to dismantle components that block access to it, such as a battery with a pallet, intake ducts, and in some cases fuel lines. Before performing work, locate the thermostat housing and determine which components must first be removed.
Examination
5. The main reason for the failure of the thermostat is the aging of the filler and the loss of its ability to significantly change its volume depending on the temperature. During operation, mechanical damage to the thermostat valve may also occur.
6. The thermostat can be checked beforehand without removing it from the engine. With the engine running, open the hood and touch the upper radiator hose.
Attention: Be careful - at a high temperature of the coolant, you can burn your hand!
If the engine has just started and has not had time to reach operating temperature, and the liquid in the upper hose is already warm, then the thermostat valve is not closed. If the indicator lamp is activated (see chapter «Controls and methods of operation», Section 16) coolant temperature on the instrument panel, and the upper pipe is cold - it is guaranteed that the valve does not open a large circuit.
Note: This is only an approximate way to check, and you need to be sure that all other components of the cooling system and temperature control are functioning properly, the coolant level is normal.
Follow the recommendations given in the section on troubleshooting the cooling system.
7. The most accurate results are obtained by checking the thermostat on a workbench.
8. Remove the thermostat from the engine (see above).
9. Tie a piece of wire to the thermostat assembly and lower it into a container filled with water (see resist. illustration). Put the thermometer in there.
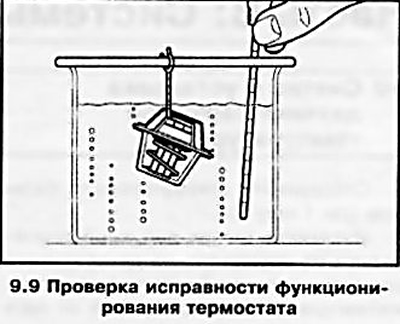
Attention: Make sure that the thermometer and thermostat do not come into contact with the walls and bottom of the container!
10. Start slowly heating the water, watching the change in the thermometer readings. The beginning of the opening of the valve should not occur before the water temperature reaches 80°C. The thermostat must also be replaced if the valve does not start to open when the water is heated to 92°C or more.
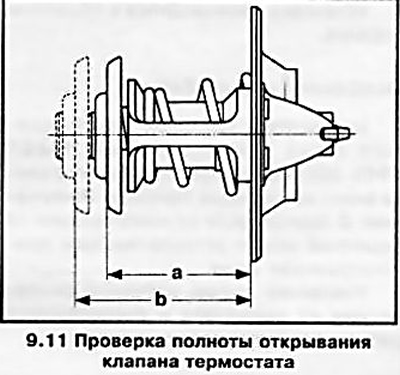
11. Estimate the value of the full opening of the valve, - the nominal value is b - a = 8 mm (see resist. illustration). If abnormal, replace the thermostat.
Installation
5. Installation is carried out in reverse order. Pay attention to the following points:
- a) The mating surfaces must be thoroughly cleaned and all sealing elements / sealant replaced;
- b) When installing in a casing, orient the thermostat correctly;
- c) The fixing bolts of the cover must be tightened with the required force;
- d) After connection, the position of all hoses and pipes must correspond to the original position, without kinks or twisting.
6. Fill the system with coolant (see Section 3).
7. Start engine, warm up to operating temperature and check for leaks.
Visitor comments