
Attention: Any work on maintenance or repair of the cooling system should be carried out on a cold engine! See also the warnings at the beginning Section 2.
1. Based on the operation to remove the radiator on models with a Z16XEP engine. For other engines, only additional operations or features of this procedure.
Z16XEP engine (without air conditioning)
Withdrawal
1. Disconnect the battery (see chapter 5).
2. Drain the coolant (see Section 3).
3. Disconnect the wiring connector on the radiator and lower the car.
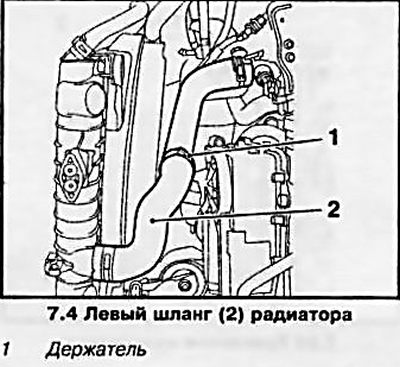
4. Loosen the clamp on the left radiator hose and slide it back. Separate the hose from the radiator and release from the holder (see resist. illustration).
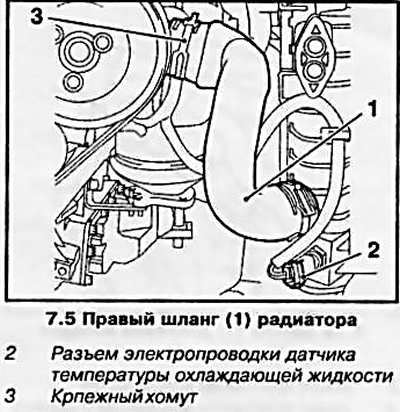
5. After loosening the mounting clamp and sliding it back (see resist. illustration), remove the right radiator hose from the thermostat housing, and disconnect the coolant temperature sensor harness connector.
6. Remove the decorative grille (see chapter 11).
7. Remove the bumper cover (see chapter 11).
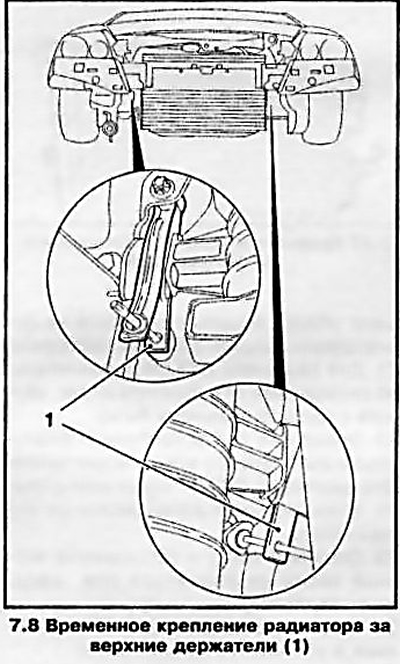
8. Secure the heatsink with a suitable tool or wire to the top brackets (see resist. illustration).
9. Mark with a marker the installation position of the lower radiator holders, unscrew the 4 fixing bolts and remove the radiator holders from the front suspension (see resist. illustration).

10. Remove the clips from the top holders and remove the heatsink along with the fan.
11. If necessary, remove the fan shroud from the heatsink.
Examination
12. Once removed from the vehicle, the radiator can be inspected for signs of leaks, damage, or abnormalities in the internal patency of the heat exchanger.
13. The remains of insects and vegetation can be removed from the space between the heat exchanger plates by blowing with compressed air (don't forget to wear safety goggles!), or scrubbing with a soft brush. Take care not to bend the thin heat exchanger plates or cut your fingers on them. If necessary, before installation, the radiator can be flushed by introducing water from a garden hose into the interior (see Section 5).
14. Check up a condition of rubber support of a radiator, in case of need make replacement of the failed components.
15. Sources of small leaks can be sealed with a suitable sealant (act in accordance with the manufacturer's instructions). Any more complex repairs should be carried out only in a specialized workshop using the necessary equipment.
Installation
16. If the radiator is being replaced, reinstall all attachments from the old one on the new radiator and install the fan shroud.
15. Fasten the radiator with a suitable tool in the upper supports and, observing the markings, install the lower holders on the subframe.
16. Further installation is carried out in the reverse order to the dismantling of the components.
Features of the Z14XEP engine (without air conditioning)
17. Disconnect from a radiator a connecting hose going to a broad tank.
Features of Z20LE engines (L/R/H)
Note: Description applies to Z20LEL and Z20LER engines. Radiator removal operations for the Z20LEH engine have some differences.
18. Remove the boost air pressure sensor (see resist. illustration) and disconnect the air duct from the cooler.
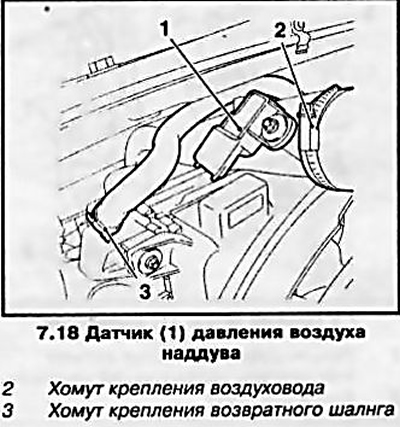
19. Disconnect the turbocharger cooling return hose from the radiator (see illustration 7.18) and remove it from the holder.
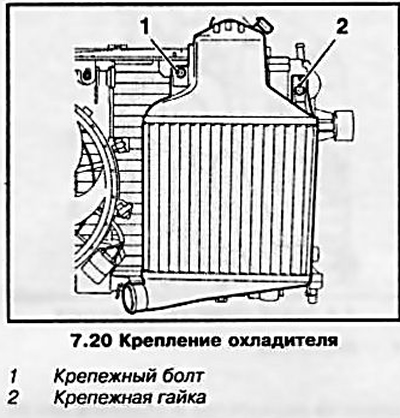
20 Remove the mounting bolt and nut and separate the intercooler from the condenser (see resist. illustration). Tilt the cooler in the lower holders forward and remove it.
Note: For a better view, the cooler module is shown in the removed state in the illustration.
21. For the 220LEH engine, additionally disconnect the hose going to the expansion tank from the radiator.
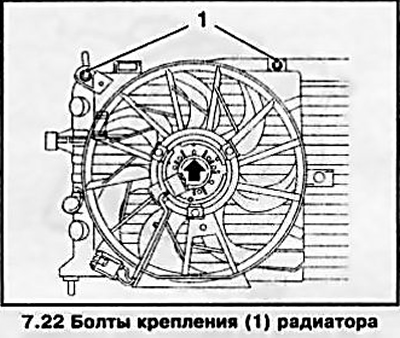
22. Turn out bolts of fastening of a radiator and pull out it upwards.
Note: For the Z20LEH engine, additionally disconnect the fan casing from the intercooler.
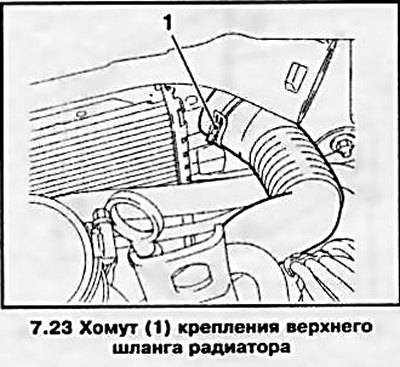
23. Loosen the clamp and disconnect the upper hose from the radiator (see resist. illustration).
24. Raise the car on a lift and place it on stands.
25. Mark the installation position of the air conditioner wiring harness fasteners and cut them, disconnect the wiring harness from the radiator.
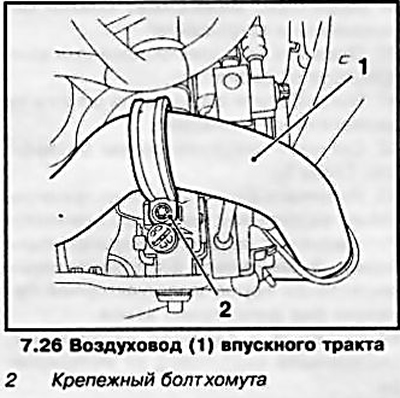
26. Turn out a fixing bolt, remove a collar and remove an air duct of an inlet path (see resist. illustration) from the cooler.
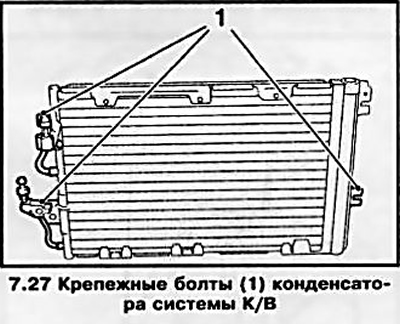
27. Turn out bolts of fastening (see resist. illustration) and remove the capacitor from the radiator.
28. Fasten the condenser together with the intercooler to the front panel with wire.
29. Being careful remove a radiator from holders and take it downwards.
30. Installation is carried out in the reverse order.
Features of the Z22YH engine (without air conditioning)
31. Remove the air cleaner (see chapter 4).
32. Remove the right engine lifting eye.
33. Remove the battery and battery tray (see chapter 5).
34. Disconnect the upper hose of the cooling system from the cylinder head.
35. Disconnect from a radiator a connecting hose going to a broad tank.
Z17DT engines (L/H)
36. The procedure for removing the radiator is the same as for the Z16XEP engine. In this case, it is necessary to carry out preparatory work, as when removing the fan (see Section 6).
Engine Z19DTH
See Section 6.
Visitor comments