


Contents: Engine Z16XEP/Z17DT(L/H) ⬇ Features of the Z14XEP engine ⬇ Features of Z18XE/ Z20LE(L/R/H)…⬇ Features of the Z13DTH engine ⬇ Features of the Z19DTH engine ⬇
1. This Section describes in detail the operation of removing the water pump only for the Z16XEP engine; for the others, only additional operations and features are provided.
Engine Z16XEP/Z17DT(L/H)
Removal
2. Disconnect the negative battery cable (see Chapter 5).
3. Remove the air cleaner (see Chapter 4).
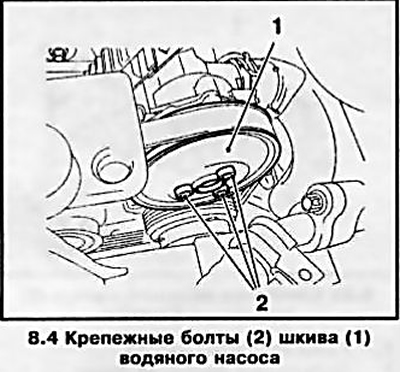
4. Loosen the water pump pulley mounting bolts while holding the crankshaft pulley from turning (see accompanying illustration).
5. Remove the multi-rib belt (see Chapter 2).
6. Drain the cooling system (see Section 3) and lower the car.
7. Remove the bolts and water pump pulley.
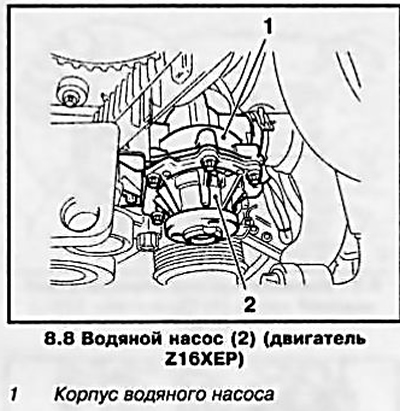
8. Unscrew the 5 mounting bolts and remove the water pump, separating it from the housing (see accompanying illustration).
Installation
10. Clean the mating surfaces on the cylinder block and on the pump and the threads: 3 threaded holes on the pump for the pulley mounting bolts and 5 threaded holes in the housing.
11. Z16XEP Engine: Apply a thin bead of sealant to the mating surface (for example, OPEL-90 542114) and install the water pump in place, securing it with new screws (Tough M6x25).
12. Engine Z17DT(L/H): Replace the sealing gasket and install the water pump - screw in 6 M8x30 bolts and tighten them alternately with the required force.
13. Install the pulley on the pump and screw in the mounting bolts by hand without tightening them.
14. Install the multi-rib belt (see Chapter 2) and tighten the pump pulley mounting bolts.
15. Install the air cleaner and connect the battery. Fill the cooling system.
Features of the Z14XEP engine
16. To remove the water pump, you must first remove the right engine support (see Chapter 2).
17. Remove the mounting bolts (see accompanying illustration) and remove the water pump from the timing cover.
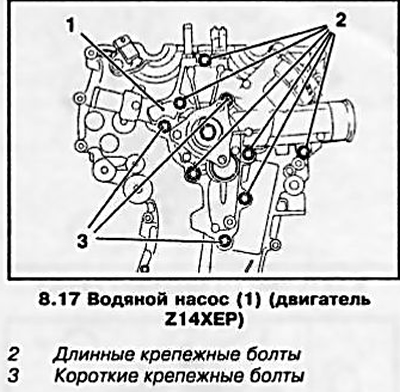
Note: The mounting bolts come in different lengths - remember the order in which they are installed.
Make sure that the two guide bushings remain in place - they must ensure the correct installation of the pump.
18. Installation is carried out in the reverse order of removal.
Features of Z18XE/ Z20LE(L/R/H) engines
Note: On these engine models, the water pump is driven by a toothed belt.
19. Drain the coolant (see Section 3).
20. Remove the timing belt and tension roller (see Chapter 2).
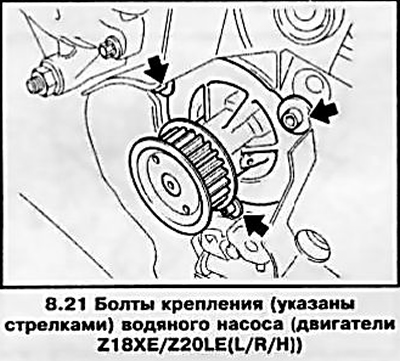
21. Remove the 3 mounting bolts and remove the water pump (see accompanying illustration).
22. Installation is carried out in the reverse order of removal. Thoroughly clean the mating surfaces of the cylinder block and the pump, lightly lubricate the mating surface on the cylinder block and the sealing ring of the pump housing with silicone grease (for example, OPEL 19 70206 - white).
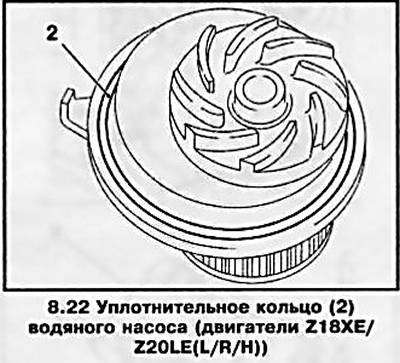
Note: The sealing ring must be replaced without fail (see accompanying illustration).
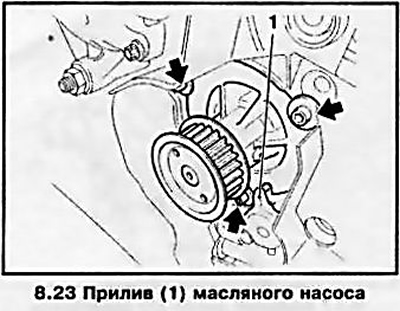
23. When installing, make sure that the oil pump lug fits into the water pump groove (see accompanying illustration) and tighten the pump mounting bolts to the required torque.
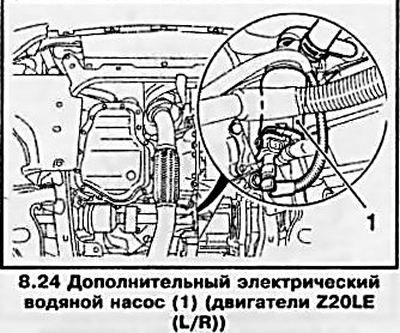
24. It is necessary to keep in mind that Z20LEL/LER engines are equipped with an additional electric water pump (see accompanying illustration).
Features of the Z13DTH engine
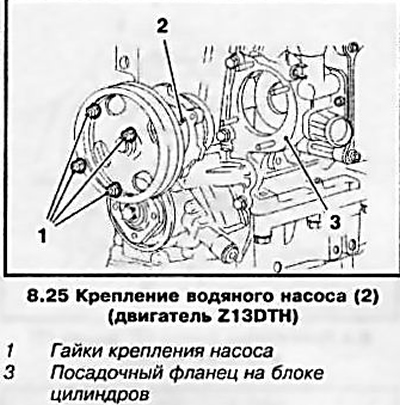
25. Unscrew the 4 mounting nuts and remove the water pump from the cylinder block (see accompanying illustration).
Material was taken from a resource opelbook
26. When installing the pump, do not forget to replace the sealing gasket. Tighten the nuts diagonally with the required force.
Features of the Z19DTH engine
Note: On these engine models, the water pump is driven by a toothed belt.
27. Remove the timing belt and tension roller (see Chapter 2).
28. Unscrew the mounting bolts and remove the water pump (see accompanying illustration).
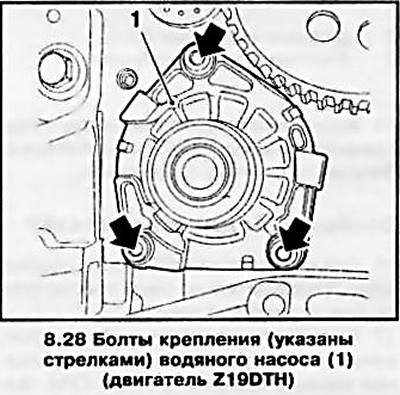
29. When installing, tighten the new mounting bolts to 25 Nm.
Visitor comments