


Contents: Emptying ⬇ Refueling ⬇
1. The coolant is replaced when servicing the vehicle in the above cases (see Chapter 1), and also mandatory when carrying out engine repairs, during which the cylinder head, cylinder head gasket, radiator, heater heat exchanger or engine were replaced. Replacement is necessary because the corrosion-protective components of the cooling mixture are deposited on engine parts made of light alloys during the running-in period and create long-term anti-corrosion protection. The amount of anti-corrosion components in used coolant is insignificant and cannot create sufficient protection on new parts. If it is necessary to drain the coolant when performing other work, it can be reused.
2. During maintenance, the condition of all hoses in the system must also be checked (see Chapter 1). Defective components are subject to replacement (see Section 4).
3. Do not forget about the precautions that must be taken when servicing the cooling system (see Section 2). You should only begin performing maintenance procedures after the engine has completely cooled down, i.e. at least several hours after the end of the trip.
Caution: When working with coolant, make sure that it does not come into contact with the toothed belt or multi-ribbed belt! The glycol contained in the coolant can damage the fabric of the toothed belt to such an extent that the belt will break after some time of operation, which in turn can lead to serious damage to the engine!
Emptying
4. On models with the corresponding configuration, it is necessary to turn off the air conditioner or set it to ECO mode.
5. Remove the expansion tank cap. Caution: If the engine is still warm, wrap the cap in a rag to avoid the risk of scalding.
6. Raise and place the vehicle on stands, remove the engine crankcase guard, (see Chapter 2, Section 5).
7. Place a clean container of appropriate volume under the radiator. For ease of draining the coolant, it is recommended to put it on the drain pipe (see accompanying illustration) place the hose and its other end into the prepared container.
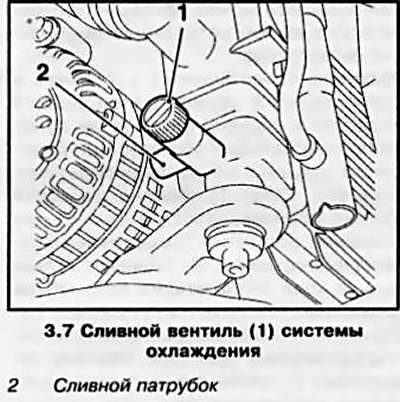
8. Open the drain valve on the radiator and drain the liquid.
9. Close the valve and lower the vehicle.
Refueling
10. Check the condition and reliability of all cooling system hoses. Replace defective components, tighten clamps (see Section 4).
11. Remove the expansion tank cap and begin slowly pouring fresh antifreeze and water mixture into the neck of the latter. Continue filling until the liquid level in the tank rises to the level of the lower branch pipe (see accompanying illustration) expansion tank.
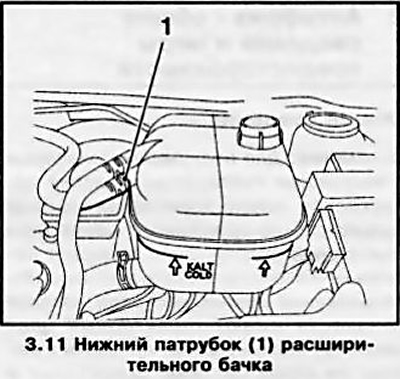
12. Replace the expansion tank cap.
13. Start the engine and allow it to warm up to normal operating temperature, while increasing the engine speed to 2500 rpm so that the first stage of the fan turns on.
14. Remove air from the cooling system by running the engine for 2 minutes at 2000-2500 rpm. The air in the cooling system is removed through the return and connecting hoses of the expansion tank (see illustration 1.2).
15. Inspect the cooling system components for signs of developing leaks, then stop the engine and allow it to cool completely.
16. If equipped, install the crankcase guard.
17. Finally, check the coolant level again and make the appropriate adjustments if necessary (see Chapter 1). Tighten the expansion tank cap.
Material copied from this resource (opelbook.ru)
Visitor comments