
2. During maintenance, the condition of all hoses in the system must also be checked see chapter 1). Defective components must be replaced (see Section 4).
3. Do not forget about the precautions that must be observed when servicing the cooling system (see section 2). The direct execution of maintenance procedures should be started only after the engine has completely cooled down, i.e. at least a few hours after the end of the trip.
Attention! Make sure that no coolant comes into contact with the toothed belt or multi-ribbed belt when working with coolant! The glycol in the coolant can damage the toothed belt fabric to such an extent that the belt breaks after some time of operation, which in turn can lead to severe engine damage!
Emptying
4. On models of the corresponding configuration, it is necessary to turn off or set the air conditioner to ECO mode.
5. Remove the cap from the filler neck of the expansion tank.
Attention! If the engine is not yet completely cool, wrap the cap with a cloth to eliminate the risk of scalding (see chapter 1, section 4)!
5 Raise and place the car on stands, remove the engine crankcase protection, (see Chapter 2, Section 5).
7. Substitute a clean container of the appropriate volume under the radiator. For the convenience of draining the coolant, it is recommended to put on the drain pipe (see resist. illustration) lower the hose and its other end into the prepared container.
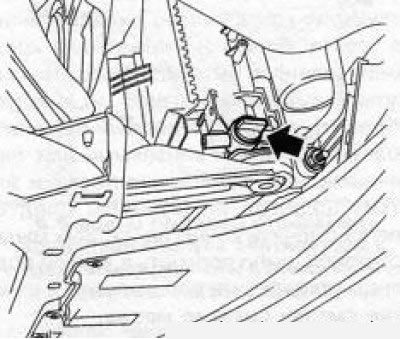
3.7 Drain valve (indicated by an arrow) cooling systems
8. Open the drain valve on the radiator and drain the liquid.
9. Close the valve and lower the car.
Refueling
10. Check up serviceability of a condition and reliability of fastening of all hoses of a cooling path. Replace defective components, tighten clamps (see Section 4).
11. Remove the cover of the expansion tank. Disconnect the quick-release hose connection of the interior heating heat exchanger.
12. Start slowly pouring a fresh mixture of antifreeze with water into the neck of the tank until liquid appears at the cut of the supply hose. Reinstall the hose.
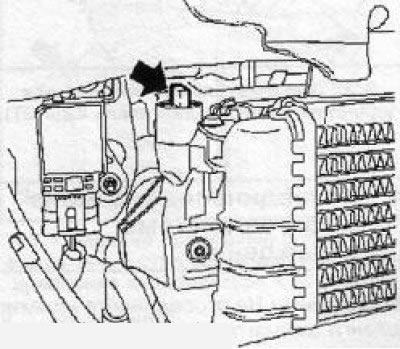
13. Continue pouring coolant into the expansion tank until the fluid level in the tank rises to the mark «KALT/COLD» (see resist. illustration) expansion tank.

3.13 Expansion tank
14. Reinstall the expansion tank cap.
15. Start the engine and allow it to warm up to normal operating temperature while bringing the engine speed up to 2500 rpm so that the first stage of the fan turns on.
16. Remove air from the cooling system, to do this, let the engine run for 2 minutes alternating engine operation 2000-2500 rpm for about 30 seconds with a 5 second idle interval. In this case, the air in the cooling system is removed through the return and connecting hoses of the expansion tank.
17. Inspect the cooling system components for signs of leaks, then stop the engine and allow it to cool completely.
18. If equipped, install the crankcase protection.
19. Finally, check the coolant level again and correct if necessary (see chapter 1). Tighten the expansion tank cap.
Features for Y30DT engine
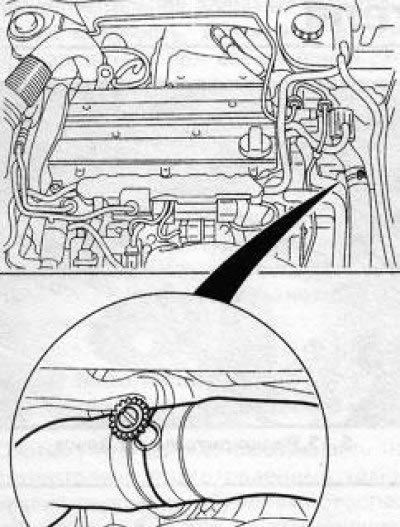
20. Before draining the liquid, additionally open the valve located on the right side of the radiator (see resist. illustration) to remove air from the cooling system. When filling the system, close the valve as soon as coolant appears at its cut.
3.20 Air bleed valve for engine cooling system Y30DT
21. To remove air after warming up and activating the first stage of the fan, the engine must operate in the mode 2000-2500 rpm longer time - approx 5 minutes.
Features for Z20NET engine
3.22 Additional vent valve (Z20NET engine)
22. An additional valve is equipped in the return hose of the cooling system (see resist. illustration) to remove air and prevent the formation of an air pocket in the upper bent section of the hose. When refueling, the valve must be open until coolant flows out through it.
Visitor comments