
Attention: Any work on maintenance or repair of the cooling system should be carried out on a cold engine!
1. This section describes in detail the operation of removing the cooling fan only for the Z16XEP engine, for the rest, only additional operations and features are given.
Z16XEP engine (without air conditioning)
2. Disconnect the battery (see chapter 5).
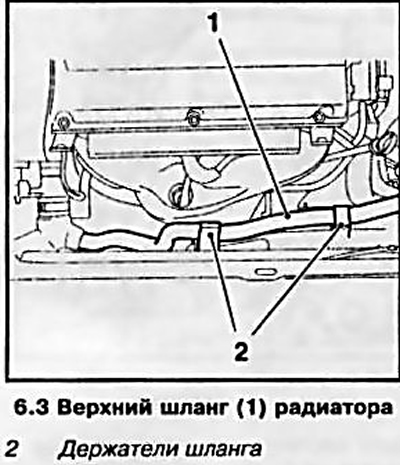
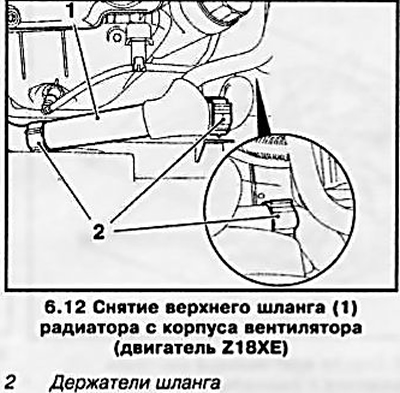
3. Release the upper radiator hose from the holders (see resist. illustration).
4. Disconnect the wiring connector on the radiator.
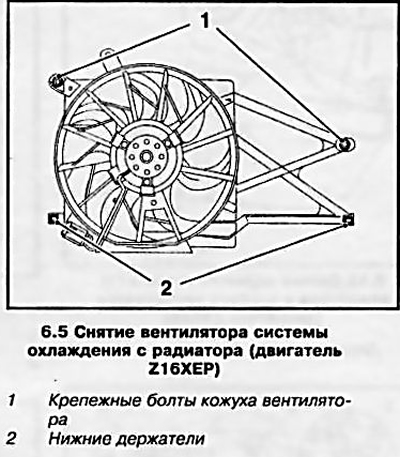
5. Remove the fan cover by unscrewing 2 bolts (see resist. illustration) and pull the fan together with the shroud upwards from the lower holders.
6. Disconnect the wiring connector and unscrew the bolt of its fastening to the casing (see resist. illustration).
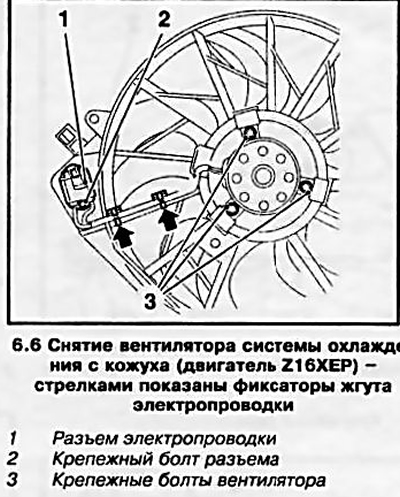
7. Release the cable harness from the clamps, unscrew the 3 fixing bolts and remove the fan motor (see illustration 6.6).
8. Installation is made in an order, the return to removal.
Features of the Z18XE engine (without air conditioning)
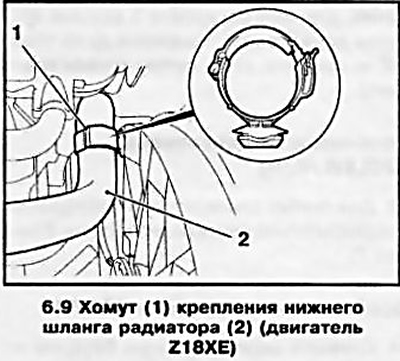
9. Remove the lower radiator hose from the fan housing, to do this, open the clamp retainer, turn the clamp 90 'and remove it (see resist. illustration).
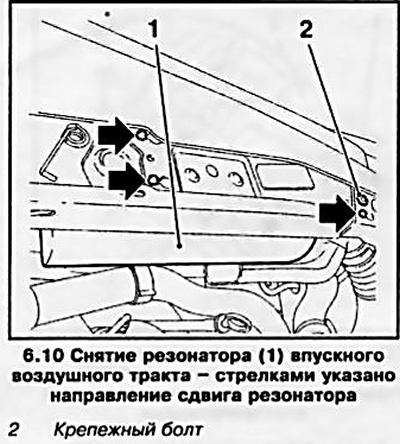
10. Remove the resonator of the intake air path, for which disconnect the air path from it, unscrew the fixing bolt and slide the resonator from the holder to the right (see resist. illustration).
Features of the Z14XEP engine (without air conditioning)
11. Remove the air intake resonator (see Z18XE engine).
12. Remove the upper radiator hose from the cooling system fan housing, to do this, open the 3 clips of the clamps of the holders, turn them at an angle of 90°and remove (see resist. illustration).
Features of Z20LE engines (L/R/H)
13. To remove the fan, you must first remove the radiator (see Section 7).
Features of the Z22YH engine
14. Remove the battery and battery tray (see chapter 5).
15. Disconnect the engine wiring harness holder and move the harness to the side.
Engine Z130TH (without air conditioning)
16. Remove the battery and battery tray (see chapter 5.
17. Remove the engine top cover (see Chapter 2, Section 2).
18. Loosen the mounting clamps and disconnect the intake duct from the turbocharger and intercooler.
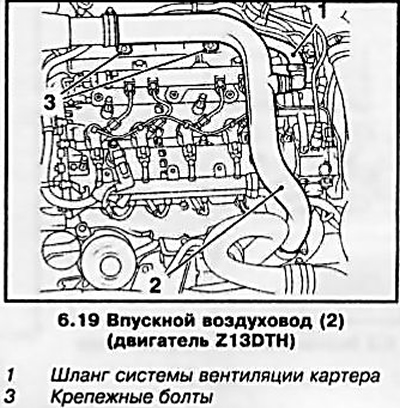
19. Disconnect the quick coupling of the crankcase ventilation hose, disconnect the 3 wiring harnesses, unscrew the 2 mounting bolts, loosen the connecting clamps and remove the air inlet pipe (see resist. illustration).
20. After loosening the clamp, remove the suction hose.
21. Release the lambda probe wiring harness from the holders in two places and take it aside.
22. Having unscrewed the mounting bolts, disconnect the fan shroud from the radiator (see resist. illustration) and disconnect from the air duct.
Features of the Z13DTH engine (air conditioned)
23. Fix the K/V condenser to the bulkhead panel by means of a wire.
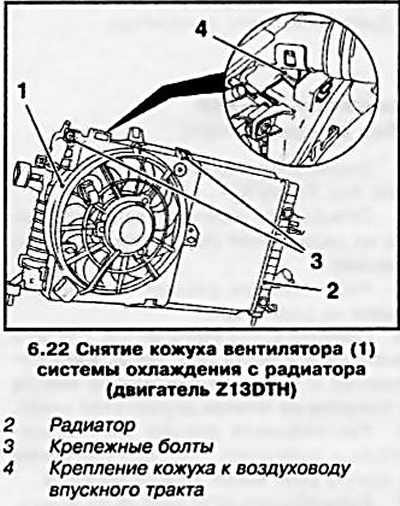
24. Disconnect the condenser with additional fan and charge air cooler (intercooler) from the radiator by unscrewing 5. fixing bolts (bolt tightening torque during installation - 5 Nm) (see resist. illustration).
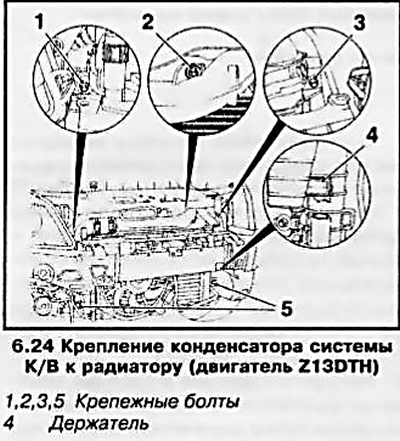
25. Release the intercooler from the holder (see illustration 6.24).
Features of Z17DT engines (L/H) (air conditioned)
26. Remove the decorative grille, (see chapter 11).
27. Remove the engine top cover (see Chapter 2, Section 2).
28. Loosen and slide back the clamps 2. and disconnect the air duct from the intercooler.
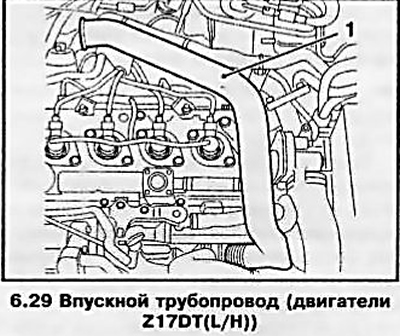
29. Release the wiring harness from the two clips, disconnect the fuel line, loosen the clamp and disconnect the crankcase ventilation system hose. Turn out 2 fixing bolts, weaken 2 collars of fastening of the inlet pipeline (see resist. illustration) and take it off.
30. Separate 2 hoses of system of cooling from a casing of the fan.
31. Remove the crankcase protection (see Chapter 2, Section 5).
32. Disconnect the fan motor connector. Cut the wiring harness clamp, after marking its position.
33. Remove the front bumper cover (see chapter 11).
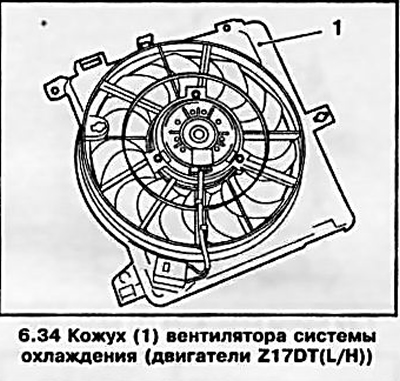
34. Turn out 2 fixing bolts and, having unrolled a casing of the fan, carefully take it upwards (see resist. illustration).
Features of the Z19DTH engine (air conditioned)
35. Remove the decorative grille (see chapter 11).
36. Remove the bumper cover (see chapter 11).
37. Remove the crankcase protection (see Chapter 2, Section 5).
38. Disconnect the fan motor wiring connector. Cut the wiring harness clamp, after marking its position.
39. Release the cooling system hose from the holders and separate it from the radiator.
Attention: Do not open the cooling circuit!
40. Separate the compressor wiring harness from the radiator.
41. Release 2 vacuum hoses from the holder on a radiator.
42. Remove the battery (see chapter 5).
43. Remove the preheat control unit upwards from the holder. Disconnect the block wiring connector.
Note: The control unit is located in front of the battery under the lock holder.
44. Loosen and slide back the clamp, disconnect the air duct from the intercooler.
45. Turn out bolts of fastening of a casing of the fan and disconnect a hose of system of cooling.
46. Fix the capacitor of the A/C system to the front panel with wire.
47. Turn out 5 bolts of fastening (see illustration 6.24) and remove the condenser with additional fan and intercooler from the radiator.
48. Remove the 2 radiator retainers and remove the radiator.
49. Separate the shroud from the fan.
Visitor comments