
Do not proceed with the procedures until the engine has completely cooled down.
Removing
Models without power steering and K / V
On vehicles with AT, the oil cooler is integrated into the engine cooling system circuit. To remove, pinch the oil hoses near the radiator. Close fittings and pipes with plugs to prevent oil leakage. After installing the radiator, fill the transmission with oil (see chapter Vehicle settings and routine maintenance).
1. Drain the coolant into a clean container by disconnecting the bottom hose from the radiator.
2. On gasoline engines remove the air intake sleeve.
3. On X14XE and X16XE engines remove the auxiliary air pump.
4. On diesel engine remove the e/motor of the fan together with a fan cover.
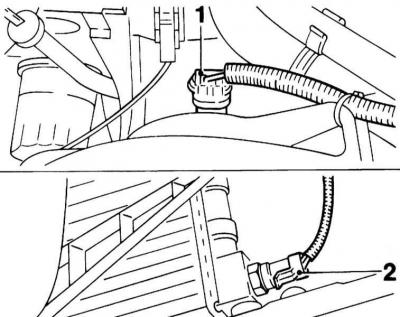
5. Separate a socket of electroconducting of the e/motor of the fan (1) and thermal switch (2).
Fan motor wiring connectors (1) and D/V temperatures (2)
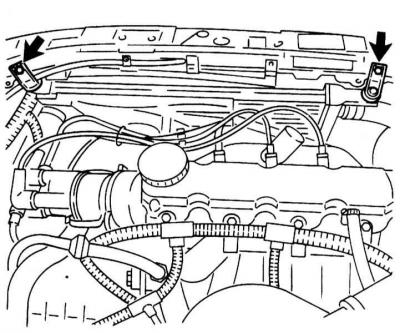
6. Disconnect the top hose of a radiator and a connecting hose going to a broad tank.
coolant hoses

7. Turn out bolts of fastening and disconnect an arm of a radiator.
Radiator bracket bolts
8. Remove the heatsink with the fan up from the bottom rubber mounts.
9. If the heatsink is being replaced, move the fan and thermal switch to the new heatsink.
Features for cars with power steering and A/C
1. Disconnect the electrical wiring from the second thermal switch on the radiator.
2. Remove both thermal switches from the heatsink.
3. Set aside the power steering fluid reservoir with hoses attached.
On 1.4 and 1.6 L DOHC engines, carefully disconnect the high pressure line from the power steering pump so that it can move slightly. To free up space, tilt the high pressure line towards the engine.
4. Give the mounting bolts and disconnect the fan housing.
Examination
1. Once removed from the vehicle, the radiator can be inspected for signs of leaks, damage, and heat exchanger leaks.
2. The remains of insects and vegetation can be removed from the space between the heat exchanger plates by blowing with compressed air (don't forget to wear safety goggles!), or scrubbing with a soft brush. Take care not to bend the thin heat exchanger plates or cut your fingers on them. Before installation, the radiator must be flushed by introducing water from a garden hose into the interior (see chapter Vehicle settings and routine maintenance).
3. Check up a condition of rubber support of a radiator, in case of need make replacement of the failed components.
4. Sources of small leaks can be sealed with a suitable sealant (act in accordance with the manufacturer's instructions). Any more complex repairs should be carried out only in a specialized workshop using the necessary equipment.
Installation
1. Installation is in the reverse order to the removal of the components. Pay attention to the following points:
- Follow the correct installation of the rubber pads of the lower radiator supports;
- Make sure that all hoses are connected correctly and securely fixed with clamps;
- Finally, refill the cooling system (see chapter Vehicle settings and routine maintenance) and inspect its components for signs of leaks.
Visitor comments