
Engines with one camshaft
Removing
The camshaft can be removed without removing the casing, only with a special tool (Vauxhall/Opel N 603850 or equivalent), that allows you to press the valve lifters.
In the case when there is no such tool, the casing is also removed. Since this removes the cylinder head bolts, we recommend that you put a new gasket on it. If the gasket is not new and breaks during installation, the block head will again have to be removed to install a new gasket, and another set of bolts will also be required.
Removal and installation of a casing are considered in the following section together with a head of the block of cylinders. It is recommended to fix the head on the cylinder block with four bolts with gaskets. to reduce the possibility of damage to the seal between the head and cylinder block.
After removing the camshaft, perform the following operations.
On carbureted engines, remove the fuel pump (chapter 4).
Remove the ignition distributor or ignition coil.
On 1.6L engines with multipoint fuel injection, remove the three bolts and remove the ignition coil panel.
On engines 1.8 and 2.0 l, remove the rear camshaft oil seal.
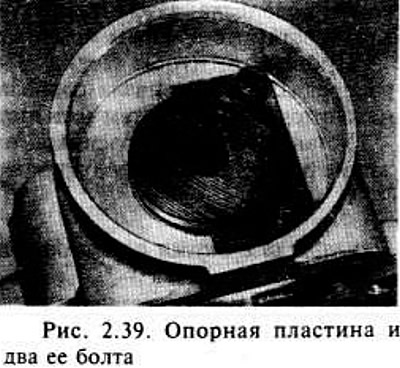
At the rear of the camshaft, unscrew the two base plate bolts with a socket wrench (it is shown in the picture), then remove it by marking the position.
Carefully remove the camshaft so as not to damage the journals.
Examination
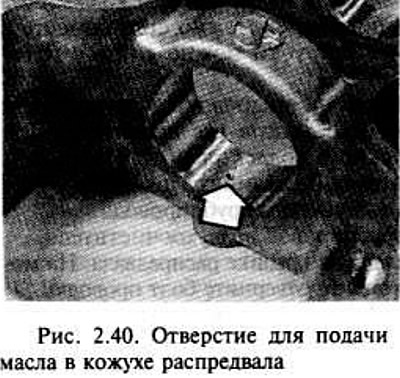
After removing the camshaft, inspect the bearings for signs of wear or chipping. Check that the oil supply holes in the camshaft housing are not clogged.
The shaft must not have scratches or burrs on the surfaces of the journals and cams. If present, replace the camshaft (after its replacement, the rocker arms must also be replaced).
Check the shaft bearing plate and replace if necessary.
Installation
It is highly recommended to replace the front camshaft oil seal if it is removed. Pry off the oil seal with a screwdriver and remove it by gently tapping, put on a new one so that it lies flush with the surface.
Begin installation by generously lubricating the bearings as well as the seal lips.
Carefully insert the camshaft into the housing at the distributor/coil side, being careful not to damage the bearings.
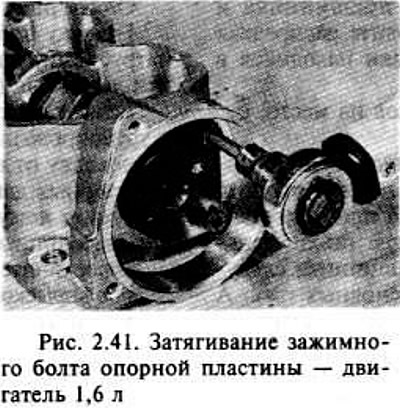
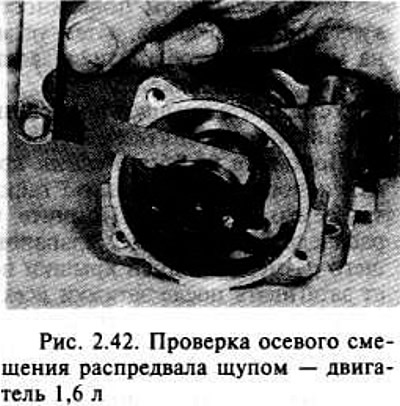
Install the base plate and tighten the fixing bolts. Check the camshaft offset along the axis with a feeler gauge. If it exceeds the limit, replace the base plate.
On 1.8 and 2.0L engines, install a new rear camshaft oil seal flush with the casing.
On 1.6L engines with multiport fuel injection, check the condition of the seals at the rear of the mounting plate and replace if necessary.
Install the ignition distributor or ignition coil if required (chapter 5).
On carbureted engines, install a fuel pump.
Where required, remove the bolts and gaskets from the cylinder head.
Install the camshaft housing.
If a new camshaft is fitted, the following burn-in schedule must be followed immediately after starting the engine:
- a) within 1 min at 2000 rpm;
- b) within 1 min at 1500 rpm;
- c) within 1 min at 3000 rpm;
- d) for 1 min at 2000 rpm.
Change engine oil (the filter does not need to be changed if the time has not come), after about 1000 km of run after installing a new shaft.
Engines with two camshafts
Removing
Remove the camshaft sprocket.
If it is necessary to remove the exhaust camshaft, remove the ignition distributor.
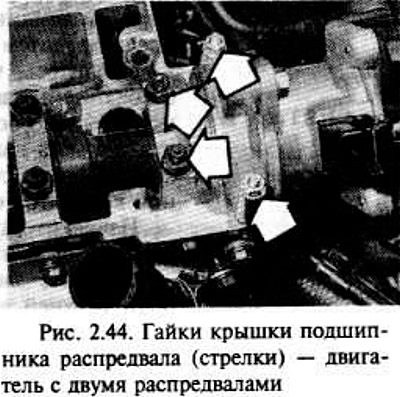
Check the markings on the camshaft bearing caps, and if not, make marks on the caps and on the top surface of the cylinder head. Before removing the bearing caps, note their location, they must then be installed exactly in place.

Before removing the camshaft, check its axial displacement. If it exceeds the allowable value, the camshaft must be replaced.
Loosen the bearing cap nuts in 1/2 turn increments.
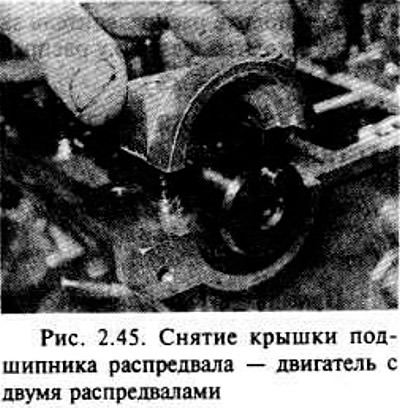
Remove the nuts of the bearing caps with washers and the caps themselves, then carefully remove the shaft.
Examination
After removing the camshaft, check the bearing surfaces for wear or chipping. If there are any, it is necessary to change the cylinder head and bearing caps as a set, since only bearings cannot be changed.
The camshaft must not have scratches or nicks on the surfaces of the journals or cams. If present, replace the camshaft.
We strongly recommend changing the front camshaft oil seal.
Installation
Start the installation by generously lubricating the contact surfaces of the cams with molybdenum disulphide paste.
Lubricate the bearing cap mating surfaces. in which the oil seal is located, and, if it is an exhaust camshaft, the bearing cap at the ignition distributor drive with an appropriate sealant (Vauxhall/Opel N 15 04 201 or equivalent).
Lubricate the surfaces of the bearing and camshaft lobes with oil, then reinstall the camshaft so that the sprocket pin is at its highest point.
Install the bearing caps to the location marked before removal.
Fit the washers and nuts of the bearing caps and progressively tighten the nuts by half a turn to the required torque. Note that when installing the exhaust camshaft, the two smaller nuts at the rear bearing cap must be tightened after all the main nuts have been tightened. Also, that the two smaller nuts should be tightened with a torque wrench with a lower setting than for the main nuts.
Lightly coat the lip of the new front oil seal with grease and install it in place.
Install the ignition distributor (chapter 5).
Install the camshaft sprocket.
Visitor comments