
Engines with one camshaft
Camshaft sprocket
The outer belt covers are removed, then the following operations follow.
Turn the crankshaft so that the No. 1 piston is at TDC.
On 1.4 and 1.6 liter engines, fix the position of the tension indicator.
Loosen the three coolant pump bolts with a socket wrench, then turn the pump to loosen the belt tension.
It is necessary to fix the camshaft so that it does not scroll, and this can be achieved in one of the two following ways.
- 1. Assemble the fixture shown in the figure and use it to fix the sprocket with the holes.
- 2. Remove the distributor cover and fix it with a wrench, grabbing the shaft by the chamfers between the cams NN 3 and 4.

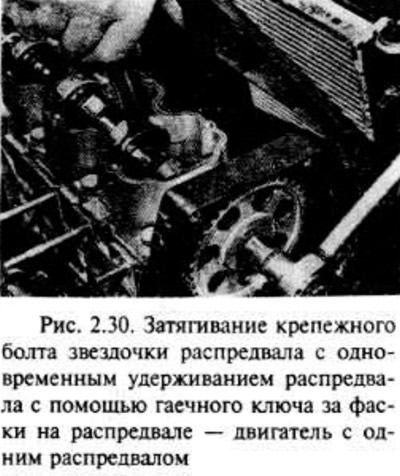
Remove the camshaft sprocket bolt, not forgetting the washer.
Remove the sprocket from the end of the camshaft.
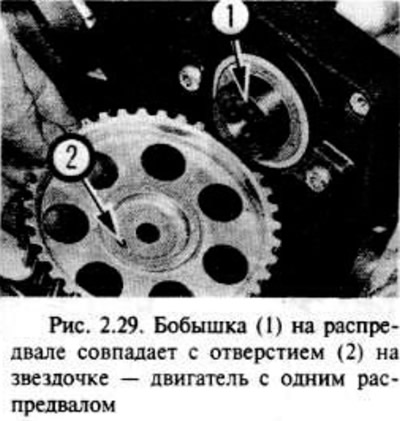
Installation begins with putting the sprocket on the camshaft (make sure the boss on the camshaft lines up with the hole on the sprocket).
Tighten the sprocket bolt to specification.
Check that the TDC marks on the camshaft and crankshaft sprocket match (piston N 1 at TDC), then put on the belt.
Adjust the timing belt tension and install the outer belt covers.
Crankshaft sprocket - removal
After removing the outer covers of the belt, the following operations are carried out.
Rotate the crankshaft, bringing the piston to TDC, and remove the crankshaft pulley.
On 1.8 and 2.0 liter engines, also unscrew the crankshaft sprocket bolt. To prevent the crankshaft from turning, or engage direct gear and ask an assistant to apply the brake (only for models with manual transmission), or remove the starter and insert a suitable tool between the ring gear teeth. Loosen the sprocket bolt (Be careful when doing this as it is very tight) and remove the gasket.
Next, lock the tension indicator lever and rotate the pump as previously indicated, then remove the belt.
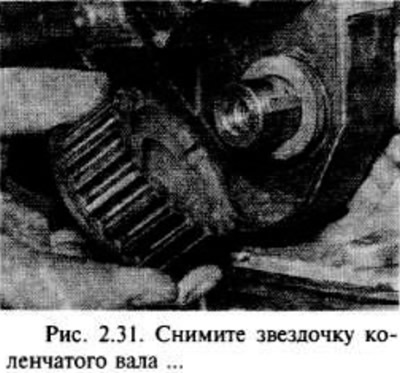
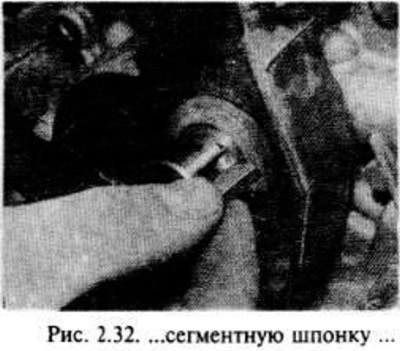
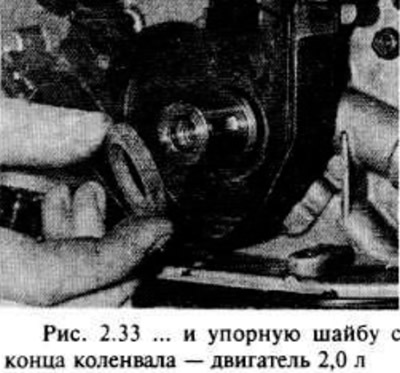
Remove the sprocket from the crankshaft using an appropriate puller. Where necessary, remove the segment key and thrust washer from the crankshaft.
Installing the crankshaft sprocket
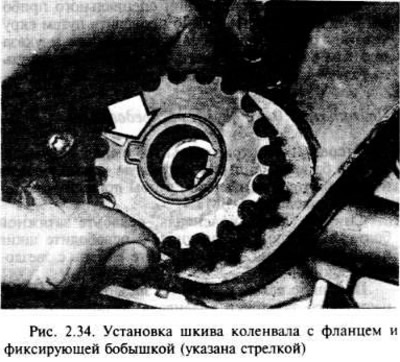
Where applicable, install the key on the end of the crankshaft, then install the sprocket with locking boss.
On 1.8L and 2.0L engines, where applicable, install thrust washer and key on crankshaft pins, then install crankshaft sprocket and torque new bolt.
Check that the TDC marks on the camshaft and crankshaft sprocket match (piston number 1 is at TDC), then put on the belt.
Install the crankshaft pulley, adjust the belt tension, install the outer belt covers.
Engines with two camshafts
Removing and installing camshaft sprocket
Remove the timing belt as described earlier.
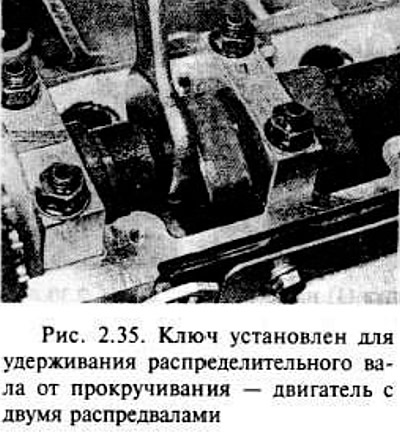
It is necessary to secure the camshaft so that it does not rotate when the sprocket bolt is removed, and this can be achieved by following the operations indicated at the beginning of this section, not forgetting that the chamfers to hold the camshaft in a stationary position are located in front of the 1st lobe of the cam (see fig. 2.35).
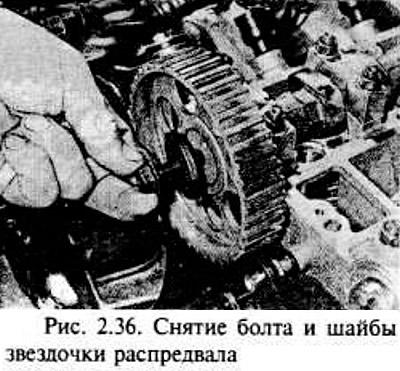
Loosen the camshaft sprocket bolt and remove it, along with the washer. Remove the sprocket from the end of the camshaft.
Slide the sprocket onto the camshaft, making sure the boss aligns with the hole on the sprocket.
Install a new bolt and tighten it in two steps. fixing the distributor.
Install a new timing belt and adjust the tension.
Crankshaft sprocket - removal and installation
Remove the timing belt. After this, it is necessary to unscrew the crankshaft sprocket bolt, fix it. Loosen the bolt using a Tox socket (he is very tight) and remove the puck.
Disconnect the sprocket from the crankshaft using an appropriate puller, if necessary.
Install the sprocket to the crankshaft. Apply some lubricant to the threads of the new sprocket bolt and tighten it in two steps. Check that the washer is under the head of the bolt and secure the crankshaft from turning.
Install a new belt and adjust its tension.
Visitor comments