
Note: Before you start, see Chapter 2.
Removing
Single overhead cam models
1. The procedure is the same as described for models with carburetors. See Section 4A but note the following:
- a) Depressurize the fuel system (Chapter 8).
- b) On models with C16 NZ and XI6 SZ engines, disconnect the exhaust system from the manifold
- c) When working with sensors in the fuel tank, note that only one hose needs to be disconnected.
- d) Disconnect the fuel pump hose and wiring as described in Chapter 12.
- e) When releasing the tank straps, please note that the fuel filter must be moved to the side or completely removed, whichever is more convenient for you
- j) One of the fuel supply hoses is connected to a pipe on the side of the tank.
Models with double overhead camshafts
2. Disconnect the negative cable from the battery.
3. Pump out any remaining fuel from the tank.
4. Block the front wheels, then jack up the rear of the vehicle and place it on axle stands placed under the sidewalls of the body frame.
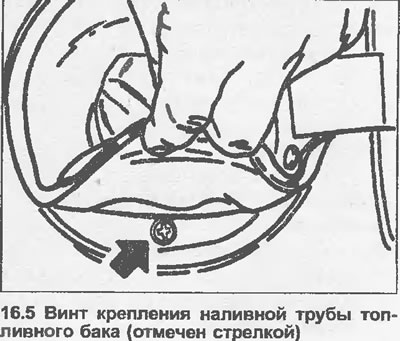
5. Open the cap of the native filler neck of the fuel tank, then remove the rubber seal, and unscrew the screw under it that secures the fuel tank filler pipe (see illustration).
6. Release the drain hoses from the brackets on the bottom.
7. Support the fuel tank with a jack.
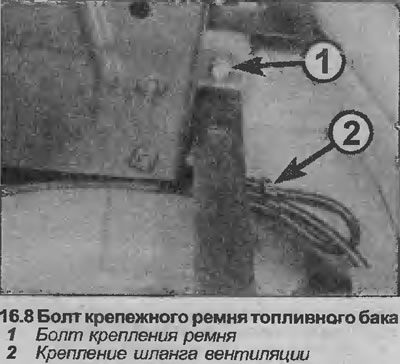
8. Turn off bolts of fastening from adjusting belts of a tank. Then remove the belts, lower the tank just enough so that you can disconnect the fuel supply hoses, ventilation hoses and wiring for the fuel level sensor in the tank (see illustration).
9. Disconnect the ventilation hoses and sensor wiring. Note the positions of the hoses to make installation easier.
10. Disconnect the fuel supply hoses from the tank and sensor, noting their position so as not to confuse during installation. Seal the open ends of the hoses to prevent dirt from entering and further loss of fuel.
11. Lower the fuel tank and remove it from under the vehicle.
12. If there is sediment or water in the tank, flush it two or three times with clean fuel. But before that, remove the sensor from the fuel tank as described in Chapter 17. This procedure must be performed in a well-ventilated area or outdoors, and fire safety precautions must be observed.
Installation
13. Fuel tank repair must be carried out by a professional.
14. Install in reverse order. Make sure all hoses are properly connected as noted prior to removal.
15. Finally, fill the fuel tank, then start the engine and check the system for leaks. If there are leaks, shut off the engine immediately and have the problem repaired without delay.
Visitor comments