
OpelBook.ru
Cars AvtoVAZ Cars Mitsubishi Cars BMW Cars Mercedes Cars Nissan Cars Toyota Cars Chevrolet
English Русский
Български
Беларускі
Український
Српски
Hrvatski
Română
Polski
Slovenský
Magyar
 |  Sitemap  |  Contacts  |    


Main Astra Corsa Insignia Kadett Omega Vectra Zafira Others Articles
Vectra A (1988-1995, petrol) Vectra A (1988-1995) Vectra B (1995-2002, petrol) Vectra B (1995-2002) Vectra C (2002-2008)
  • Main
  • Vectra
  • Vectra A
  • Power unit
  • Fuel system (injector)
  • Throttle cable — removal, installation and adjustment

Throttle cable — removal, installation and adjustment (Opel Vectra A)

            0

Contents: Removal ⬇ Installation ⬇ Adjustment ⬇

Removal


1. This procedure is basically the same as described in Section 4A. But also pay attention to the following.

2. Not all models are equipped with an air block.

3. By "carburetor" you mean "throttle body", and note that the cable bracket is bolted to the intake manifold.

4. The end of the throttle cable can be connected to a ball joint on the throttle lever, which is secured with a bracket (see illustration).
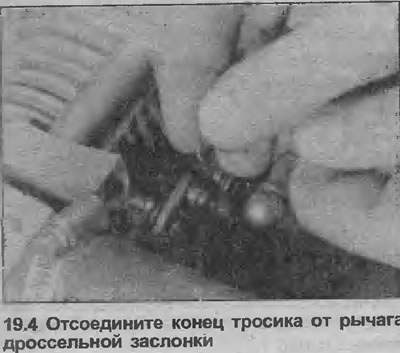
4. The end of the throttle cable can be connected to a ball joint on the throttle lever, which is…


5. If present, remove the air block. Follow the directions as necessary Chapter 5.

6. Where used, use pliers to remove the spring clip securing the ball joint end of the cable to the throttle linkage. Use a screwdriver to disconnect the end of the cable from the linkage.

7. Remove the bracket and remove the cable sealing ring from the bracket (see illustration).
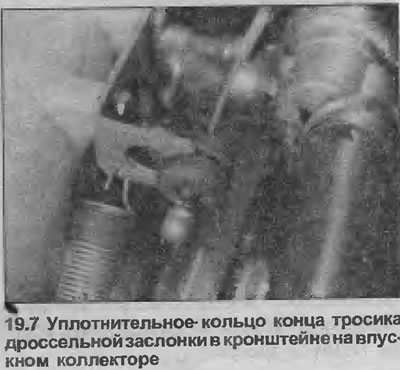
7. Remove the bracket and remove the cable sealing ring from the bracket (see illustration).


8. In the car interior, remove the trim panel in the driver's footwell, using the following instructions if necessary Section 11.


(The article was published on the website: Opelbook.ru)

9. Release the inner end of the cable from the "eye" at the top of the gas pedal by pulling back the spring and using a screwdriver to remove the end of the cable from the groove.

10. Remove the sealing ring from the partition with a screwdriver and tie a piece of twine to the cable.

11. Remove the cable through the bulkhead into the engine compartment; when the end of the rope appears, untie the twine, leaving it in place.

Installation


12. Installation is carried out in the reverse order of removal. But please note the following.
  • a) First make sure that the cable is laid correctly, then pull it through the opening of the partition with twine.
  • b) Position the bulkhead sealing ring correctly.
  • c) Connect the end of the cable to the throttle linkage. Place the outer cable seal on the bracket and pull the cable so that the inner end is taut when the throttle is fully closed. Install the clamp, fixing the cable housing in this position.
  • d) Check the throttle action and cable adjustment as described below.

Adjustment


13. See. Section 4A, but instead of "carburetor" mean "throttle body". If present, the air block must be removed.

14. First check that the pedal is at a comfortable height for the driver. This can be adjusted by turning the pedal lock screw (you need to remove the footwell trim panel to get to the screw). Remember that the pedal should be raised enough so that when you press it, the throttle valve opens completely. Also check that the pivot axle bushings are in good condition.


15. Returning to the engine compartment, check that the tie rod pivots and ball joints are not worn and move freely throughout their range. With the throttle fully closed and the accelerator pedal not depressed, there should be barely noticeable play in the cable.

16. If adjustment is required, remove the clip securing the cable housing seal to the bracket and move it to the desired distance.

17. Ask an assistant to press the gas pedal from the driver's seat. When the pedal is fully depressed, the throttle valve should be fully open. If the pedal travel is insufficient to fully open the valve, unscrew the pedal stop screw and repeat the adjustment of the cable on the throttle rod.

18. After adjustment, install all disturbed components.


This article is available at russian, bulgarian, belarusian, ukrainian, serbian, croatian, romanian, polish, slovak, hungarian
Checking the article: Chernov Alexander

Share information:

Previous articles
Opel Vectra A: Fuel system (injector)
Next articles

Fuel Flow Arrester — Removal and Installation
Fuel tank sensor — removal and installation
Fuel tank — removal and installation
Fuel tank filler pipe — removal and installation
Fuel Pump Relay — Replacement
Fuel pump — removal and installation
Idle mixture — checking and adjustment
Fuel pressure regulator — removal and installation
Idle Speed Regulator — Removal and Installation
Throttle Position Sensor — Removal and Installation
Throttle Potentiometer — Removal and Installation
Air Flow Meter (if equipped) — Removal and Installation


See similar ones from other Opel car manuals:
▶ Throttle Cable — Removal, Installation and Adjustment Opel Astra F (1991-1998, petrol)
▶ Throttle Control Cable — Adjustment and Replacement Opel Ascona C (1981-1988)
▶ Replacing and adjusting the throttle cable Opel Corsa B (1993-2000)
▶ Adjusting the carburetor throttle cable Opel Kadett D (1979-1984)
▶ Carburetor Throttle Damper (Automatic Transmission Models)… Opel Omega A (1986-1993)
Link to this page in different formats

Visitor comments


No comments yet


How much will 44 + 28 =


Vectra C (2002-2008) 
  • General information
  • User manual
  • Vehicle device
  • Maintenance
  • Troubleshooting
  • Power unit
  • Engine repair
  • Cooling system
  • Power and control system
  • Engine electrics
  • Transmission
  • Clutch
  • Car gearbox
  • Drive shafts
  • Chassis
  • Car suspension
  • Steering
  • Brake system
  • Body
  • Exterior
  • Interior
  • Doors, locks and windows
  • Heating and ventilation
  • Electrical equipment
  • Equipment and devices
  • Headlights and lighting
  • Electrical circuits
Vectra B (1995-2002) 
  • General information
  • User manual
  • Weekly checks
  • Maintenance (gasoline)
  • Maintenance (diesel)
  • Troubleshooting
  • Power unit
  • SOHC gasoline engine
  • DOHC petrol engine
  • Diesel engine 1.7 liter
  • Diesel engine 2.0 liters
  • Engine repair
  • Cooling system
  • Fuel system (gasoline)
  • Fuel system (diesel)
  • Charging system
  • Launch system
  • Ignition and preheat
  • Transmission
  • Clutch
  • Mechanical gearbox
  • Automatic gearbox
  • Drive shafts
  • Chassis
  • Brake system
  • Wheel suspension
  • Steering
  • Body
  • Exterior
  • Interior
  • Doors and windows
  • Heating and ventilation
  • Electrical equipment
  • Equipment and devices
  • Electrical circuits
Vectra B (1995-2002, petrol) 
  • General information
  • Maintenance
  • Help with malfunctions
  • Power unit
  • Engine repair
  • Exhaust system
  • Cooling system
  • Fuel system
  • Multec injection system
  • Four point injection
  • Transmission
  • Clutch
  • Gearbox and drive
  • Chassis
  • Wheel suspension
  • Steering
  • Brake system
  • Wheels and tires
  • Body
  • Exterior
  • Interior
  • Electrical equipment
  • Fuses and electronics
  • Power devices
  • Ignition system
  • Lighting and signaling
  • Equipment and devices
  • Heating and ventilation
  • Electrical circuits
Vectra A (1988-1995) 
  • Power unit
  • Engine repair
  • Ignition system
  • Lubrication system
  • Cooling system
  • Injection system
  • Fuel system (carburetor)
  • Fuel system (diesel)
  • Exhaust system
  • Transmission
  • Clutch
  • Car gearbox
  • Chassis
  • Front suspension
  • Rear suspension
  • Steering
  • Brake system
  • Wheels and tires
  • Body
  • Exterior
  • Interior
  • Electrical equipment
  • Electrical circuits
Vectra A (1988-1995, petrol) 
  • General information
  • User manual
  • Maintenance
  • Power unit
  • SOHC engine
  • DOHC engine
  • Cooling and ventilation
  • Fuel system (carburetor)
  • Fuel system (injector)
  • Exhaust converter
  • Transmission
  • Clutch
  • Mechanical gearbox
  • Automatic gearbox
  • Drive shafts
  • Chassis
  • Brake system
  • Car suspension
  • Steering
  • Body
  • Body elements
  • Electrical equipment
  • Power devices
  • Equipment and devices
  • Electrical circuits
OpelBook.ru © 2017–2026 · Mobile version · · Sitemap: EN BG BY UA RS HR RO PL SK HU · Feedback · Site search
Astra F, petrol · Astra G, petrol · Astra G · Astra H · Astra J, petrol · Corsa B · Corsa C, petrol · Corsa C · Insignia A · Kadett D · Kadett E · Omega A · Omega B · Omega B2 · Vectra A, petrol · Vectra A · Vectra B, petrol · Vectra B · Vectra C · Zafira A, petrol · Frontera A, petrol · Frontera B · Ascona C · Vivaro A ·
We want your visit to be comfortable 🤝! We use cookies 🍪 to make that happen.