


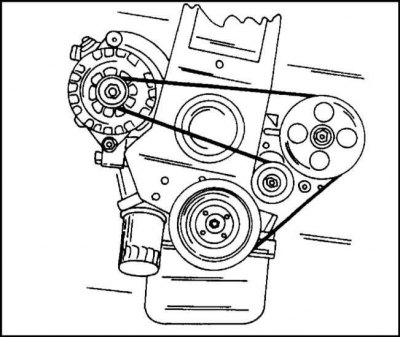
V-belt routing diagram for 2.0L engine since 1995 and DOHC engine without air conditioning
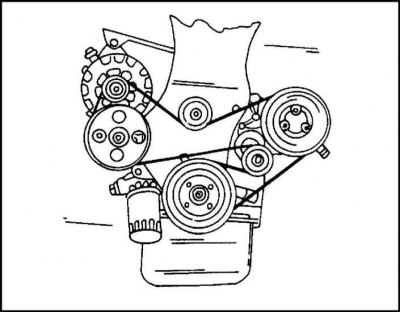
V-belt routing diagram for 2.0L mid-1995 engine and DOHC engine with power steering pump and air conditioning
Checking the status
1. Drive belts, sometimes called V-belts or simply fan belts, are located at the front of the engine and play an important role in the operation of the vehicle and its individual components. Due to the nature of the material and operating conditions, drive belts fail after some time, and therefore their condition should be checked periodically and the tension adjusted to avoid serious damage to the engine.
2. The number of belts used on a particular vehicle depends on the units and systems installed on it. Drive belts are used to drive the generator, steering pump, water pump and air conditioning compressor. Depending on the arrangement of the pulleys, one belt can drive several components at once.
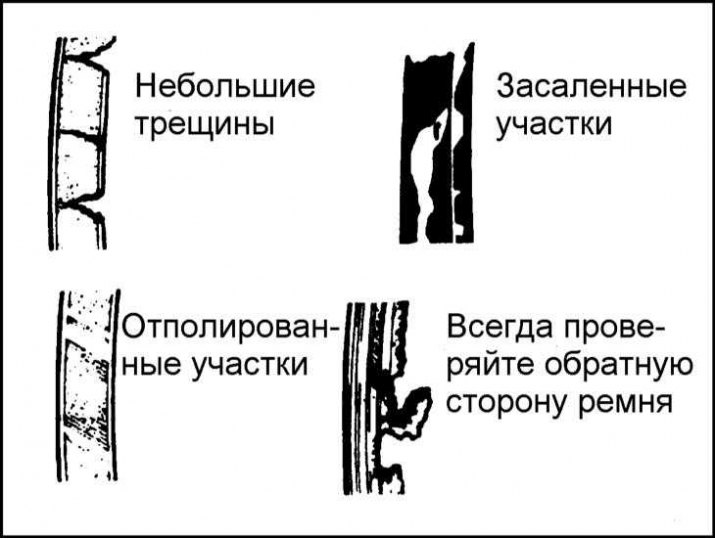
Some of the most common drive belt defects.
3. Turn off the engine, open the hood and locate the various drive belts at the front of the engine. With fingers (and using a flashlight if necessary) walk the entire length of each belt, feeling for cracks and delamination. Also check the belts for any scuffs or polished areas. Each belt must be inspected from both sides, which means twisting it to check the condition of the reverse side.
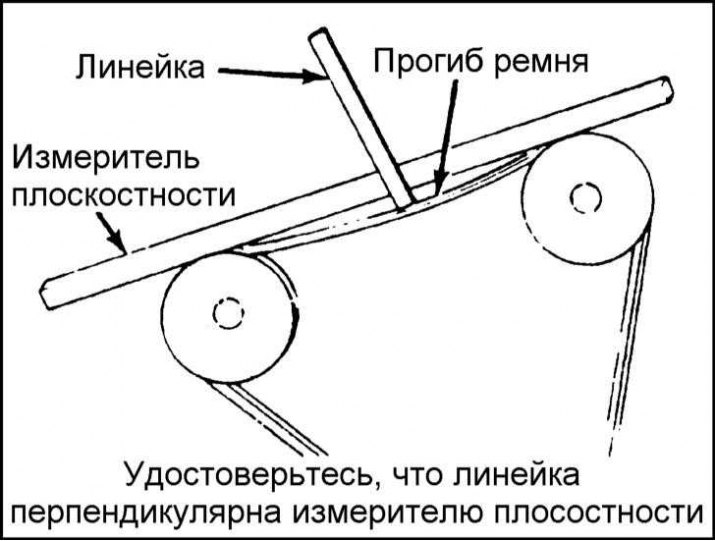
4. The belt tension is checked by pressing firmly on it with your thumb and determining the degree of its deflection. Measure the amount of deflection with a ruler. A rule of thumb is that if the pulley centres are between 180mm and 280mm, the deflection should be 6mm. If the pulley centres are between 300mm and 400mm, the deflection should be 13mm.
Adjustment
1. If it is necessary to adjust the belt tension to increase or decrease it, this is done by moving the unit driven by the belt on its mounting bracket. In cases where a belt drives more than one component, it is usually sufficient to move only one component to adjust it.
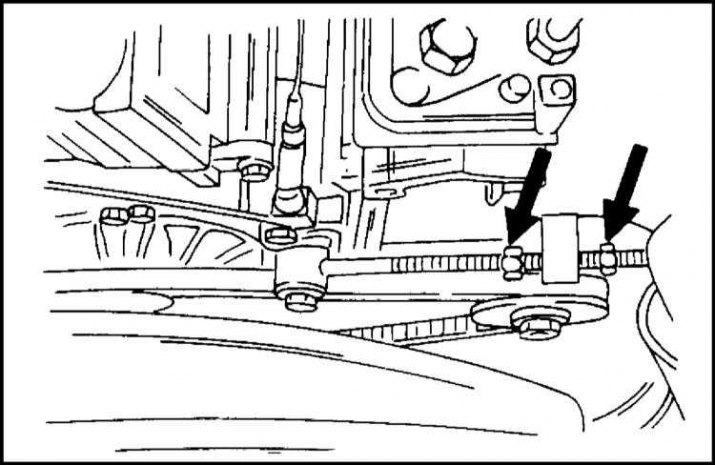
The arrows point to the locknuts of the V-belt tensioning screw (2.4L engine).
2. Each unit has an adjusting bolt and an axle bolt. To move it on the bracket, you need to slightly loosen both bolts. For some units, the drive belt tension can be adjusted by turning the adjusting bolt after loosening the lock bolt.
3. Once both bolts are loosened, move the unit away from the engine to increase belt tension, or toward the engine to loosen the belt. Fix the unit in the new position and check the belt tension. If no further adjustment is required, tighten both bolts and recheck the tension. If nothing has changed, tighten the bolts completely.
4. Often, to move the unit in order to adjust the belt tension, it is necessary to use a lever. If necessary, proceed with extreme caution to avoid damaging the unit being moved or the element being used as a support point.
Replacement
1. To replace the belt, follow the adjustment instructions above, but remove the belt from the pulleys.
2. In some cases, you will have to remove more than one belt due to their location at the front of the engine. Therefore, and also because belts tend to fail at the same time, it is best to replace them at the same time. Mark each belt and its corresponding groove on the pulley to ensure new belts are installed correctly.
3. When purchasing new belts, it is convenient to take the old ones with you so that you can directly compare them in length, width and construction.
4. Check the tension of new belts after driving several hundred kilometers.
Visitor comments