


Tools needed to replace spark plugs
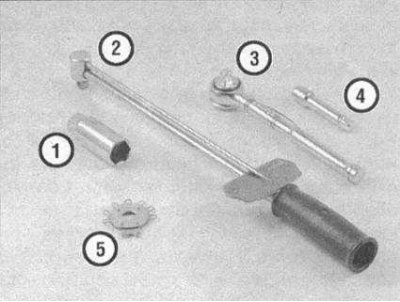
1 - Spark plug wrench head - equipped with a special soft insert to protect the porcelain spark plug insulator.
2 - Torque wrench - although not an absolutely necessary tool, it provides the maximum guarantee of the correct tightening force of the spark plugs.
3 - Ratchet drive - included as standard with the spark plug wrench.
4 - Extension - Depending on your vehicle model and its accessories, you may need special extensions and universal joints to provide access to the spark plugs.
5 - Spark plug gap gauge - this device for checking the spark plug gap is available in various modifications. Make sure you have a gauge specifically for the gap of your vehicle. Feeler gauge blades can be used instead.
1. Before starting work, prepare all the necessary tools, which include a replacement spark plug wrench head and a set of feeler gauge blades. Some spark plug manufacturers supply special tools for measuring spark plug gaps.
2. The best way to replace spark plugs is to purchase new plugs in advance, adjust their gap, and replace each plug one at a time. When purchasing spark plugs, it is very important to choose exactly those spark plugs that are intended for your car's engine.
3. With new spark plugs on hand, allow the engine to cool completely before removing the old ones. During this time, you can inspect the new spark plugs for defects and check the spark plug gaps.
4. The spark plug gap is checked by inserting a gauge of the required thickness between the electrodes at the end of the spark plug. The gap must correspond to that specified in Specifications. The wire should only touch each of the electrodes. If the gap is not within the specified range, slightly bend the curved part of the electrode using the notched adjuster until the required gap is achieved.
Note: When adjusting the gap of a new spark plug, bend only the base of the ground electrode, without touching its end. If the ground electrode is offset from the center electrode, use the notched adjuster to align them. Check the porcelain insulator for cracks, which would indicate that the spark plug needs to be replaced.
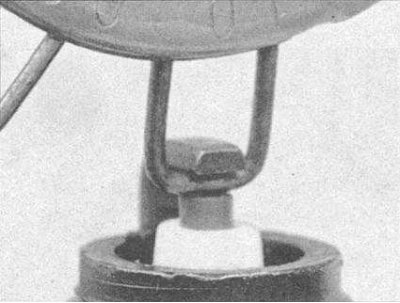
4a. Spark plug manufacturers recommend using wire gauges to determine the spark plug gap size - if the measuring element does not slide between the spark plug electrodes with slight resistance, then the gap needs to be adjusted.
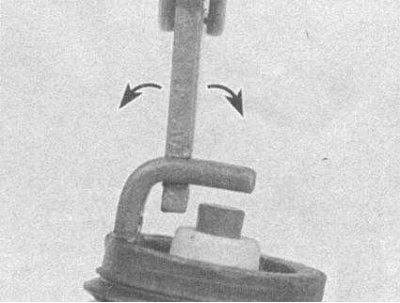
4b. To adjust the gap, bend only the ground electrode as indicated by the arrows in the picture, and be extremely careful not to damage the porcelain insulator around the center electrode.
(Article published on the website: OpelBook.ru)
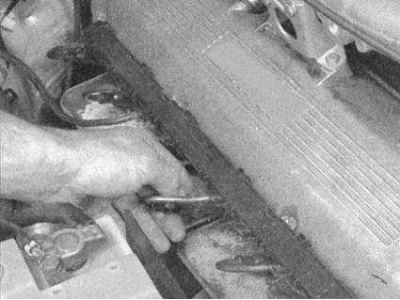
5. With the engine cool, disconnect the high-voltage wire from one of the spark plugs. Do not pull on the wire itself, but hold on to the connector at its end. Sometimes a twisting motion is required to disconnect the connector.
6. If possible, use compressed air to blow dirt and foreign material particles out of the area around the spark plugs. You can use a regular bicycle pump for this. This is done to avoid the possibility of debris getting into the cylinder after removing the spark plugs.
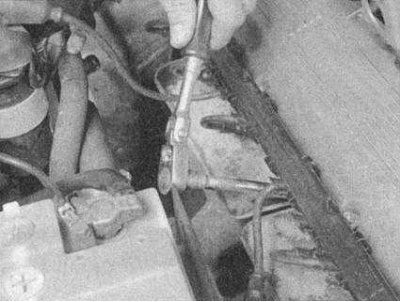
7. Place the spark plug wrench head on the spark plug and remove the spark plug from the engine by turning it counterclockwise. Use a wrench with a replaceable head and extension.
8. Compare the removed candle with those shown in the pictures in Chapter Engine electrical equipment, this will give you useful information about the general condition of the engine.
9. Apply a small amount of copper-based anti-seize compound to the threads of the new spark plug. Insert the spark plug into the cylinder head and screw it in with your fingers until it stops, then tighten it with the spark plug wrench. If possible, use a torque wrench to tighten the spark plug to ensure it is installed correctly. The tightening force of the spark plugs is included in Specifications.
Recommendations
To avoid the possibility of screwing the spark plug in incorrectly, place a small piece of rubber hose or plastic tube onto its tail. The flexible tube will act as a universal joint, ensuring alignment of the spark plug in relation to the spark plug socket, and if the spark plug starts to warp, the hose will slip on it, preventing the threads from being stripped.
10. Before connecting the high-voltage (HV) wire to the spark plug, carefully inspect it as described in Section Checking and replacing spark plug wires, cover and distributor rotor.
11. Connect the wire to the new spark plug installed, again using a twisting motion and holding the connector until it is fully seated on the spark plug.
12. Repeat the above procedure for the remaining spark plugs in sequence to avoid incorrectly connecting the spark plug wires.
Visitor comments