


2. Begin this procedure by visually inspecting the wires while the engine is running. In a darkened garage (make sure there is good ventilation in the room) start the engine and carefully inspect each wire. Try not to touch moving engine parts. If there is a break, the wire will spark at the point of damage. In this case, replace the wires, then let the engine cool down.
3. Disconnect the negative battery cable.
Caution! Warning: If your vehicle's radio is equipped with an anti-theft system, make sure you enter the correct code before disconnecting the battery.
4. To avoid confusion during installation, the high-voltage wires should be checked one by one.
5. Disconnect the high voltage wire from the spark plug. Do not pull on the wire, only on the connector.
6. Inspect the inside of the connector for corrosion, which appears as a white, loose powder. Connect the wire with the connector to the spark plug. The connector should fit tightly onto the spark plug. If this cannot be achieved, remove the wire again and use pliers to adjust the position of the terminal inside the connector.
7. Using a clean cloth, wipe the wires along their entire length from the outside, removing any dirt or grease that has stuck to them. After cleaning, check the wire for signs of burnout, cracks and other damage. Do not bend the wire at sharp angles, as this may result in the conductor breaking.
8. Disconnect the high voltage wire from the distributor. Remember to pull only on the connector. Check it for corrosion and reconnect it in the same way as the spark plug wire. Replace the distributor wire if necessary.
9. Check the remaining spark plug wires and after checking, make sure each one is securely connected to the distributor and spark plug.
10. If your spark plug wires need replacing, purchase a set of wires specifically designed for your engine model. The kits include wires of the required length and with installed connectors. Remove and replace high voltage wires one at a time to avoid confusion in the firing order of the cylinders when installing them.
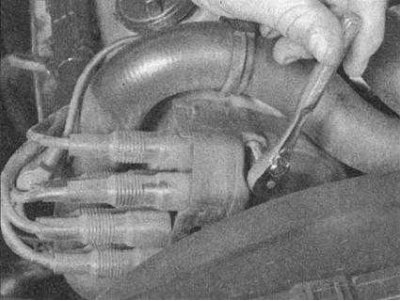
11a. Loosen the screws or open the clamps, then remove the distributor cap. Pull back the distributor cap enough to allow inspection from the inside.
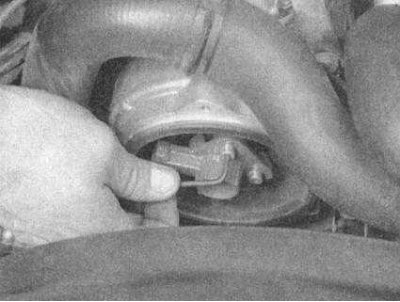
11b. Give me the screws (if they exist) and remove the runner from the shaft.
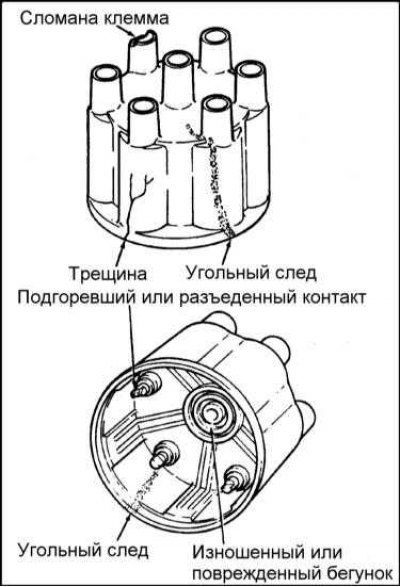
11s. The illustration shows some of the common distributor cap defects to look for during inspection (if there is any doubt about its condition, it is better to replace it).
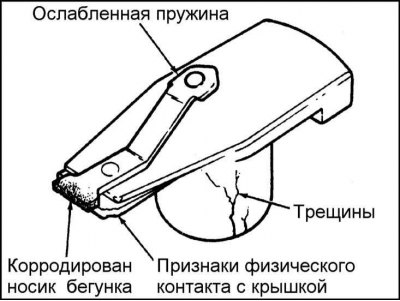
11d. Check the distributor cap and rotor for signs of wear, cracks, carbon deposits, and worn, burnt, or loose contacts. If any defects are found, replace the cover or runner. Typically, the cap and rotor are replaced every time the spark plug wires are replaced. When installing a new cap, disconnect the high voltage wires from the old cap one at a time and connect them to the new one in exactly the same order - never disconnect all the wires at the same time to avoid confusion in the firing order of the cylinders when they are installed.
Visitor comments