


Warning! Long-term skin contact with used engine oil is quite dangerous. Use barrier cream and wear gloves while performing this procedure. Change clothes soaked in oil immediately.
Recommendations. Frequent engine oil changes are the most important preventative maintenance procedure available to the amateur mechanic. Over time, oil is susceptible to dilution and contamination, leading to premature engine wear.
Tools needed to change engine oil and oil filter
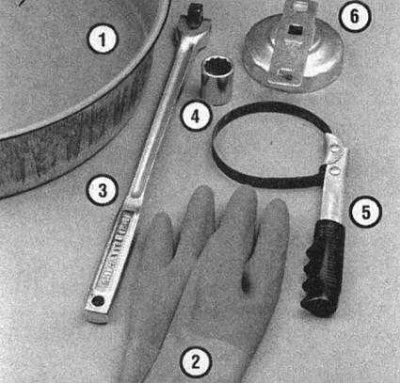
1 - Drainage container - should not be very deep, but wide enough to avoid spilling.
2 - Rubber gloves - when removing the drain plug and oil filter, oil will inevitably get on your hands (gloves will protect against burns).
3 - Wrench - sometimes the drain plug is tightened very tightly and a long wrench must be used to loosen it. You can also use a socket wrench of the appropriate size.
4 - Socket head - used in combination with a wrench or ratchet drive (must match the size of the drain plug head.
5 - Oil Filter Wrench - This is a metal strap wrench that requires a certain amount of clearance around the filter to use. This key is not required for all engine types.
6 - Oil Filter Removal Wrench - This wrench fits onto the bottom of the filter and can be turned using a ratchet or a crank (there are different size keys for different types of filters). This key is not required for all engine types.
1. Before you begin work, make sure you have all the necessary tools. You should also have plenty of rags or old newspapers on hand to soak up any spilled oil.
2. Start the engine and warm it up to normal operating temperature - warm oil and sludge flow out of the engine better. If you need to buy new oil, a filter or any tools, go get them in your car, this way you will also warm up the engine oil.
3. Park the car on a level surface and turn off the engine when it is warm enough. Remove the oil filler cap from the cylinder head cover.
4. To gain access to the drain plug and oil filter, jack up the vehicle and support it securely on supports.
Warning! Never work under a vehicle supported only by a hydraulic or scissor jack - always use supports!
5. If this is your first time changing the oil on this vehicle, get underneath it and familiarize yourself with the location of the drain plug and oil filter. Please note that on some engines the oil filter is located on the top left side of the engine. The exhaust system components will be hot during this procedure, so take note of where the pipes run to avoid contact with them during the process.
6. Being careful not to touch hot components, place a drain pan under the drain plug at the bottom of the engine.
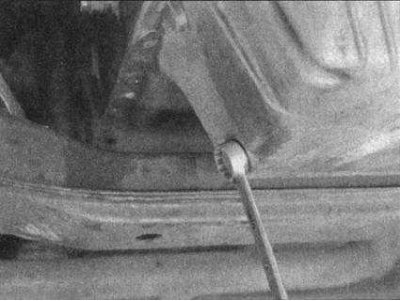
7. Clean the area around the cork, then remove the cork. It is recommended to use rubber gloves when releasing the plug for the last few turns to avoid getting burned by hot oil. While unscrewing the plug, try to press it against the crankcase, and then pull it out sharply. This will help you avoid contact of your hand with the stream of hot oil, as well as the possibility of the plug falling into the drain container.
8. As the oil pressure weakens as it leaks out, it may be necessary to change the position of the container under the crankcase. Check your old oil for metal particles, this can give you early warning of engine wear.
9. After draining the old oil, wipe the drain plug with a clean rag. Any metal particles, even the smallest ones, that stick to the plug will immediately contaminate the new oil.
10. Install the plug and tighten it securely. Use a new washer if necessary.
11. Place the drain pan in place under the oil filter.
Non-separable oil filter
1. Loosen the screw-out oil filter by turning it counterclockwise with a filter wrench. Any filter wrench will do.
2. Sometimes the twist-out filter is screwed in so tightly that it is not easy to release. In this case, pierce it with a metal rod or a long screwdriver and, using it as a winch, turn the filter. Be prepared for oil to spray out when the filter housing is punctured.
3. After releasing the filter, unscrew it from the cylinder block by hand. After removing the filter, quickly turn it upside down with the open end facing up to prevent oil spillage.
4. Wipe the surface of the cylinder block with a clean cloth. Make sure that none of the old O-rings are stuck in the block mounting surface. If necessary, they can be removed with a scraper.
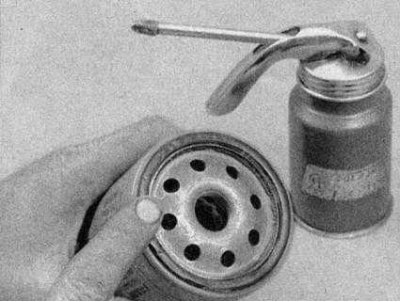
5. Make sure the new filter type matches the old one. Lubricate the rubber sealing ring of the new filter with engine oil and install it in place. Do not use a filter wrench as overtightening the filter will damage the seal. Most filter manufacturers recommend hand tightening only. Typically they are tightened three quarters of a turn after the O-ring contacts the block, but it is better to follow the instructions on the filter itself.
Oil filter with replaceable element
1. Some models are equipped with an oil filter with a replaceable element. Loosen the bolt, remove the cover and pull out the filter.
2. Compare the new element with the old one to make sure it is the same type, then install it into the filter housing.
3. Wipe the mounting surface of the housing and the cover with a clean cloth. Replace the rubber O-ring if necessary. Lubricate the new ring with clean oil and install the cover and bolt. Tighten the bolt securely.
All models
1. Remove all tools and rags from under the vehicle, being careful not to spill oil from the drain pan, then lower the vehicle to the ground.
2. Fill the engine with new oil through the filler neck in the cylinder head cover. Use a funnel to avoid spilling oil on the engine. Pour the amount of fresh oil specified in the Specifications into the engine. Wait a few minutes to allow the oil to drain into the oil pan, then check the oil level with the dipstick (see section Checking fluid levels*). If the level is within the normal range, close the filler neck with a lid.
3. Start the engine and let it run for about a minute. The low oil pressure warning light may take a few seconds to go out while new oil fills the filter; while it is on, do not turn off the engine. While the engine is running, look under the vehicle and check for leaks at the drain plug and around the oil filter. If there is a leak, turn off the engine and tighten the plug and/or filter slightly.
4. Wait a few minutes and check the oil level again. Top up if necessary.
5. During the first few days after changing the oil, check the oil level frequently and look for signs of leaks.
6. Used oil drained from the engine in its current form cannot be reused and must be thrown away. Recycling centers and some auto repair shops may accept used oil, which can then be recycled. After the drained oil has cooled, it can be poured into a suitable container and sent to a collection point.
Note: To dispose of used oil, please contact your local waste oil collection point.
Visitor comments