
When operating the car in conditions of increased tension (see Schedule of ongoing maintenance) change the engine oil/oil filter every 5000 km.
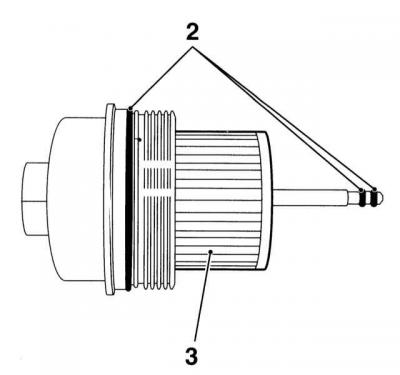
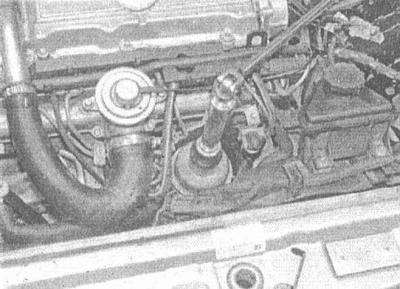
A set of tools needed to change the engine oil and oil filter
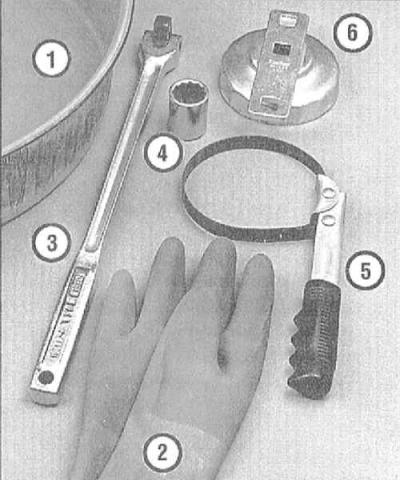
1 — Drainage tank should be shallow and wide enough to minimize the chance of oil spilling onto the ground
2 — Latex gloves will help protect your hands from burns if oil inevitably gets on them while turning out the drain plug of the oil pan
3 — gate: sometimes the drain plug is tightened quite tight, which requires considerable force when turning it out
4 — Interchangeable socket used in conjunction with a gate or a drive equipped with a ratchet when turning out the drain plug, must correspond to the latter in size
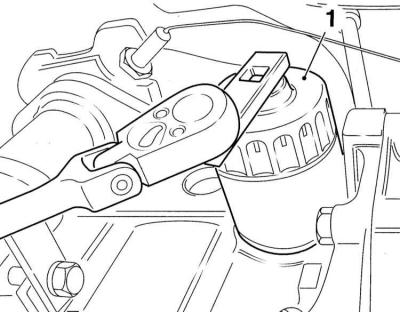
5 — Band key allows you to unscrew the full-flow oil filter in conditions of limited access to it
6 — Special spanner is put on the end of the filter and can then be rotated using a winch or ratchet, must match the filter housing in size
Regular and fairly frequent replacement of engine oil is one of the main preventive maintenance procedures for a car that lies within the skill of the average amateur mechanic. Over time, motor oil is subject to aging, which is manifested in its gradual dilution and contamination, leading to premature wear of internal engine components. Despite the fact that some sources recommend changing the oil filter only every second engine oil change, the compilers of this Guide believe that due to the relative insignificance of the cost of the replacement component and the importance of its condition on the correct operation of the engine / output efficiency, it makes sense to change the filter every time you change the oil.
1. Make sure you have all the materials and tools needed to perform an oil and oil filter change on hand (see illustration A set of tools needed to change the engine oil and oil filter). Also, have enough rags and old newspapers ready to catch any spilled oil.
2. In order to provide free access to the oil pan and oil filter, lift the car with a winch, drive it onto a flyover, or jack it up and place it on props.
Never carry out any work under the car, supported only by the bumper or held in a raised position only by a jack!
3. Climb under the vehicle and familiarize yourself with the location of the oil pan drain plug and oil filter. Remember that the power unit and components of the exhaust system will remain hot enough during the entire procedure - consider a safe hand manipulation scheme to avoid accidental contact with heated surfaces.
4. Make sure the vehicle is level on the stands/lift. Warm up the engine to normal operating temperature - hot oil is more fluid and is better at flushing out sludge and deposits. Use the forced downtime in order to lay out in a convenient manner all the necessary tools and materials. Stop the engine and remove the cap from the engine oil filler neck.
5. Make sure that the car is securely fixed in the raised position.
6. Be careful (see item 3), climb under the car and place a drain container under the oil pan, with the expectation that at the first moment the jet will flow through the hole with a decent pressure. Taking care not to touch the hot surfaces of the power unit and exhaust system components, remove the drain plug from the bottom of the oil pan. Depending on the temperature of the oil, at the final stage of turning the cork, you can use rubber gloves, or refuse them.
7. Allow the oil to flow freely into the container, adjusting the position of the latter accordingly as the pressure of the jet weakens. Check the drained oil for the presence of metal filings.
8. After the oil stops flowing from the engine crankcase, carefully wipe the drain plug with a clean rag - small metal filings can stick to it, which will immediately lead to contamination of fresh oil.
9. Wipe the surface of the pan around the drain hole, screw the plug into place and tighten with the required force.
A - Tightening the oil pan drain plug (engines 1.2, 1.8, 2.2, 2.0D and 1.7D (Y17DT)
B - Tightening the oil pan drain plug (engines 1.6, 2.0, 1.7D (Y17DTL)
A.
B.

10. Move a drain pan under the oil filter.
Petrol models
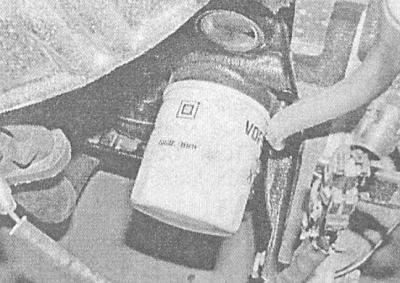
Changing the oil filter on 1.8L models
1. On models 1.4, 1.6 and 1.8 l The filter is located at the front of the cylinder block 2.0 l models - on the right side of the back of the block, where it is screwed into the oil pump housing.
2. On models 1.4, 1.6 and 2.0 l Loosen the filter with a special wrench, then unscrew it by hand. Drain the oil from the old filter into a container. On engines 1.8 l remove the oil filter housing cover together with the filter element, - sealing ring (2) must be replaced without fail.
3. With a clean rag, carefully wipe the surface of the cylinder block mating with the filter. On models 1.8 l, If required, the oil filter housing can be removed from the block after removing the mounting bolt. The housing should be rinsed and wiped dry. When installing the housing on the block, do not forget to replace the sealing ring - make sure that the mounting bolt is tightened with the required force.
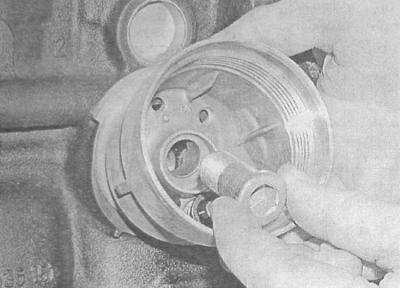
4. On models 1.4, 1.6 and 2.0 l make sure the new filter is the same size as the one removed from the vehicle. Lubricate the rubber seal of the new filter with a thin layer of clean engine oil and screw the new filter into its original place, following the direction of rotation indicated by the arrow on its housing. To avoid damaging the gasket, do not use any wrenches to tighten the oil filter. After the filter is pressed against the surface of the block by the gasket, tighten it another 3/4 turn. On models 1.8 l put a new filter element into the cover of the filter housing, put on a new sealing ring and screw the cover into the housing with the required force (see illustration Changing the oil filter on 1.8L models).
Diesel models
Engine 1.7 l SOHC
On diesel models with a 1.7L SOHC engine, the oil filter is changed in the same way as on gasoline engines of 1.4, 1.6 and 2.0L (see above).
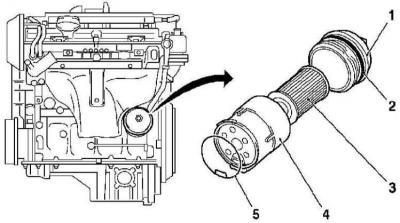
Engines 1.7 l DOHC and 2.0 l
1. On 1.7L DOHC engines, the filter is located on the rear side of the cylinder block, on 2.0L engines it is located at the top in front of the head.
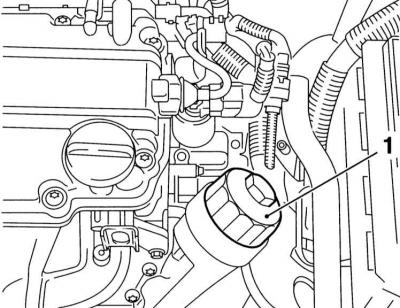
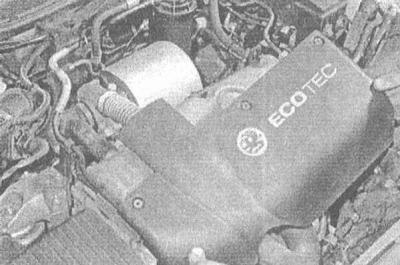
2. In order to provide access to the oil filter on 2.0 l models, remove the upper plastic casing of the power unit.
3. Using a suitable screwdriver, loosen the cap and remove it from the filter housing.
4. Remove the filter element from the cover and replace it with a new one, do not forget to replace the O-rings as well.
5. Install the cover (with built-in filter element) into place and tighten to the required torque.
6. On 2.0L models, reinstall the plastic engine cover (check the reliability of tightening the fixing bolts).
All models
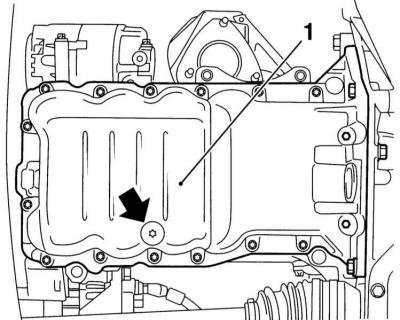
1. Reinstall the crankcase if equipped. Collect traces of spilled oil, remove drain pan and tools from under the car. Lower the car to the ground.
2. Remove all tools and materials from under the vehicle - try not to overturn the drain container. Lower the car to the ground.
3. Pour fresh oil into the engine intake - use a funnel to minimize wastage. Having filled in about half the required amount, wait a few minutes, allowing the oil to drain into the sump, then check its level on the dipstick (see Checking fluid levels). If the level is above the low mark, start the engine with fresh oil circulating (the oil pressure indicator lamp at the first start may go out with a certain delay associated with the need to fill the volume of the filter element).
To raise the oil level from the bottom (MIN) marks on the dipstick to the top (MAX) a little less than one liter of oil is required.
4. After running the engine for about a minute, shut it off again and immediately look under the vehicle, checking for leaks from the drain plug and full flow filter. Tighten the leaking component slightly if necessary.
5. During the circulation of oil through the engine (about 1 minute), the new oil filter is being filled. Now it is necessary to check the oil level again and, if necessary, add some more of it, bringing the level to the upper mark on the dipstick blade (check a few minutes after turning off the engine - the oil should have time to completely drain into the oil pan).
6. During the first few trips after changing the engine oil, check the oil level as often as possible.
7. Used oil drained from the engine cannot be reused and must be handed over to a special collection point. In no case do not drain mining to the ground or into the sewer - pour it into a hermetically sealed container and hand it over as soon as possible.
Visitor comments