
Note. The engine is very heavy, so we recommend removing it with an assistant and using special equipment (lift, hoist, etc.).
Attention! When removing and installing a power unit assembly with a large mass, use only fully serviceable lifting mechanisms designed for the appropriate load, and especially carefully control the correctness and reliability of connecting cables, traverses, etc. to the transport eyes of the engine.
You will need: keys «on 10», «at 13», «at 18», end heads «on 10», «at 13», «at 15», TORX E10, E14, E18, extension, wrench, TORX T30 wrench, flat and Phillips screwdrivers, sliding pliers.
Removing
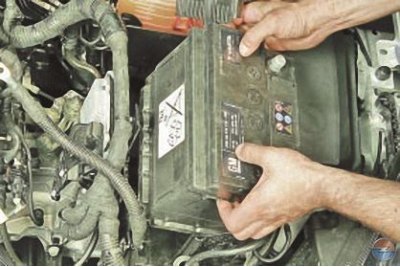
1. Remove the battery (see Removing and installing the battery).
2. Remove the battery mounting shelf (see Removal and installation of the shelf of fastening of the rechargeable battery).
3. Drain engine oil (see Changing engine oil and oil filter).
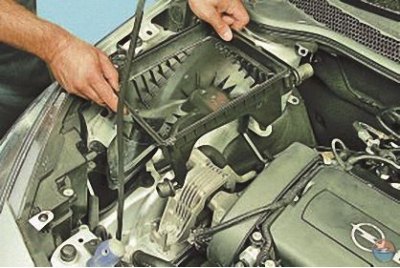
4. Remove the air filter (see Removal and installation of the air filter, air duct and intake silencer).
5. Remove mudguards and crankcase protection (see Removal and installation of mudguards and engine crankcase protection).
6. Drain the liquid from the cooling system (see Coolant replacement).
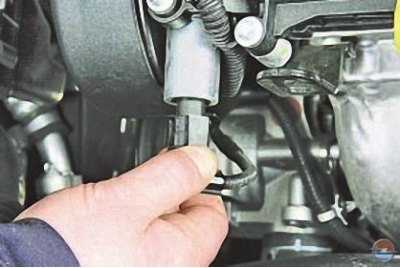
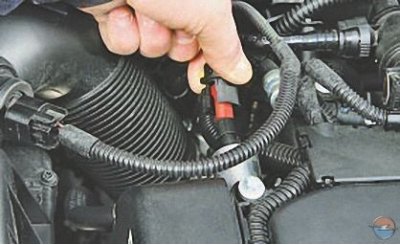
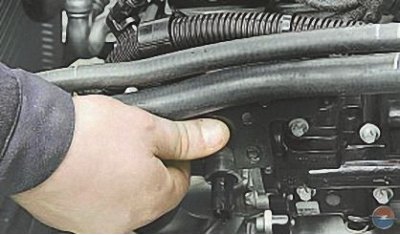
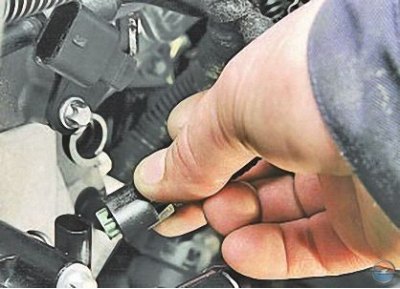
7. Press the latch..
8.... and disconnect the wiring harness connector from the electro-hydraulic valve of the exhaust camshaft.
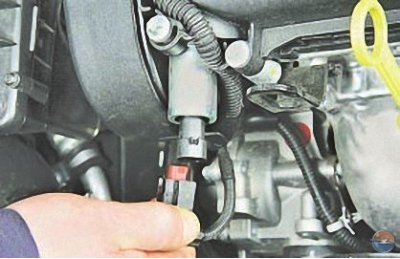
9. In the same way, disconnect the wiring harness connector from the electro-hydraulic valve of the intake camshaft.
10. Press the latch..
11.... and disconnect the wiring harness block from the coolant temperature sensor.
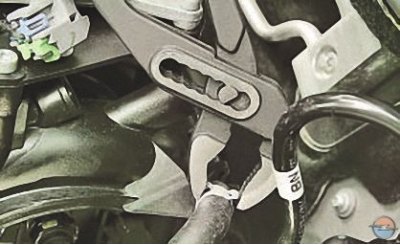
12. Turn away a nut of fastening of an arm of a plait of wires of a motor compartment..
13.... remove the bracket from the stud and move the wiring harness to the side.
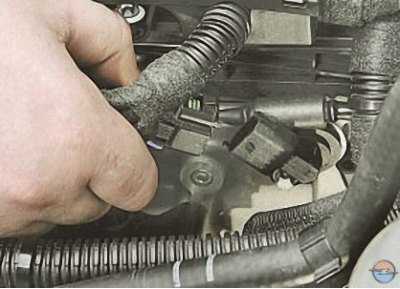
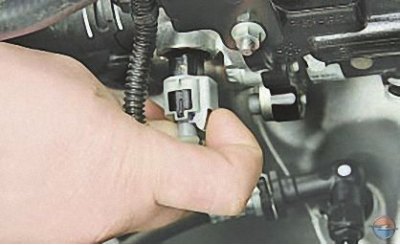
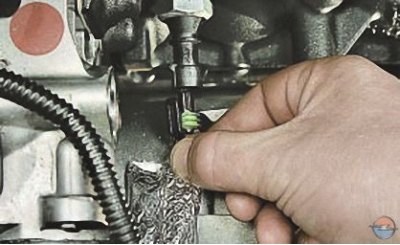
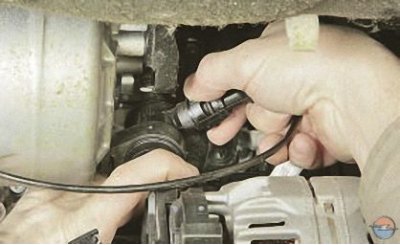
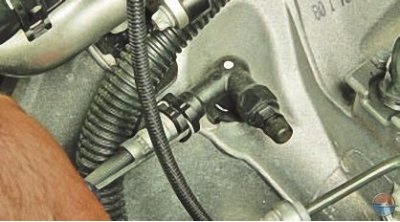
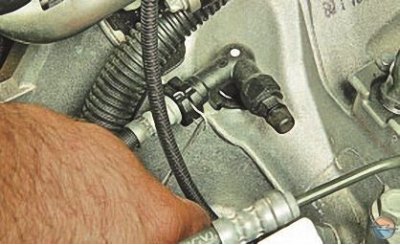
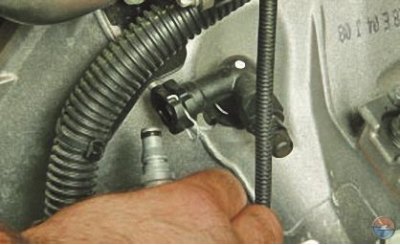
14. Disconnect the wiring harness connector from the intake camshaft position sensor.
15. Similarly disconnect block of a plait of wires from the gauge of provision of a camshaft of final valves.
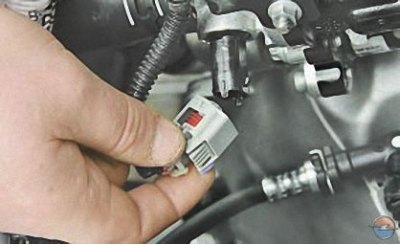
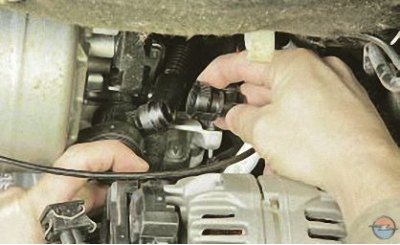
16. Disconnect the wiring harness connectors from the fuel injectors.
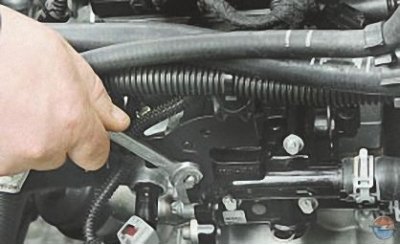
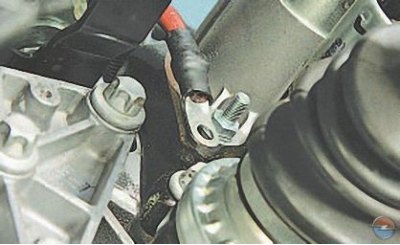
17. Turn out a bolt of fastening of a tip of a wire «minus» to the cylinder head and move the tip to the side.
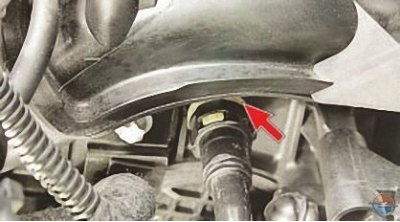
18. Press a clamp and disconnect a block of a plait of wires from the gauge of temperature of a cooling liquid.
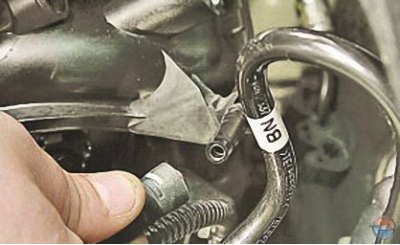
19. Disconnect the wiring harness connector from the knock sensor.
20. Loosen the hose clamp for the coolant outlet hose from the pipe, squeezing its bent antennae with pliers. Slide the clamp over the hose..
21.... and disconnect the hose from the nozzle.
22. Similarly, loosen the hose clamp to the thermostat nozzle..
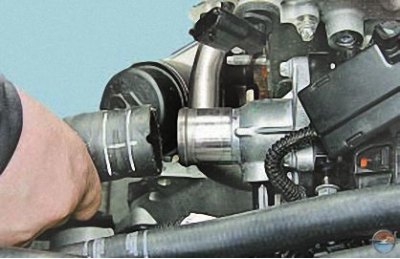
23.... and disconnect the hose from the nozzle.
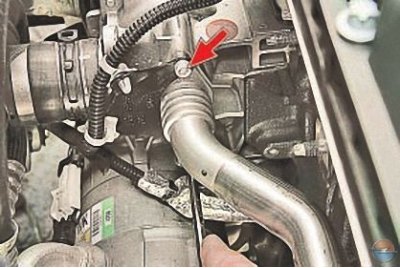
24. Press a clamp and disconnect a vacuum hose from a branch pipe of an inlet pipe.
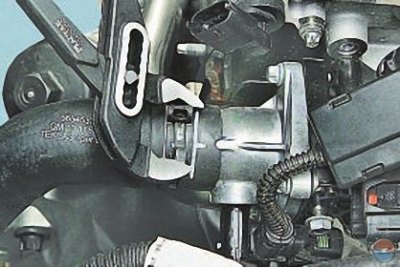
25. Remove the collector (see Removal and installation of the collector, replacement of its gasket).
26. Loosen the hose clamp for the coolant outlet hose from the pipe, squeezing its bent antennae with pliers. Slide the clamp over the hose..
27.... and disconnect the hose.
28. Remove the two bolts securing the water distribution pipe to the water pump..
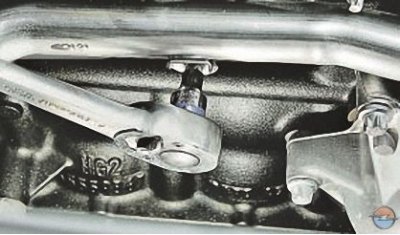
29.... a bolt for fastening the water distribution pipe to the cylinder block..
30.... two screws securing the water distribution pipe to the thermostat module..
Note. One of the screws securing the pipe to the thermostat module is not visible in the photo, as it is covered by the pipe.
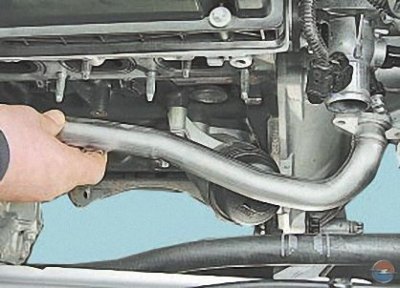
31.... and remove the water distribution pipe.
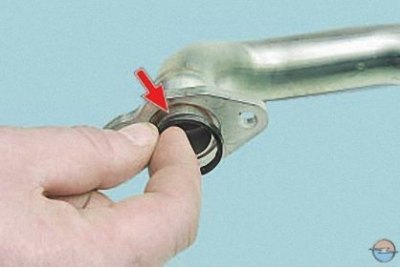
Attention! The flanges of the water distribution pipe are sealed with a rubber ring. Replace the ring each time the joint is disassembled.
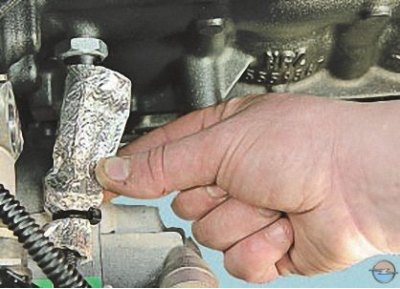
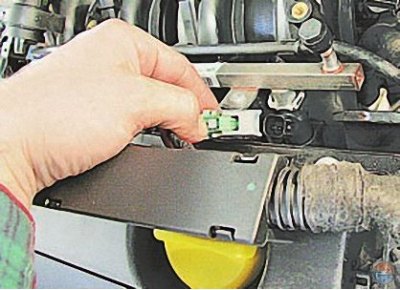
32. Slide the heat shield over the wiring harness..
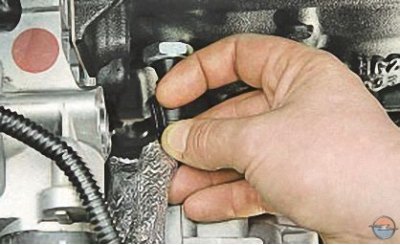
33.... move the wiring harness retainer to the side..
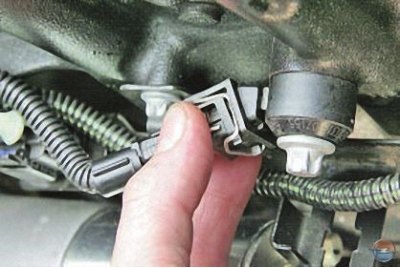
34.... and disconnect the wiring harness block from the oil pressure sensor.
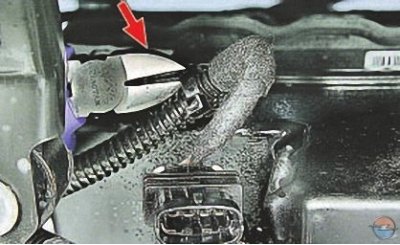
35. Disconnect the plastic holders of the motor wiring harness from the engine brackets by biting them with pliers.
36. Remove the wiring harness from the engine compartment.
37. Squeeze the bent ears of the clamp that secures the outlet hose of the radiator to the water pump pipe, slide the clamp along the hose..
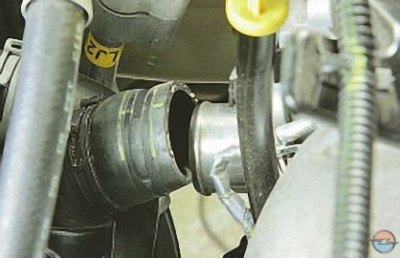
38.... and remove the hose from the nozzle.
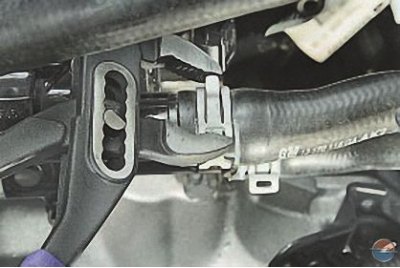
39. Squeeze the latch of the steam pipe tip..
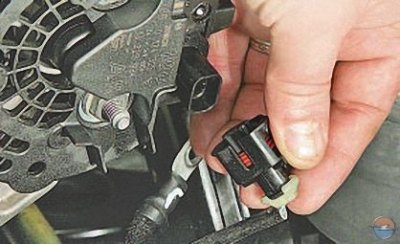
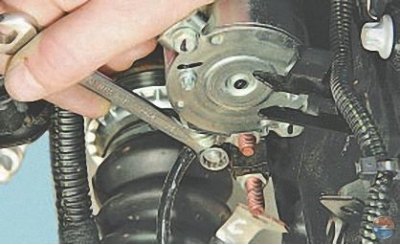
40.... and disconnect the tip from the canister purge valve fitting.
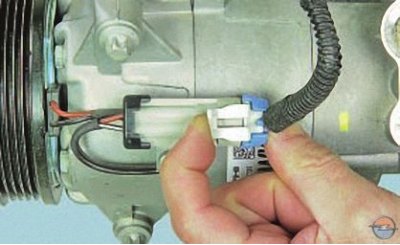
41. Press the retainer of the wiring harness block..
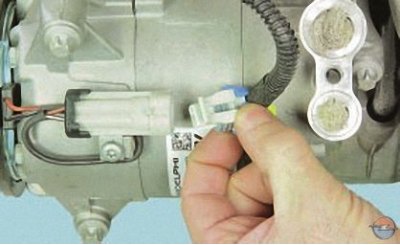
42.... and disconnect the block from the connector of the electromagnetic clutch of the air conditioning compressor.
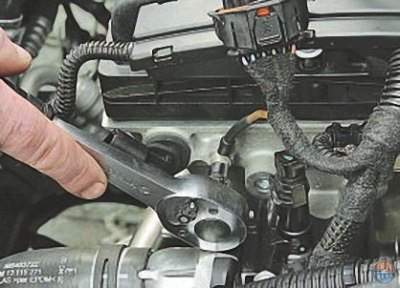
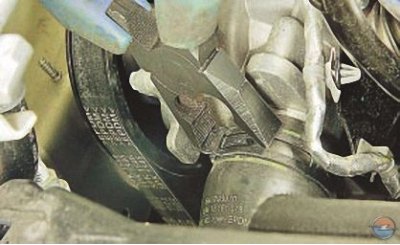
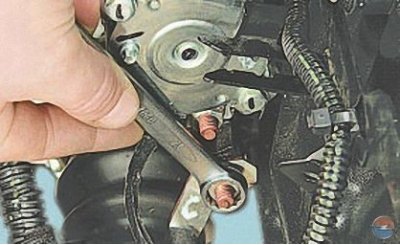
43. Remove the accessory drive belt (see Accessory drive belt replacement).
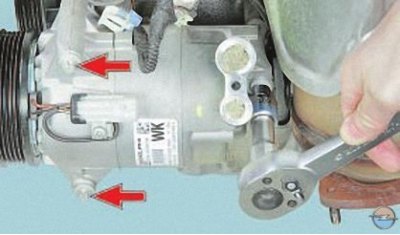
44. Turn out three bolts of fastening of the compressor of the conditioner, take the compressor aside, without disconnecting hoses from it, and fix the compressor with a wire, without allowing twisting or a tension of hoses.
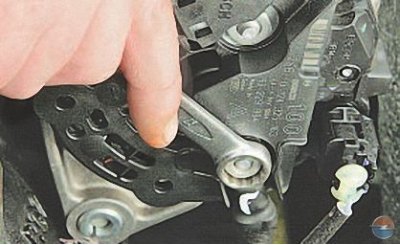
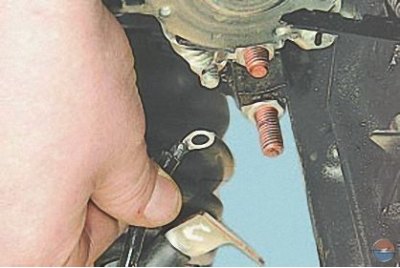
45. Turn away a nut of fastening of a tip of a power wire and disconnect a wire from an output of the generator.
46. Squeeze the clamp of the voltage regulator wiring harness block..
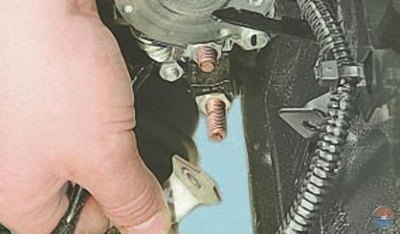
47.... and disconnect the block from the regulator.
48. Unscrew the nut of the power wire..
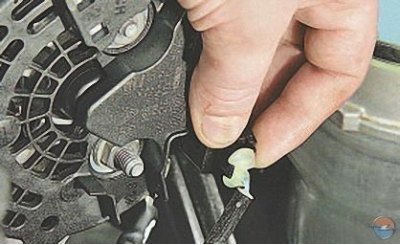
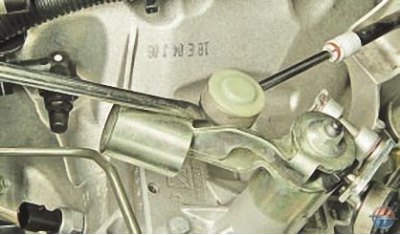
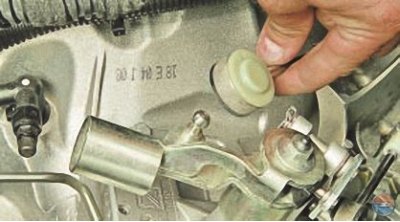
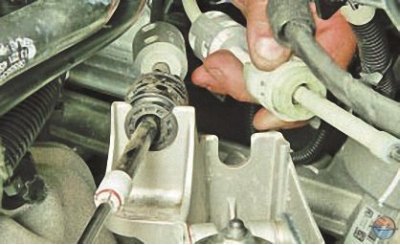
49.... and remove the wire from the contact bolt of the traction relay.
50. Turn away a nut of fastening of a control wire of the traction relay
51. Remove the control wire from the contact bolt of the traction relay and take the removed wires to the side.

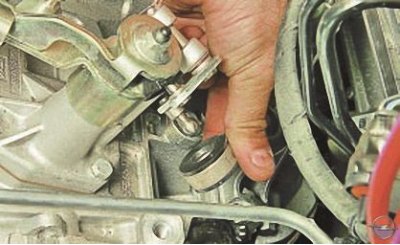
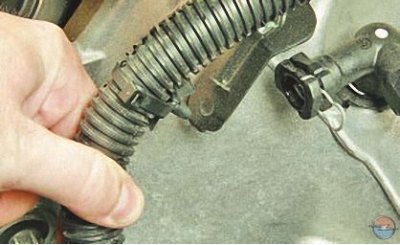
52. Remove the fastening nut «mass» wires.
53. Remove «mass» wire from the bottom stud of the starter and take it to the side.
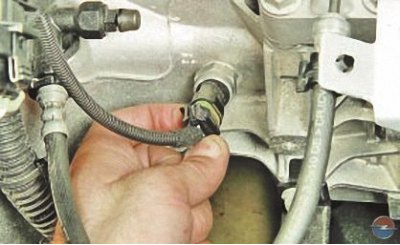
54. Pry with a screwdriver..
55.... and remove the tip of the gearshift cable from the axle of the gearshift lever.
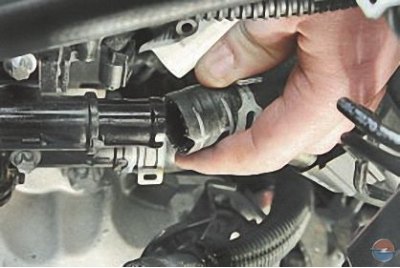
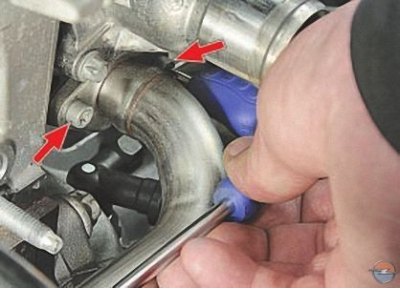
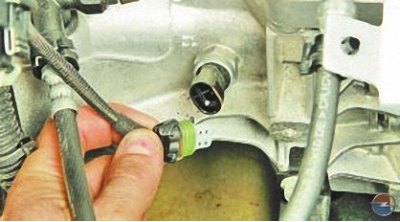
56. Similarly, remove the tip of the gear selection cable
57. Remove the ends of the cable sheaths from the bracket slot on the gearbox housing (see Replacing the transmission control cables).
58. Remove the harness holder from the hole on the transmission bracket.
59. Squeeze the latch..
60.... and remove the wiring harness connector from the reversing light switch connector.
61. Pry with a screwdriver..
62.... slide the retainer out of the clutch release pipeline adapter..
63.... and remove the hose tip from the adapter.
64. Remove the exhaust pipe of the exhaust system (see Downpipe replacement).
65. Sling the engine on the special eyelets and tighten the sling (e.g. crane, hoist or other lifting device).
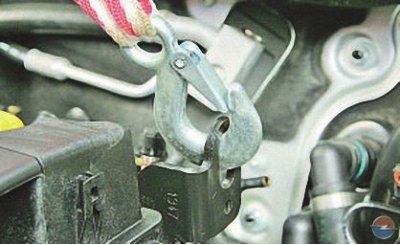
Attention! Follow the reliability of fastening the sling in the mounting eyes.
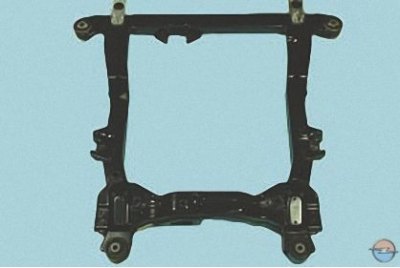
66. Remove the front suspension subframe (see Removing and installing front suspension subframe).
67. Remove the front wheel drives (see Removal and installation of front wheel drives).
68. Place reliable supports under the power unit (it is best to use a rolling cart with a load capacity of at least 300 kg).
69. Lower the front of the vehicle so that the power unit rests on a support or cart.
70. Check if all wires attached to the body are disconnected from the power unit. Check if hoses, tubes and body components interfere with the removal of the power unit down.
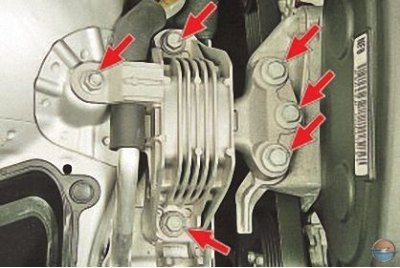
71. Remove the right suspension bracket of the power unit (see Replacement of the right support of a suspension bracket of the power unit).
72. Turn out three bolts of fastening of the left support of a suspension bracket of the power unit to an arm of a transmission.
73. Hang the front of the car (raise the car on a lift) to a height sufficient to remove the power unit from under the vehicle, and place reliable supports under the body.
74. Remove the power unit from under the car.
75. Install the power unit, as well as all removed components and parts in the reverse order of removal, taking into account the following:
- before installing the power unit, clean the threaded holes for fastening its supports with a tap from rust;
- when connecting wires and pipelines, carefully monitor their correct location in the engine compartment, avoiding contact with heating and moving elements of the power unit.
Installation
After installing the engine, do the following.
1. Fill engine oil (see Changing engine oil and oil filter).
2. Fill with coolant (see Coolant replacement).
3. Remove air from the hydraulic clutch release (see Bleeding the hydraulic clutch release).
4. Start the engine and check for fuel, oil and coolant leaks. Check oil pressure. Listen to the engine: it should run smoothly, without extraneous noise and knocks.
Visitor comments